Welcome Assembly Sneak Peak for the ORCA Hand
info
We are working hard to provide you with a detailed assembly guide for the rest of the hand. We wanted to show you a sneak peak of the finger assembly nevertheless:
Finger Assembly
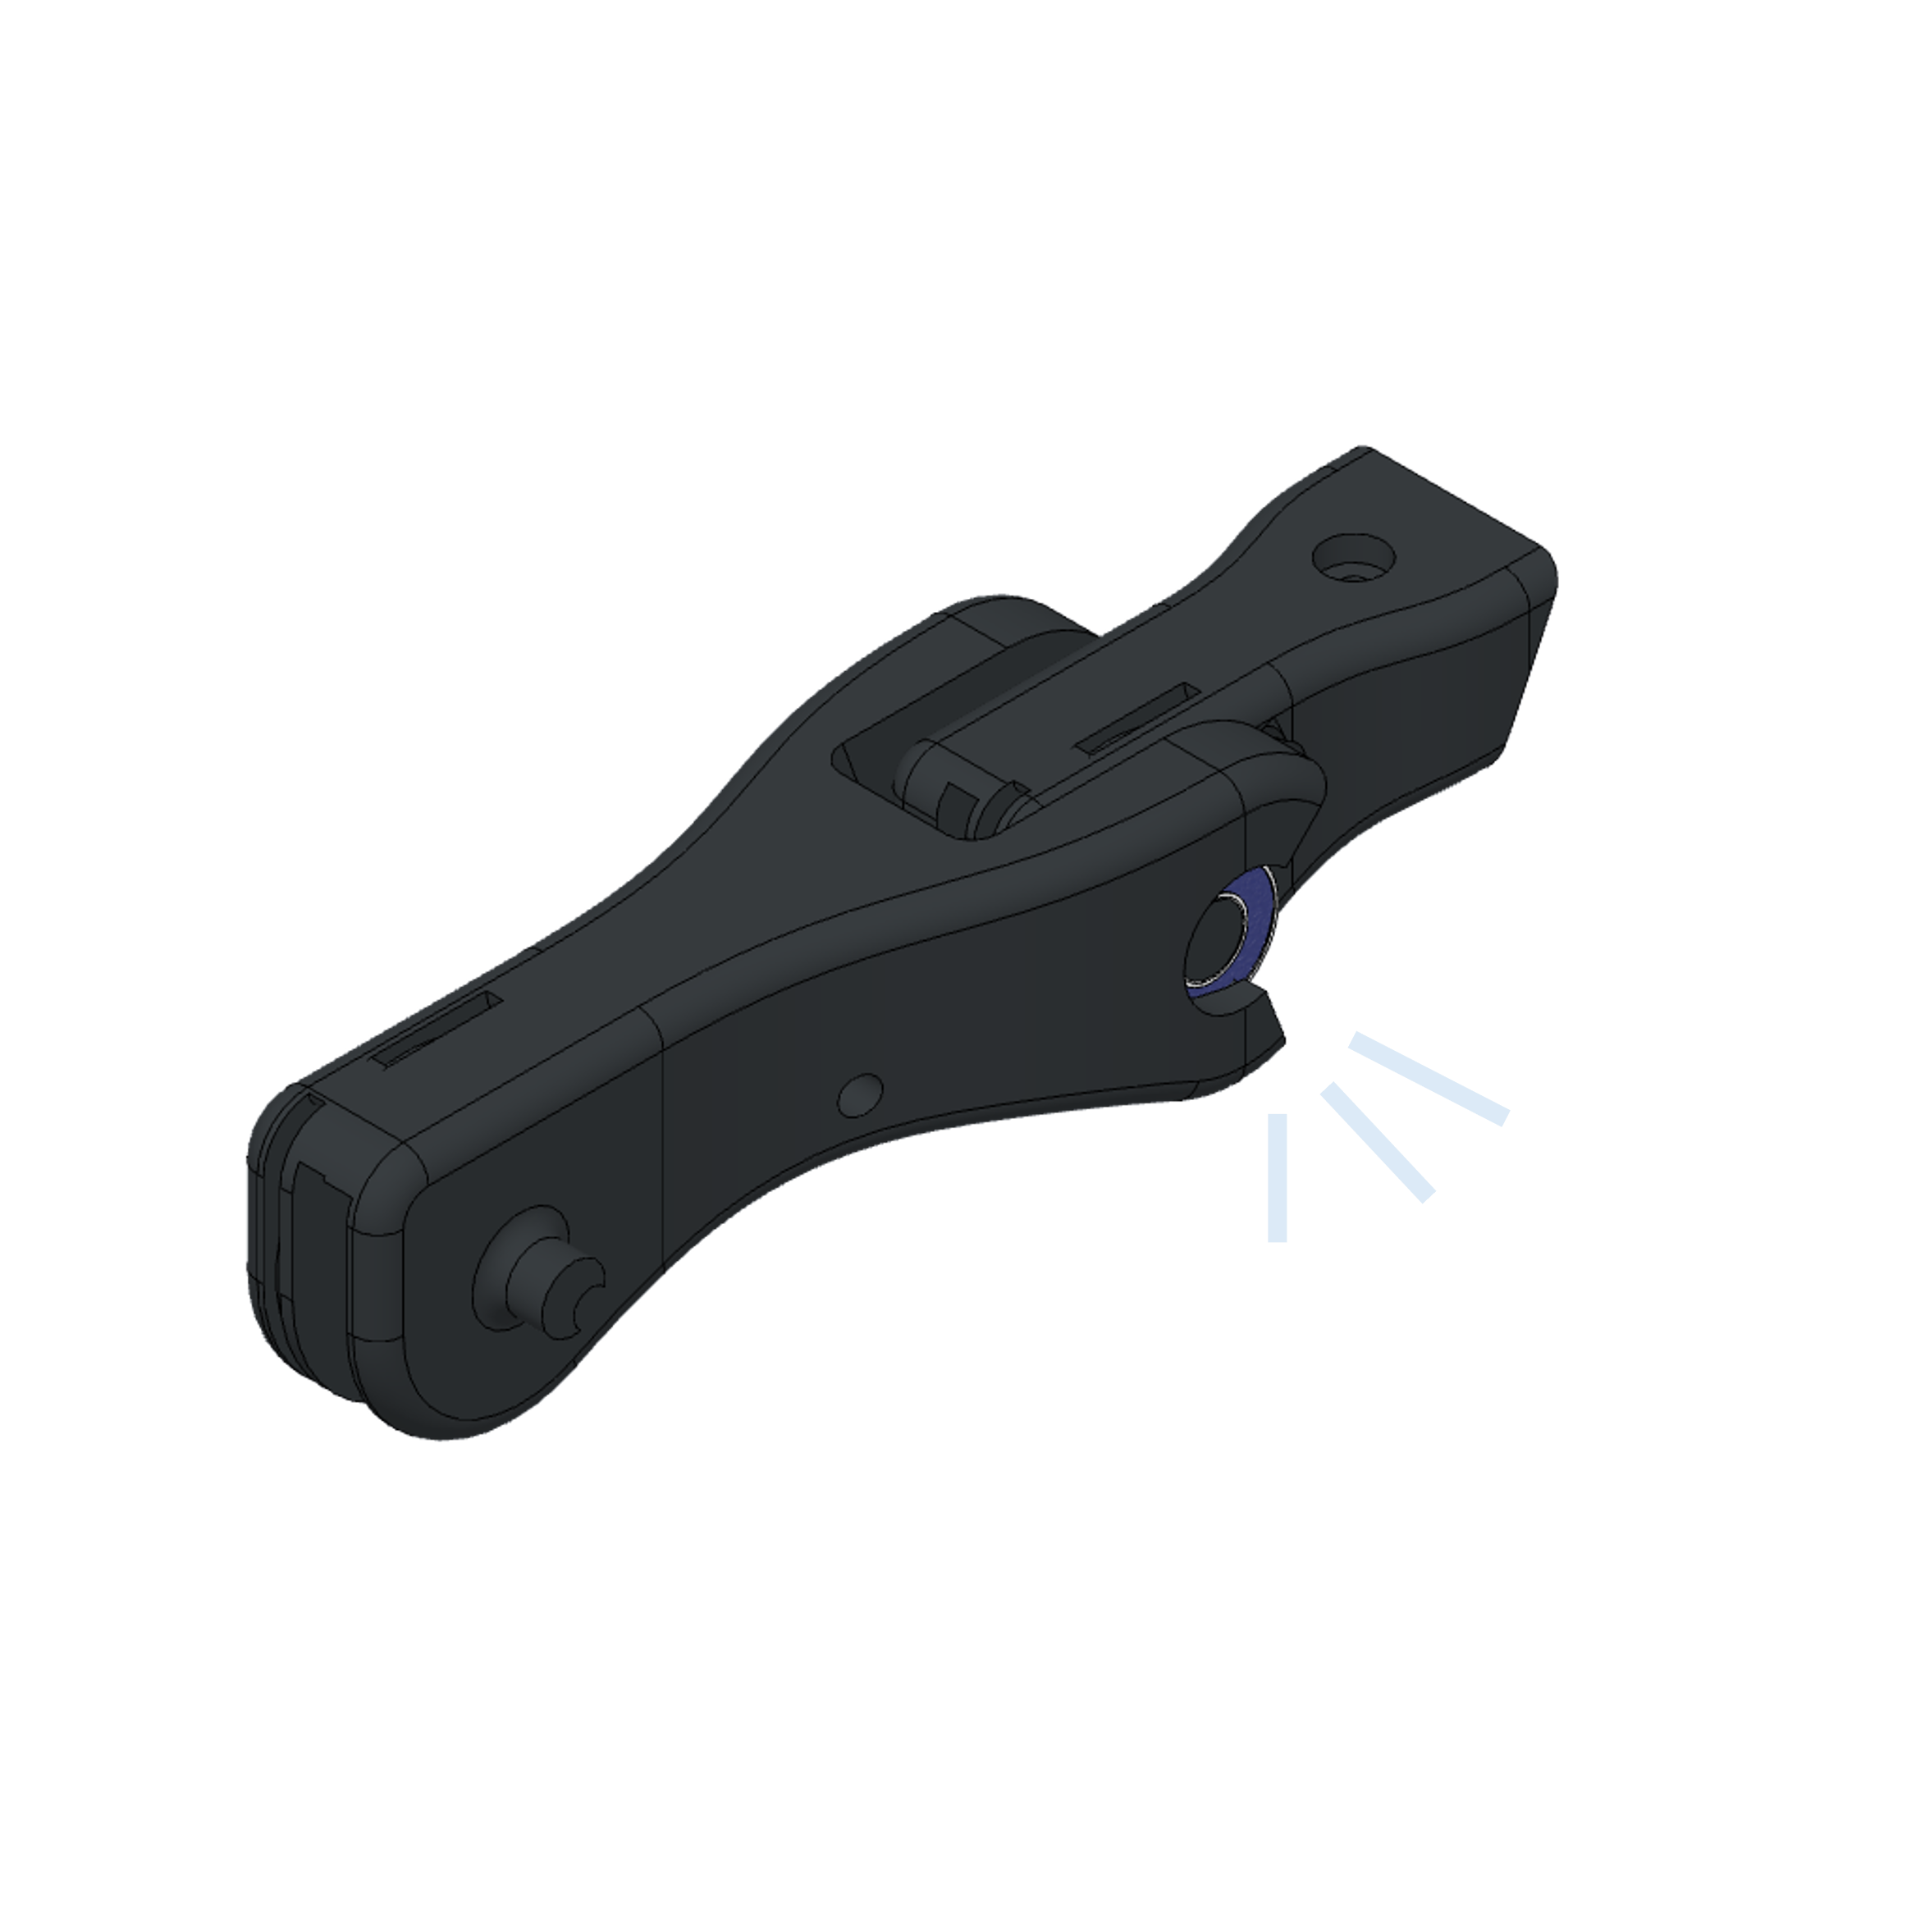
Step 1: Prepare the Proximal Phalange
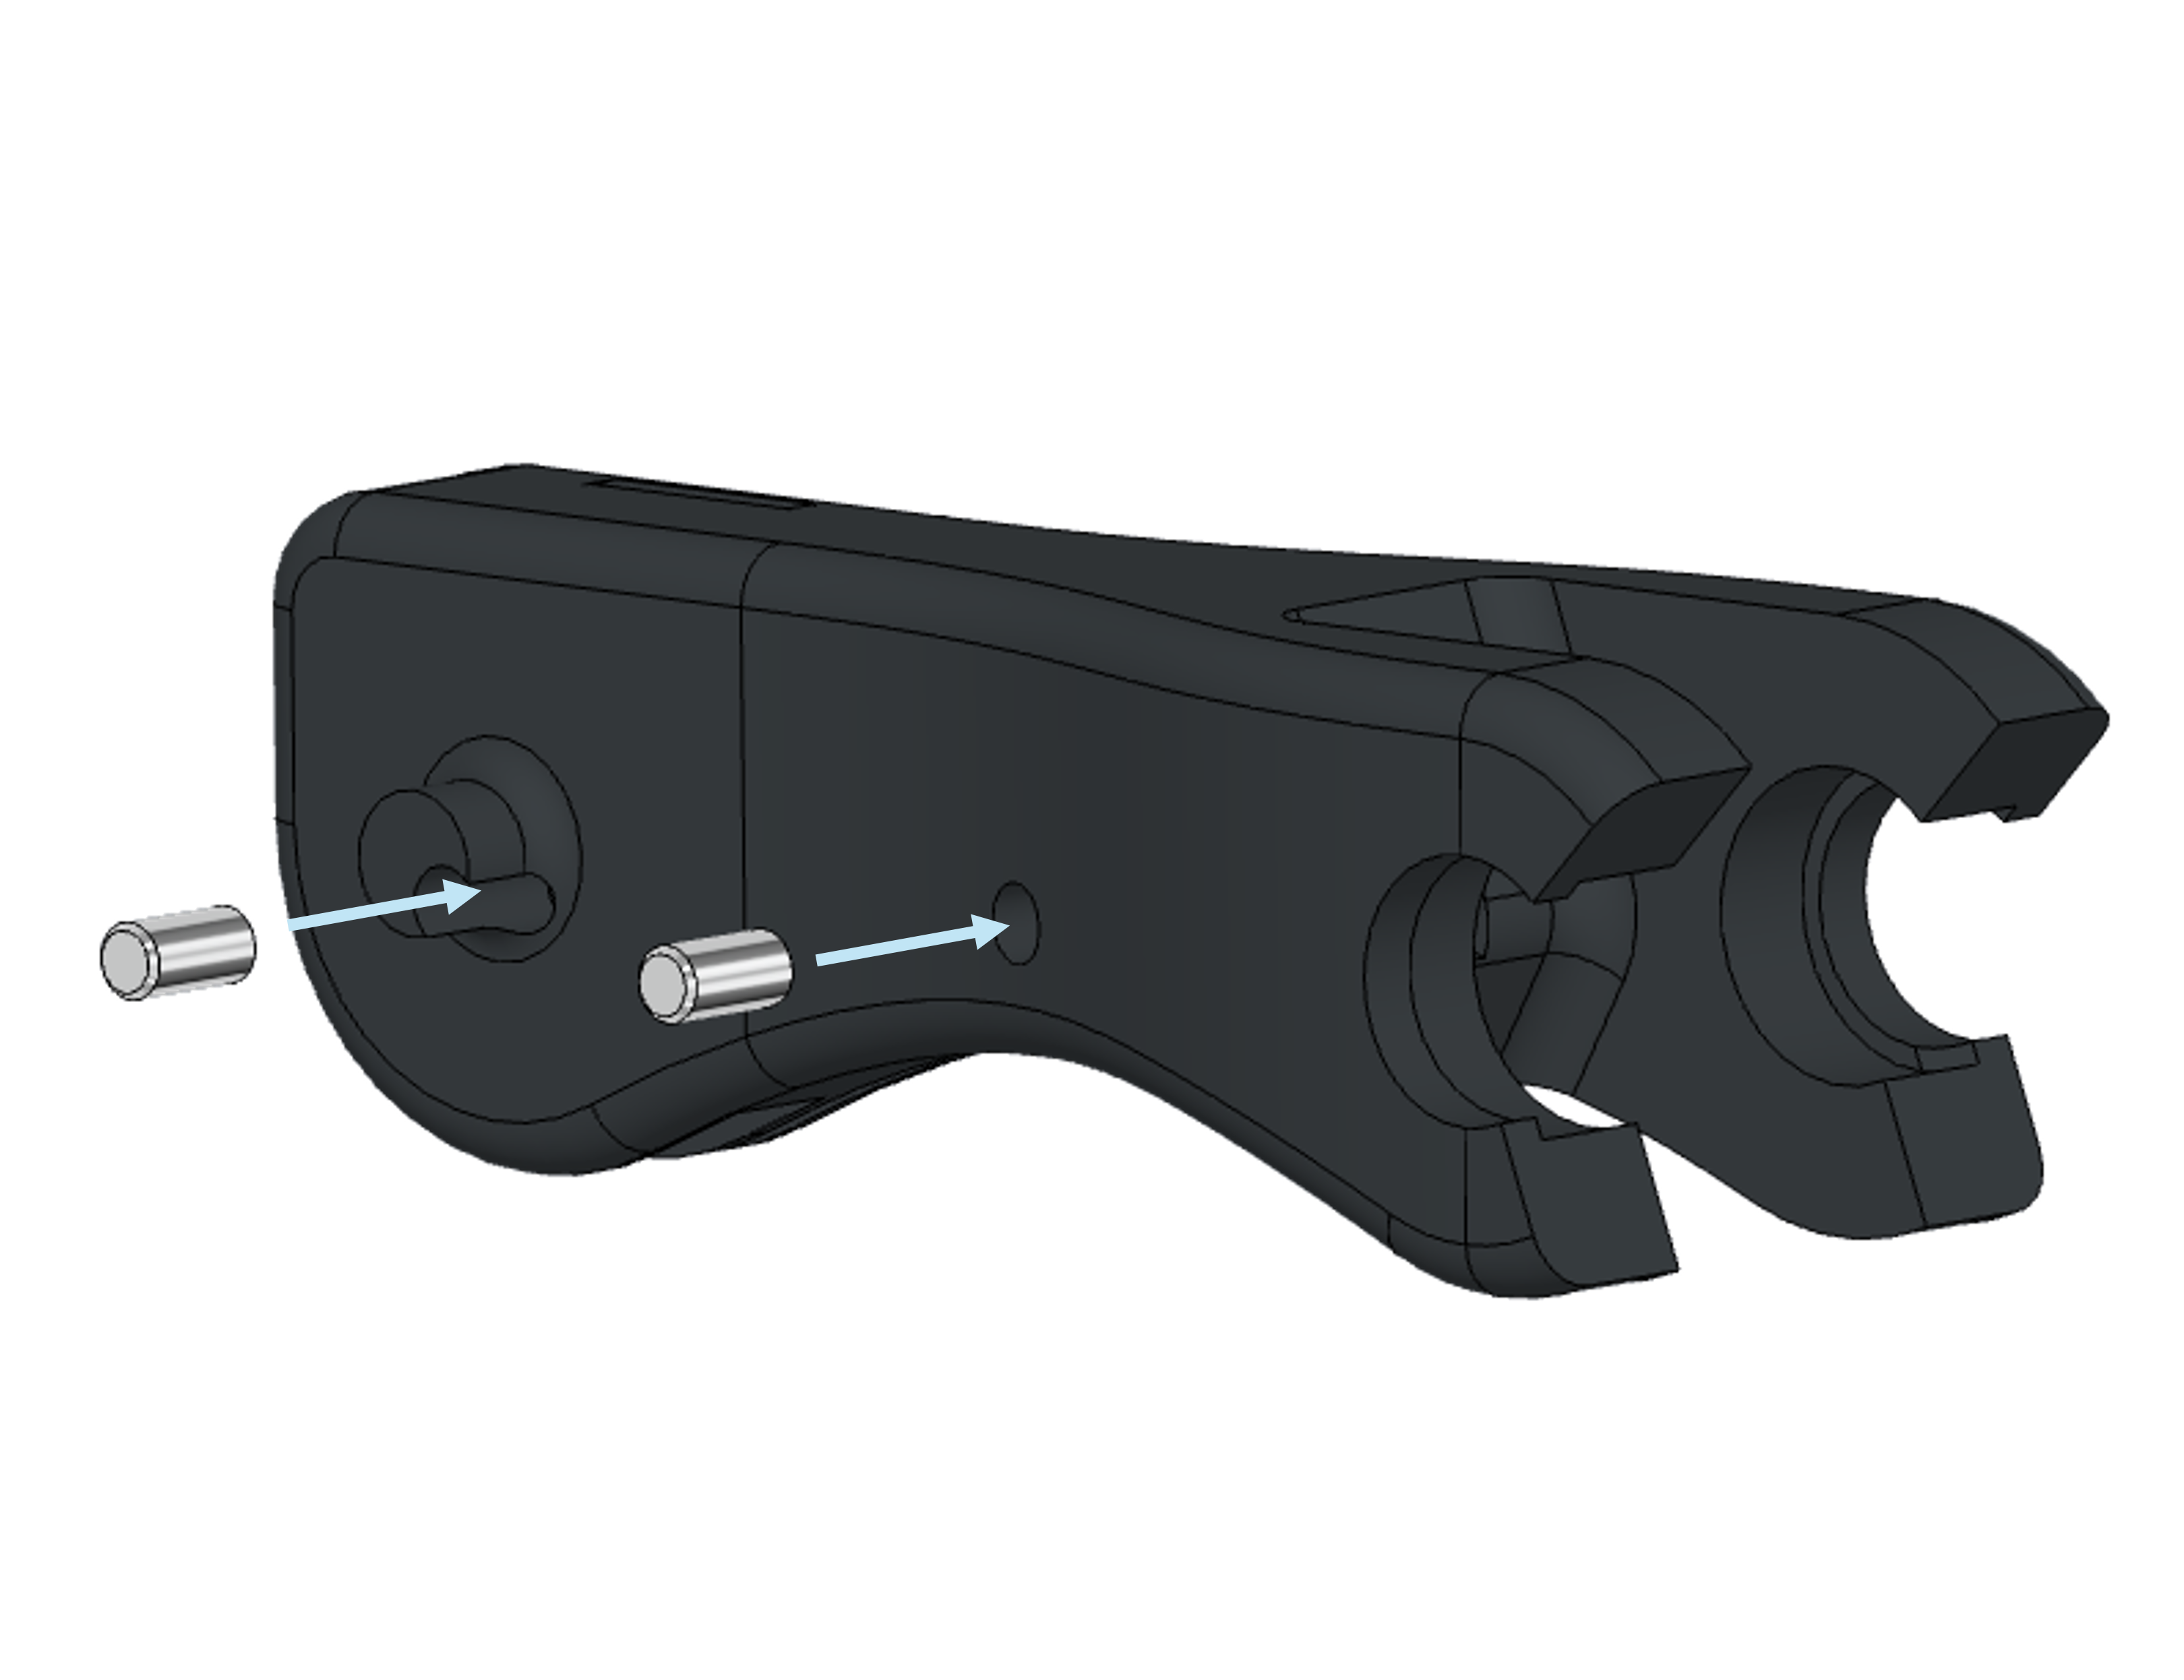
a: Insert the pins into the holes of the Proximal Phalange
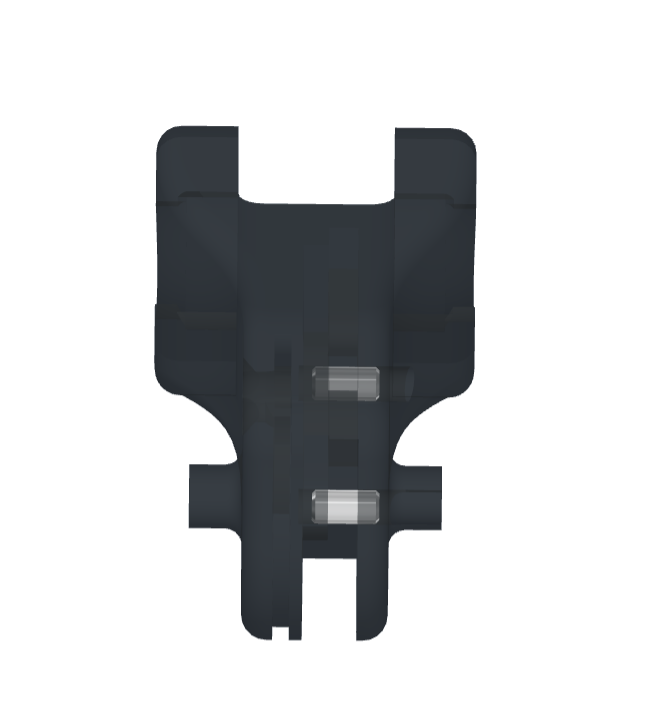
b: Make sure they are fully inserted
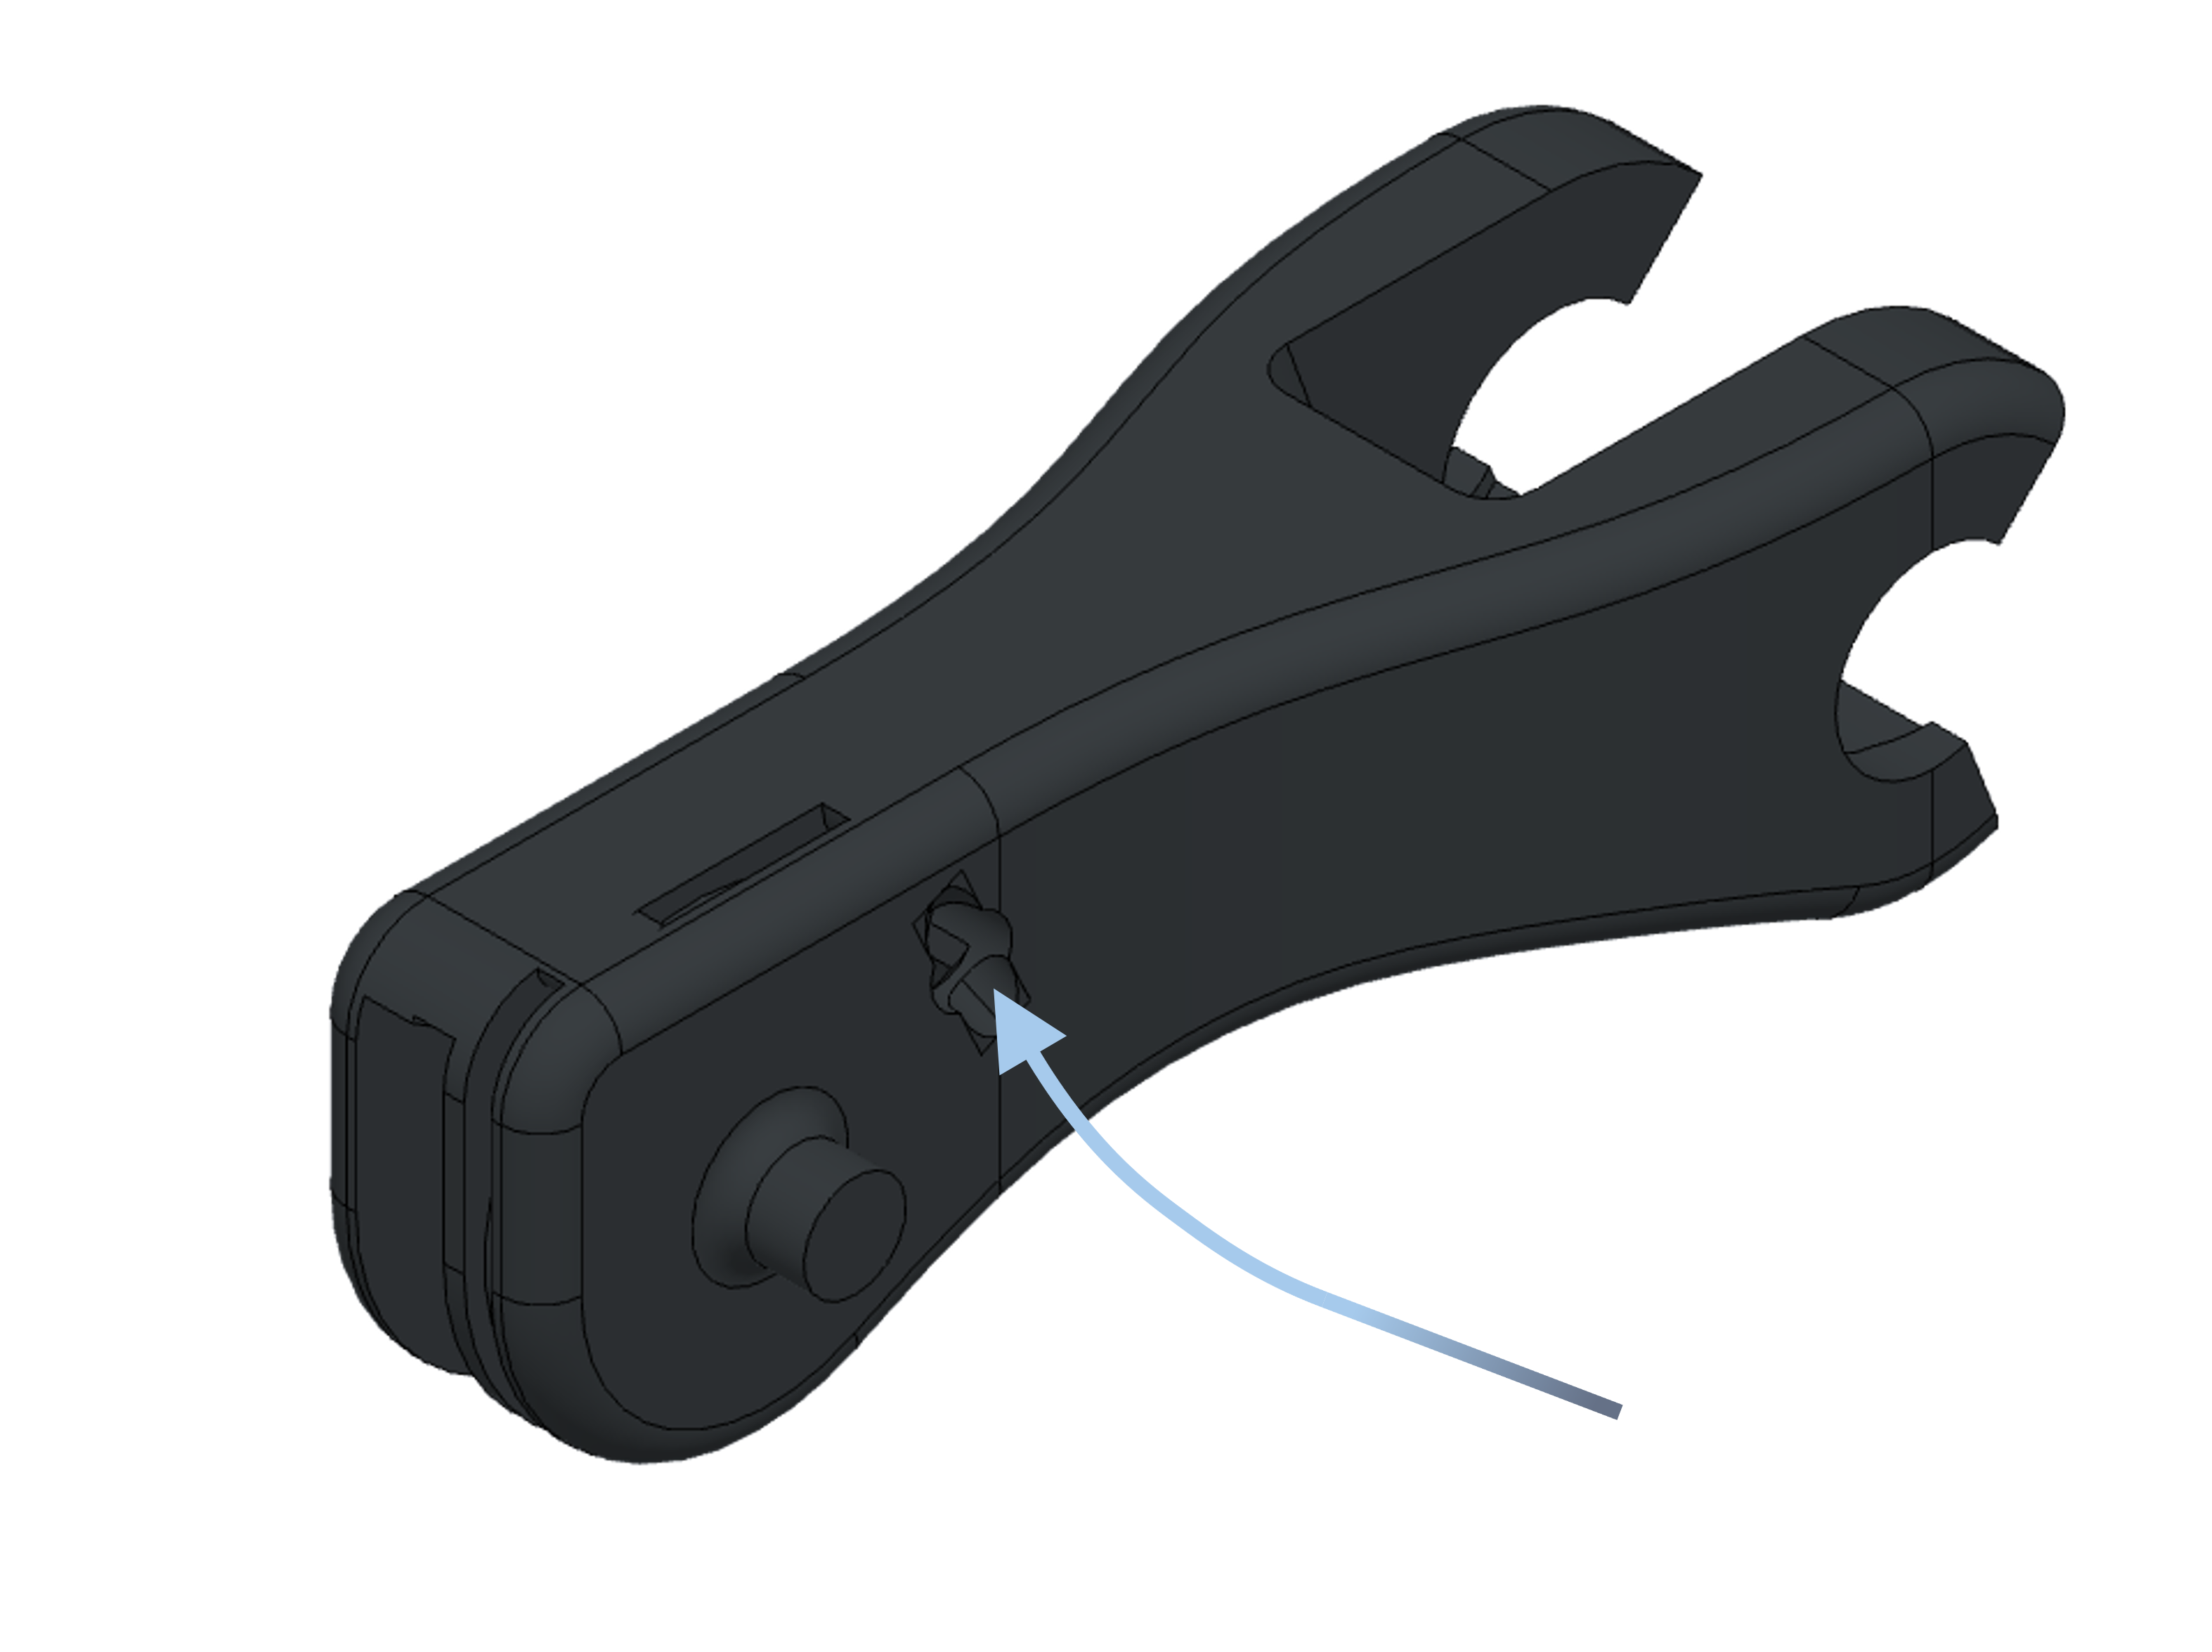
Step 2: Tendon Preparation
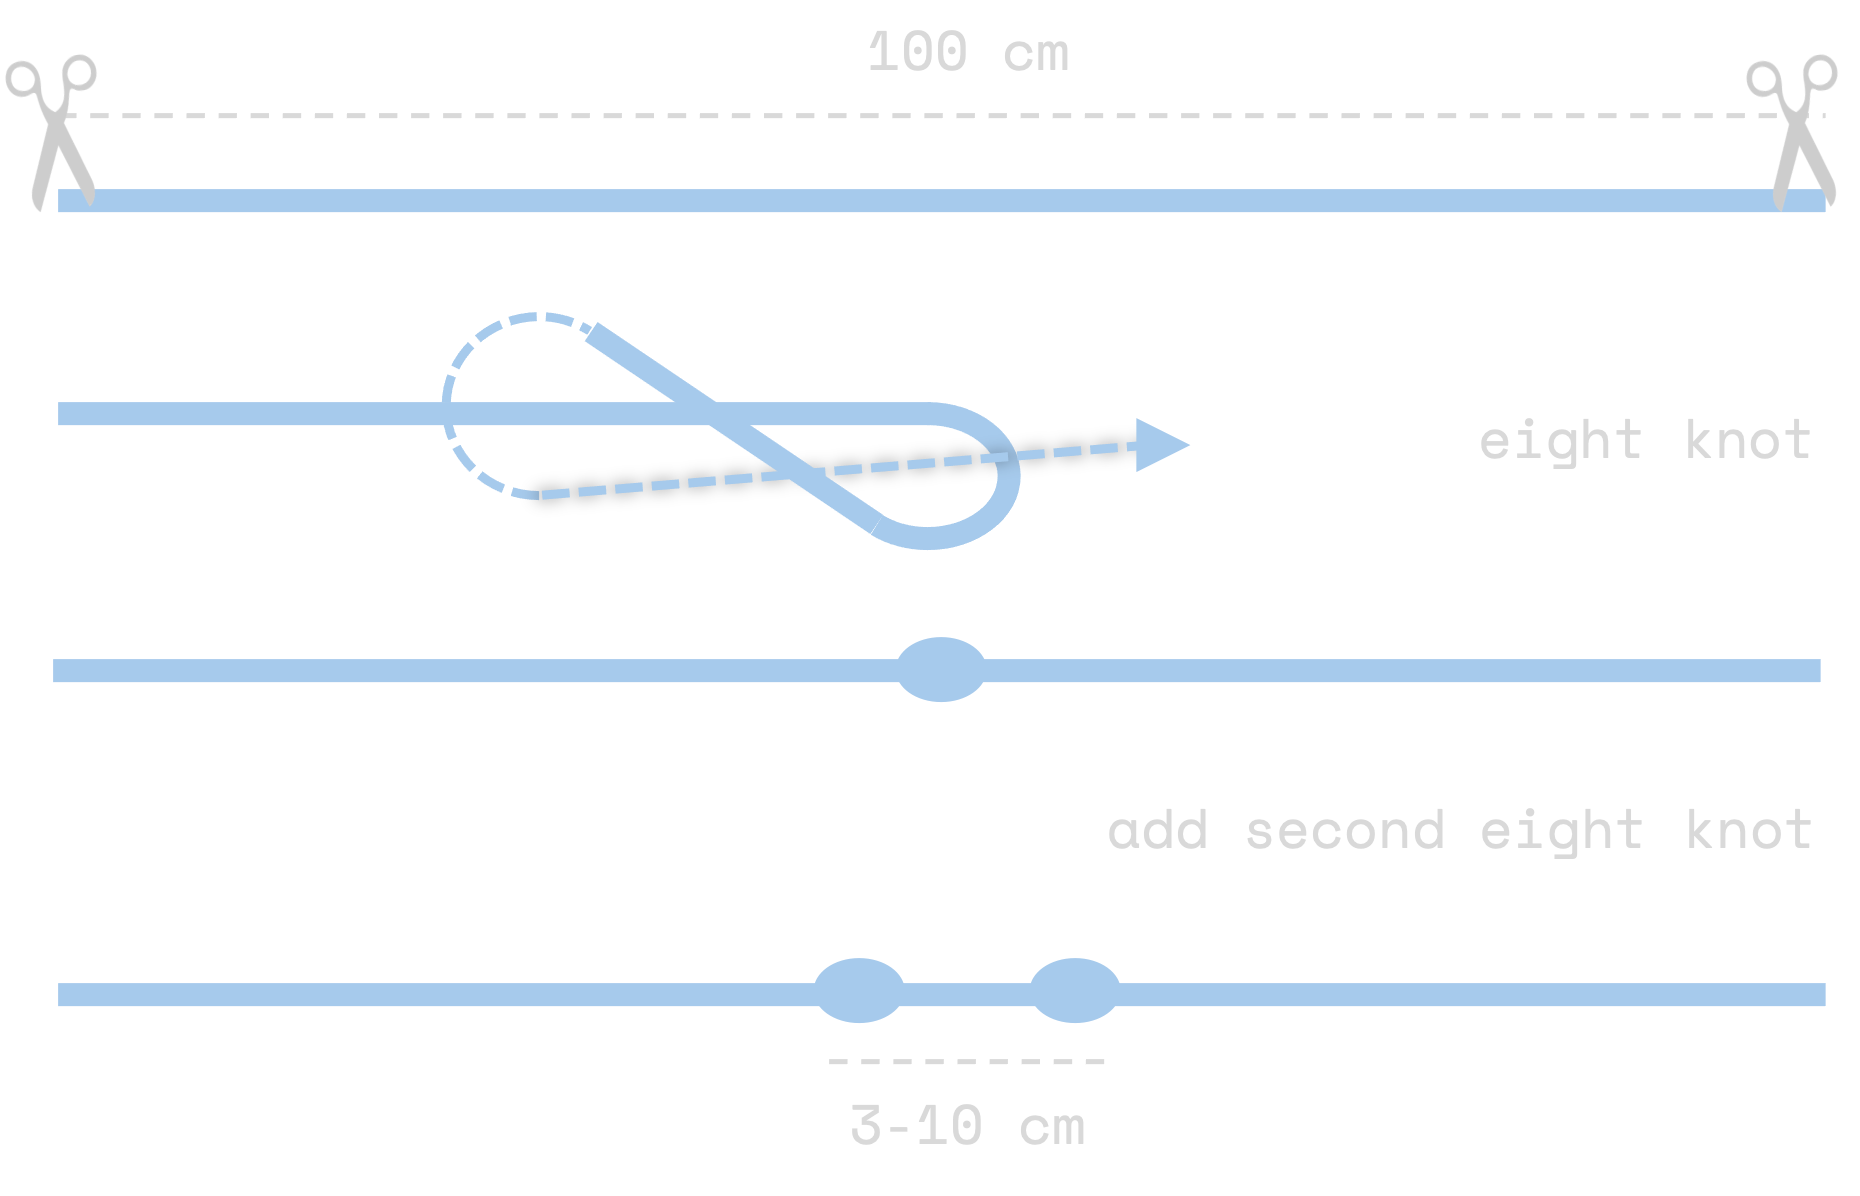
a: Cut the tendon and tie two eight knots
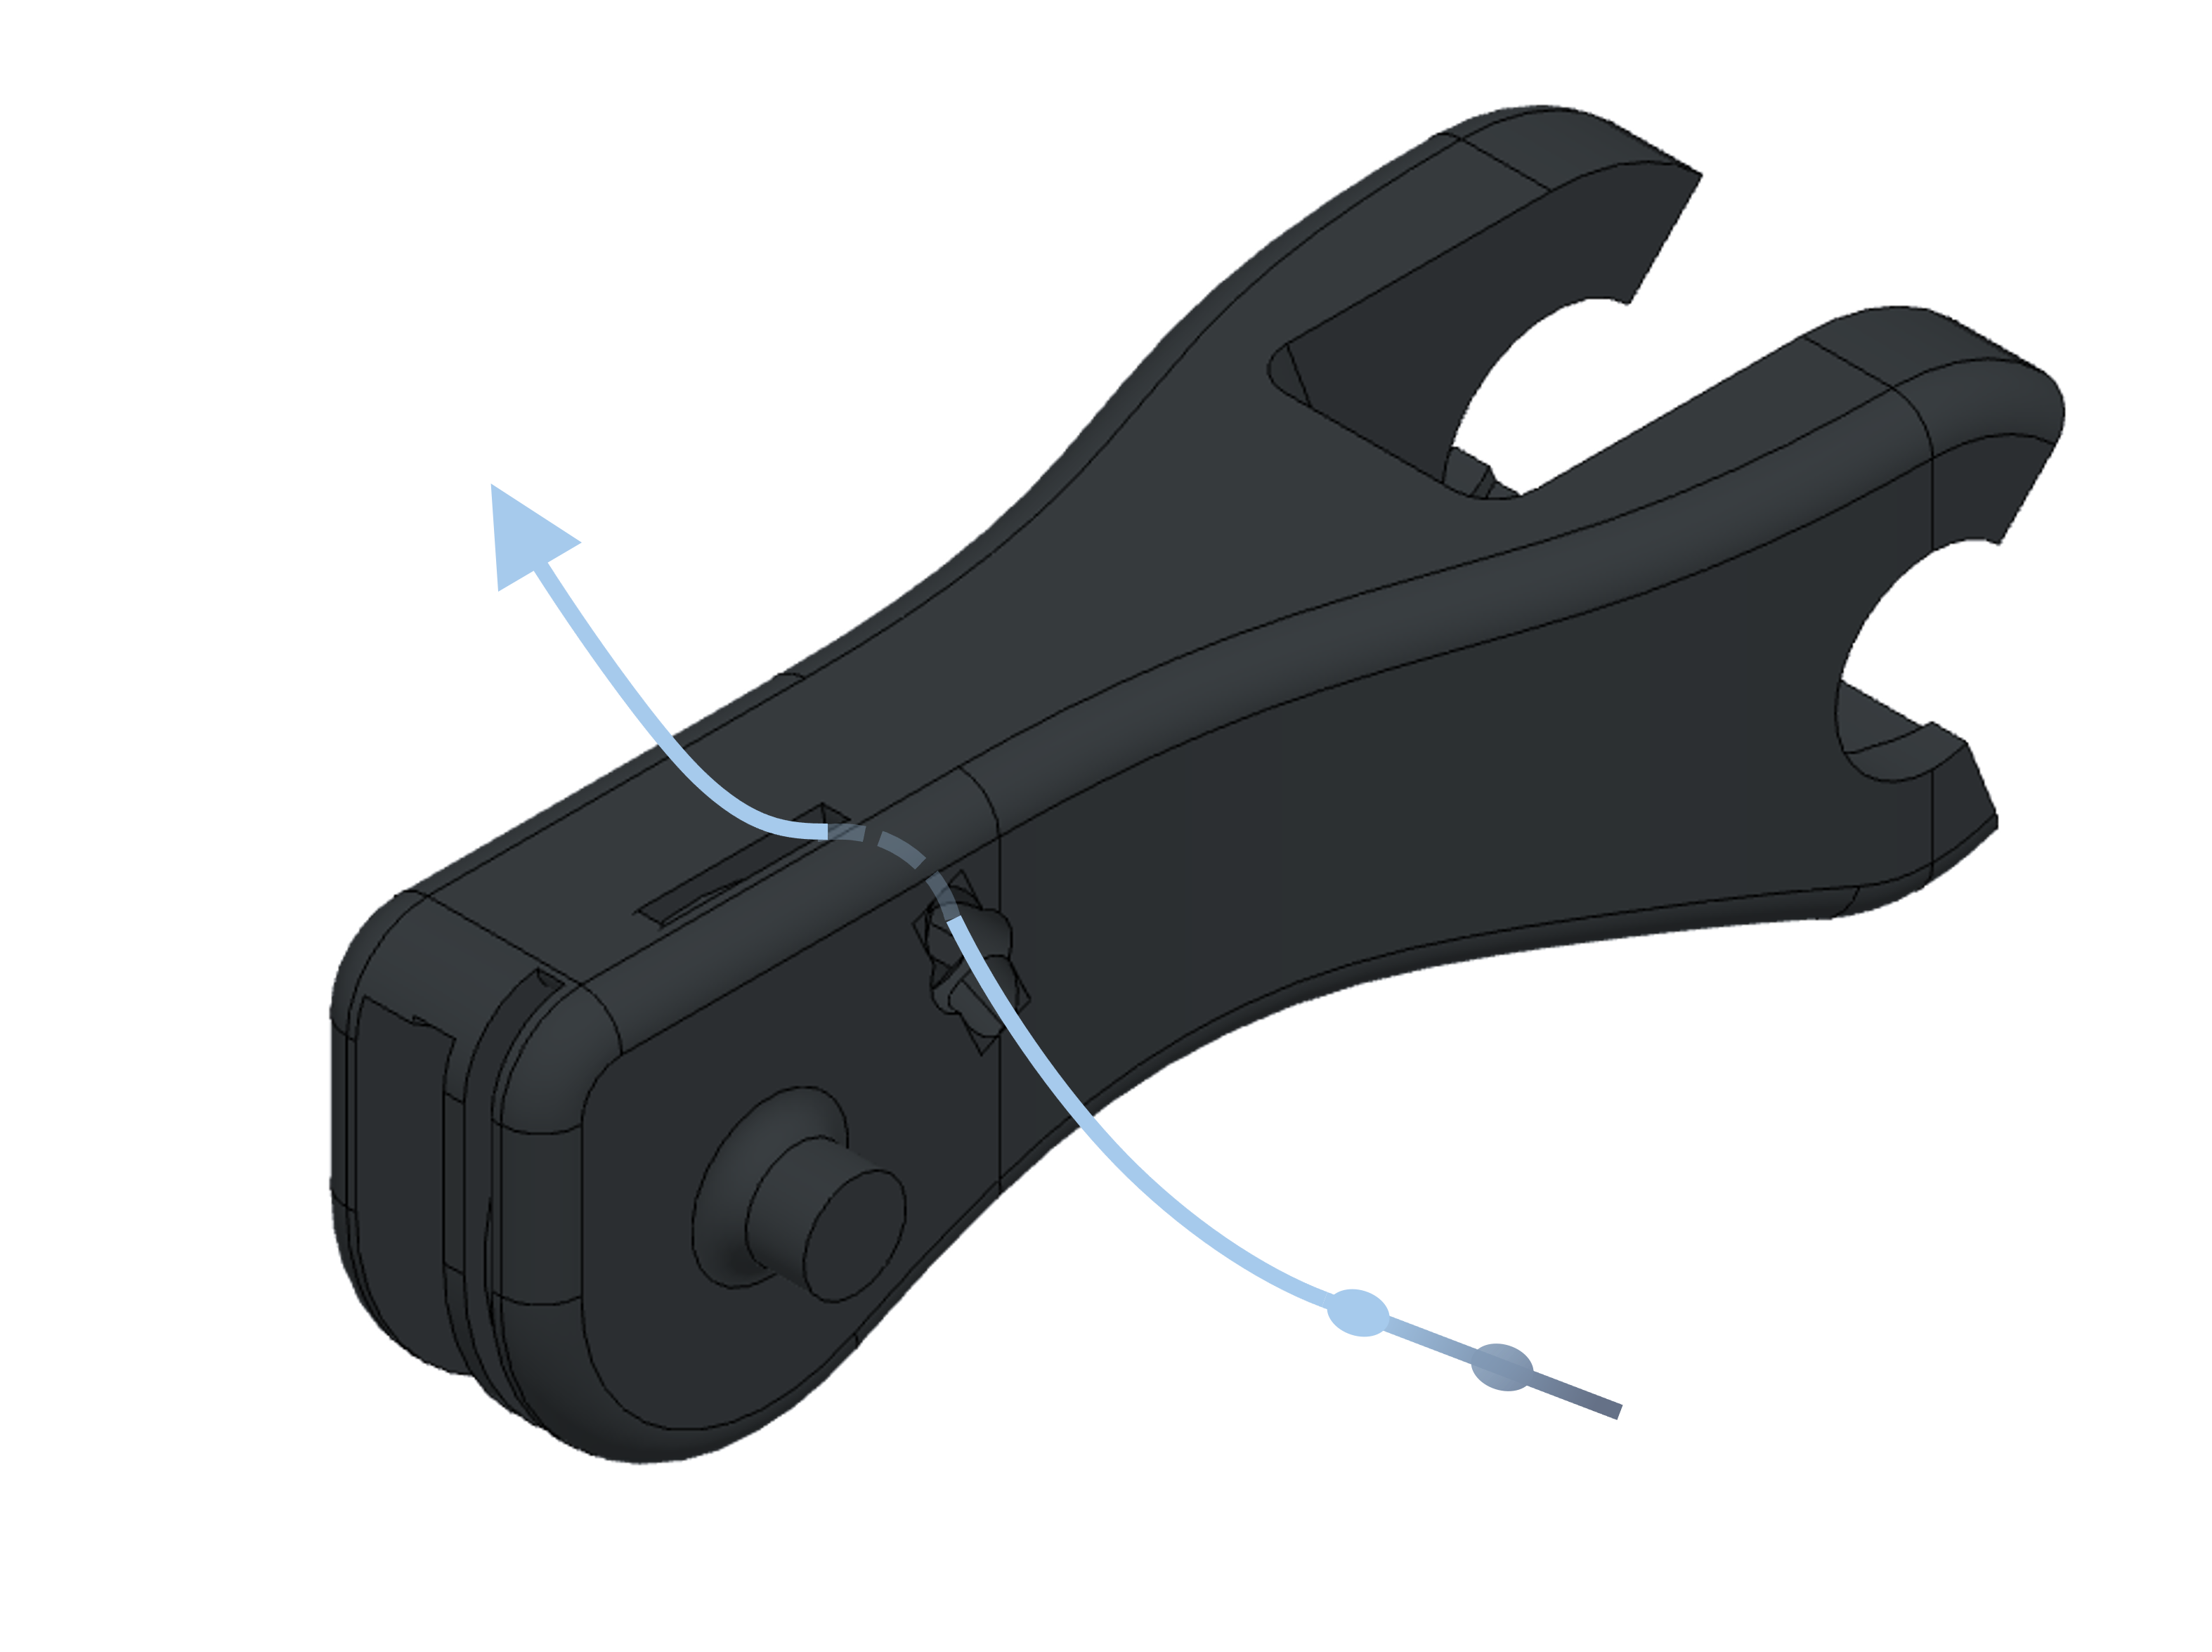
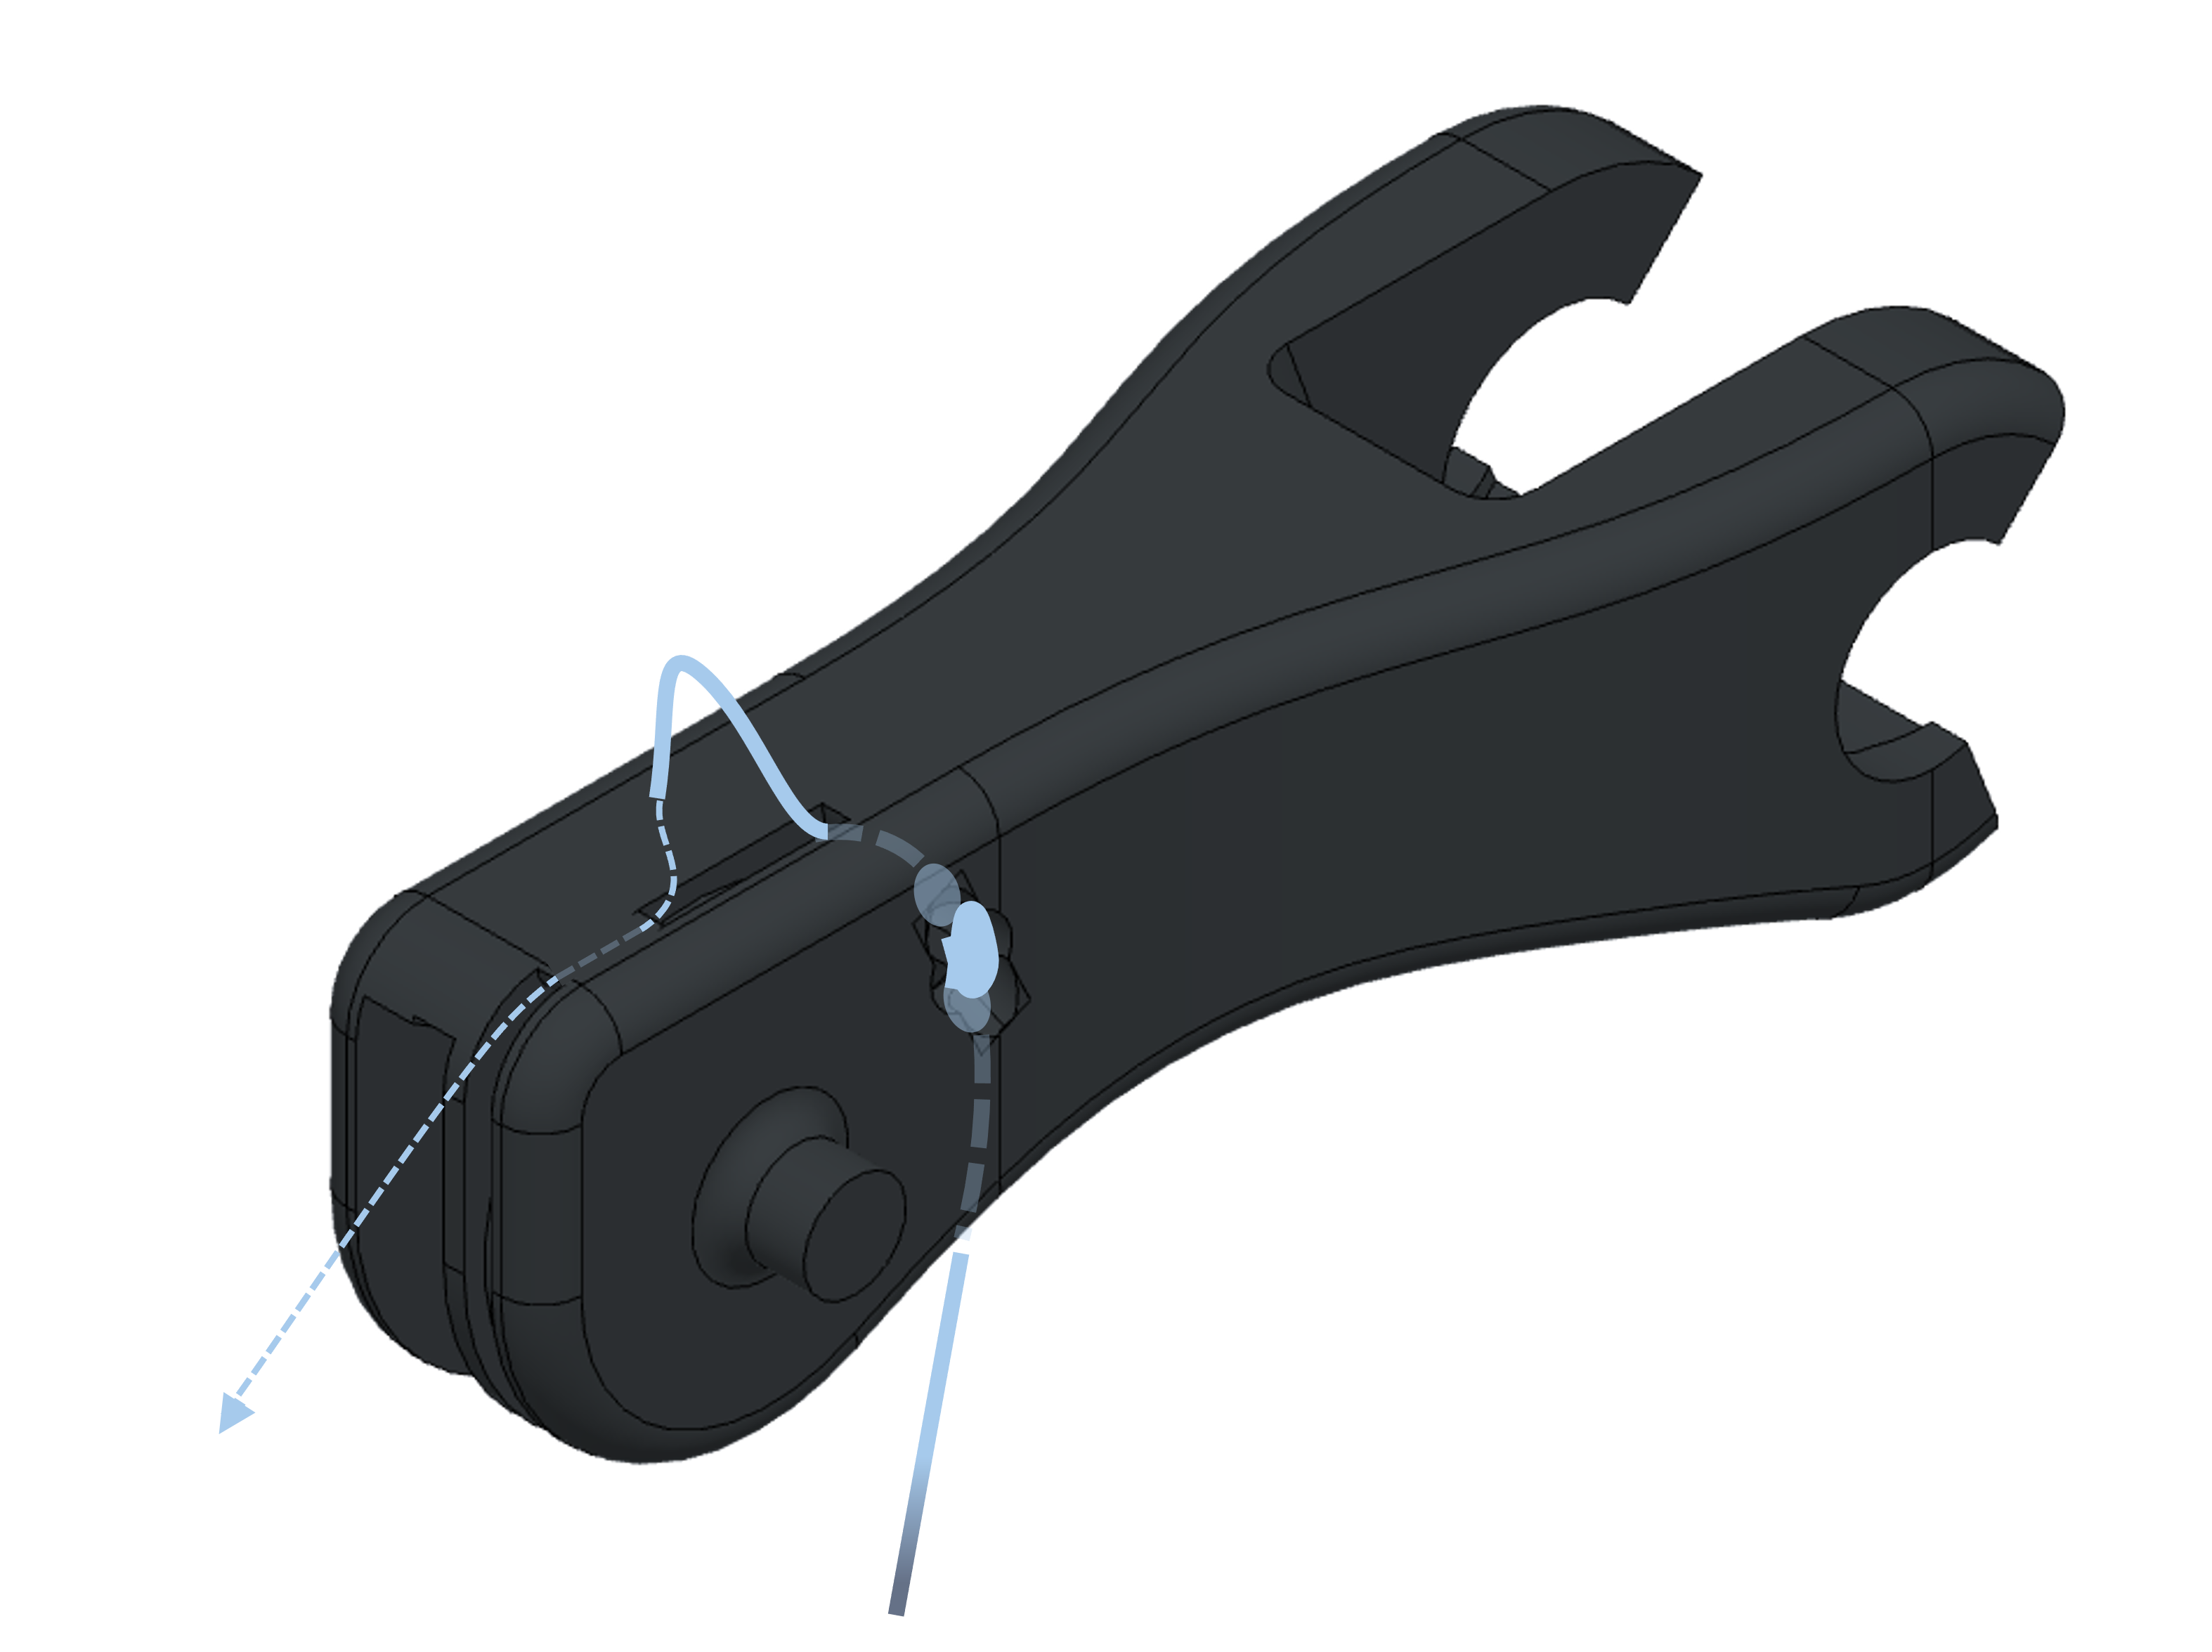
Step 3: PIP Tendon Attachment
a: Insert one end of the tendon into the hole
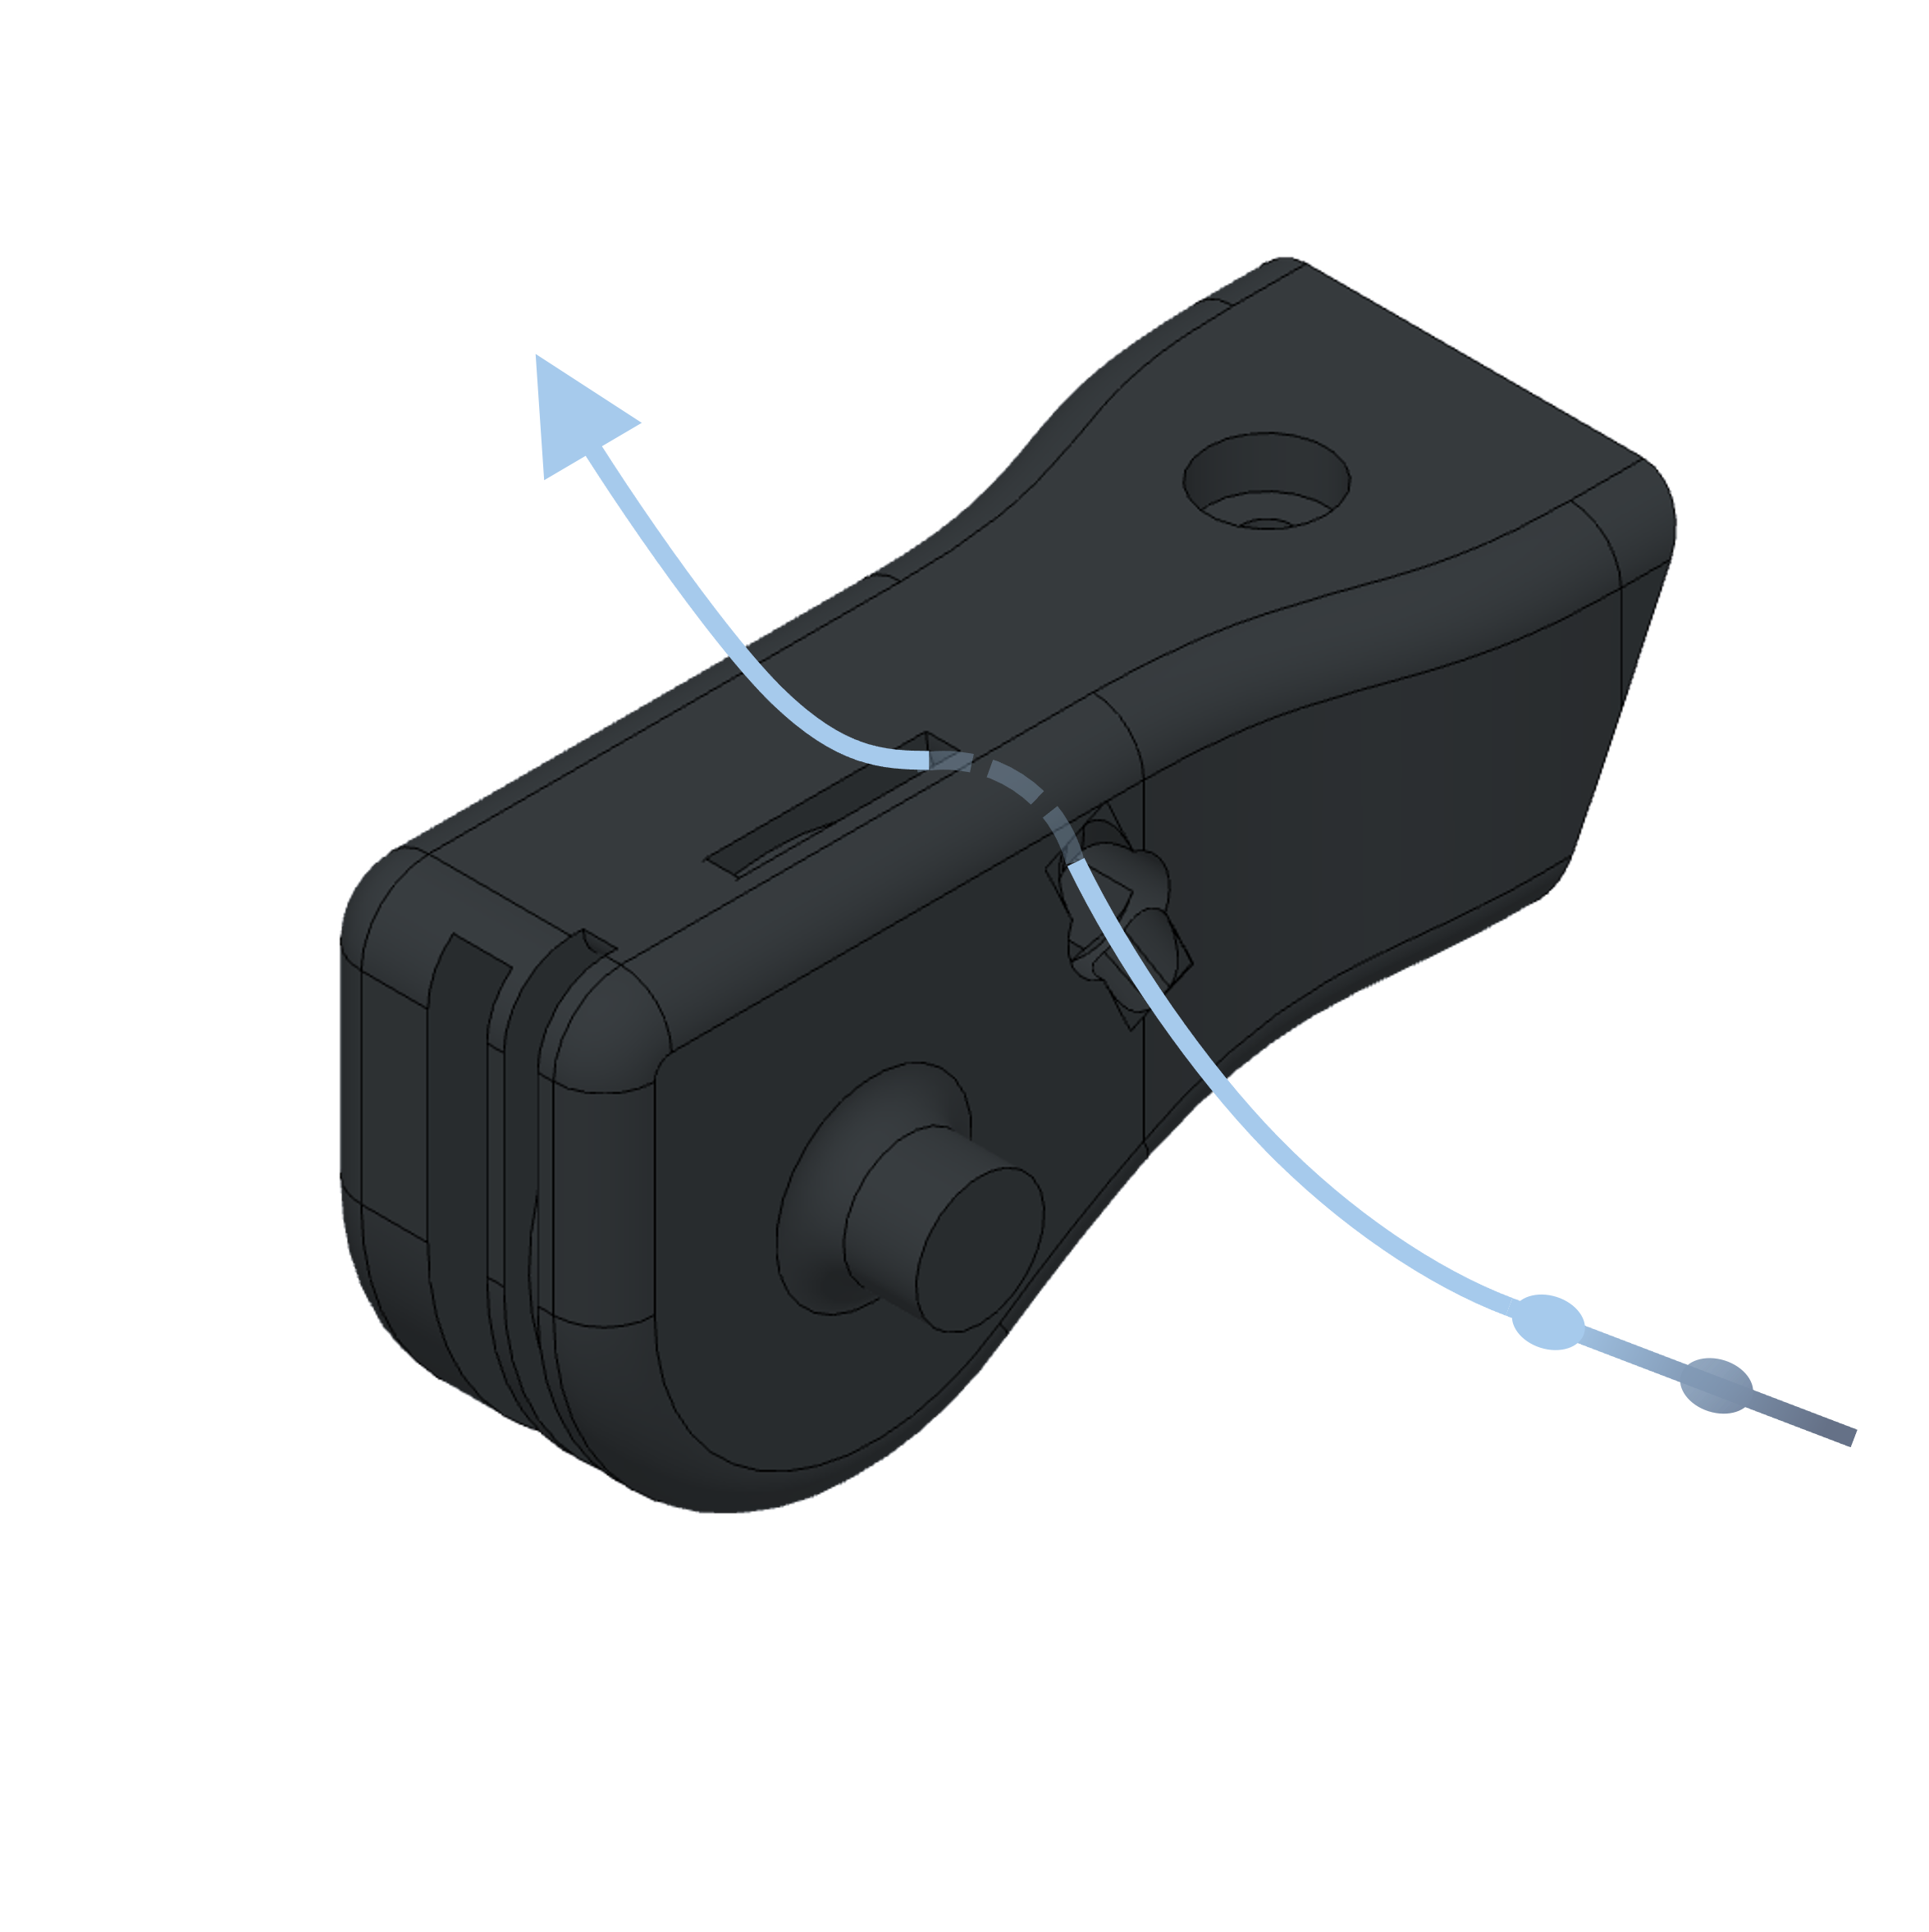
b: Make sure it exits the hole on the upper side
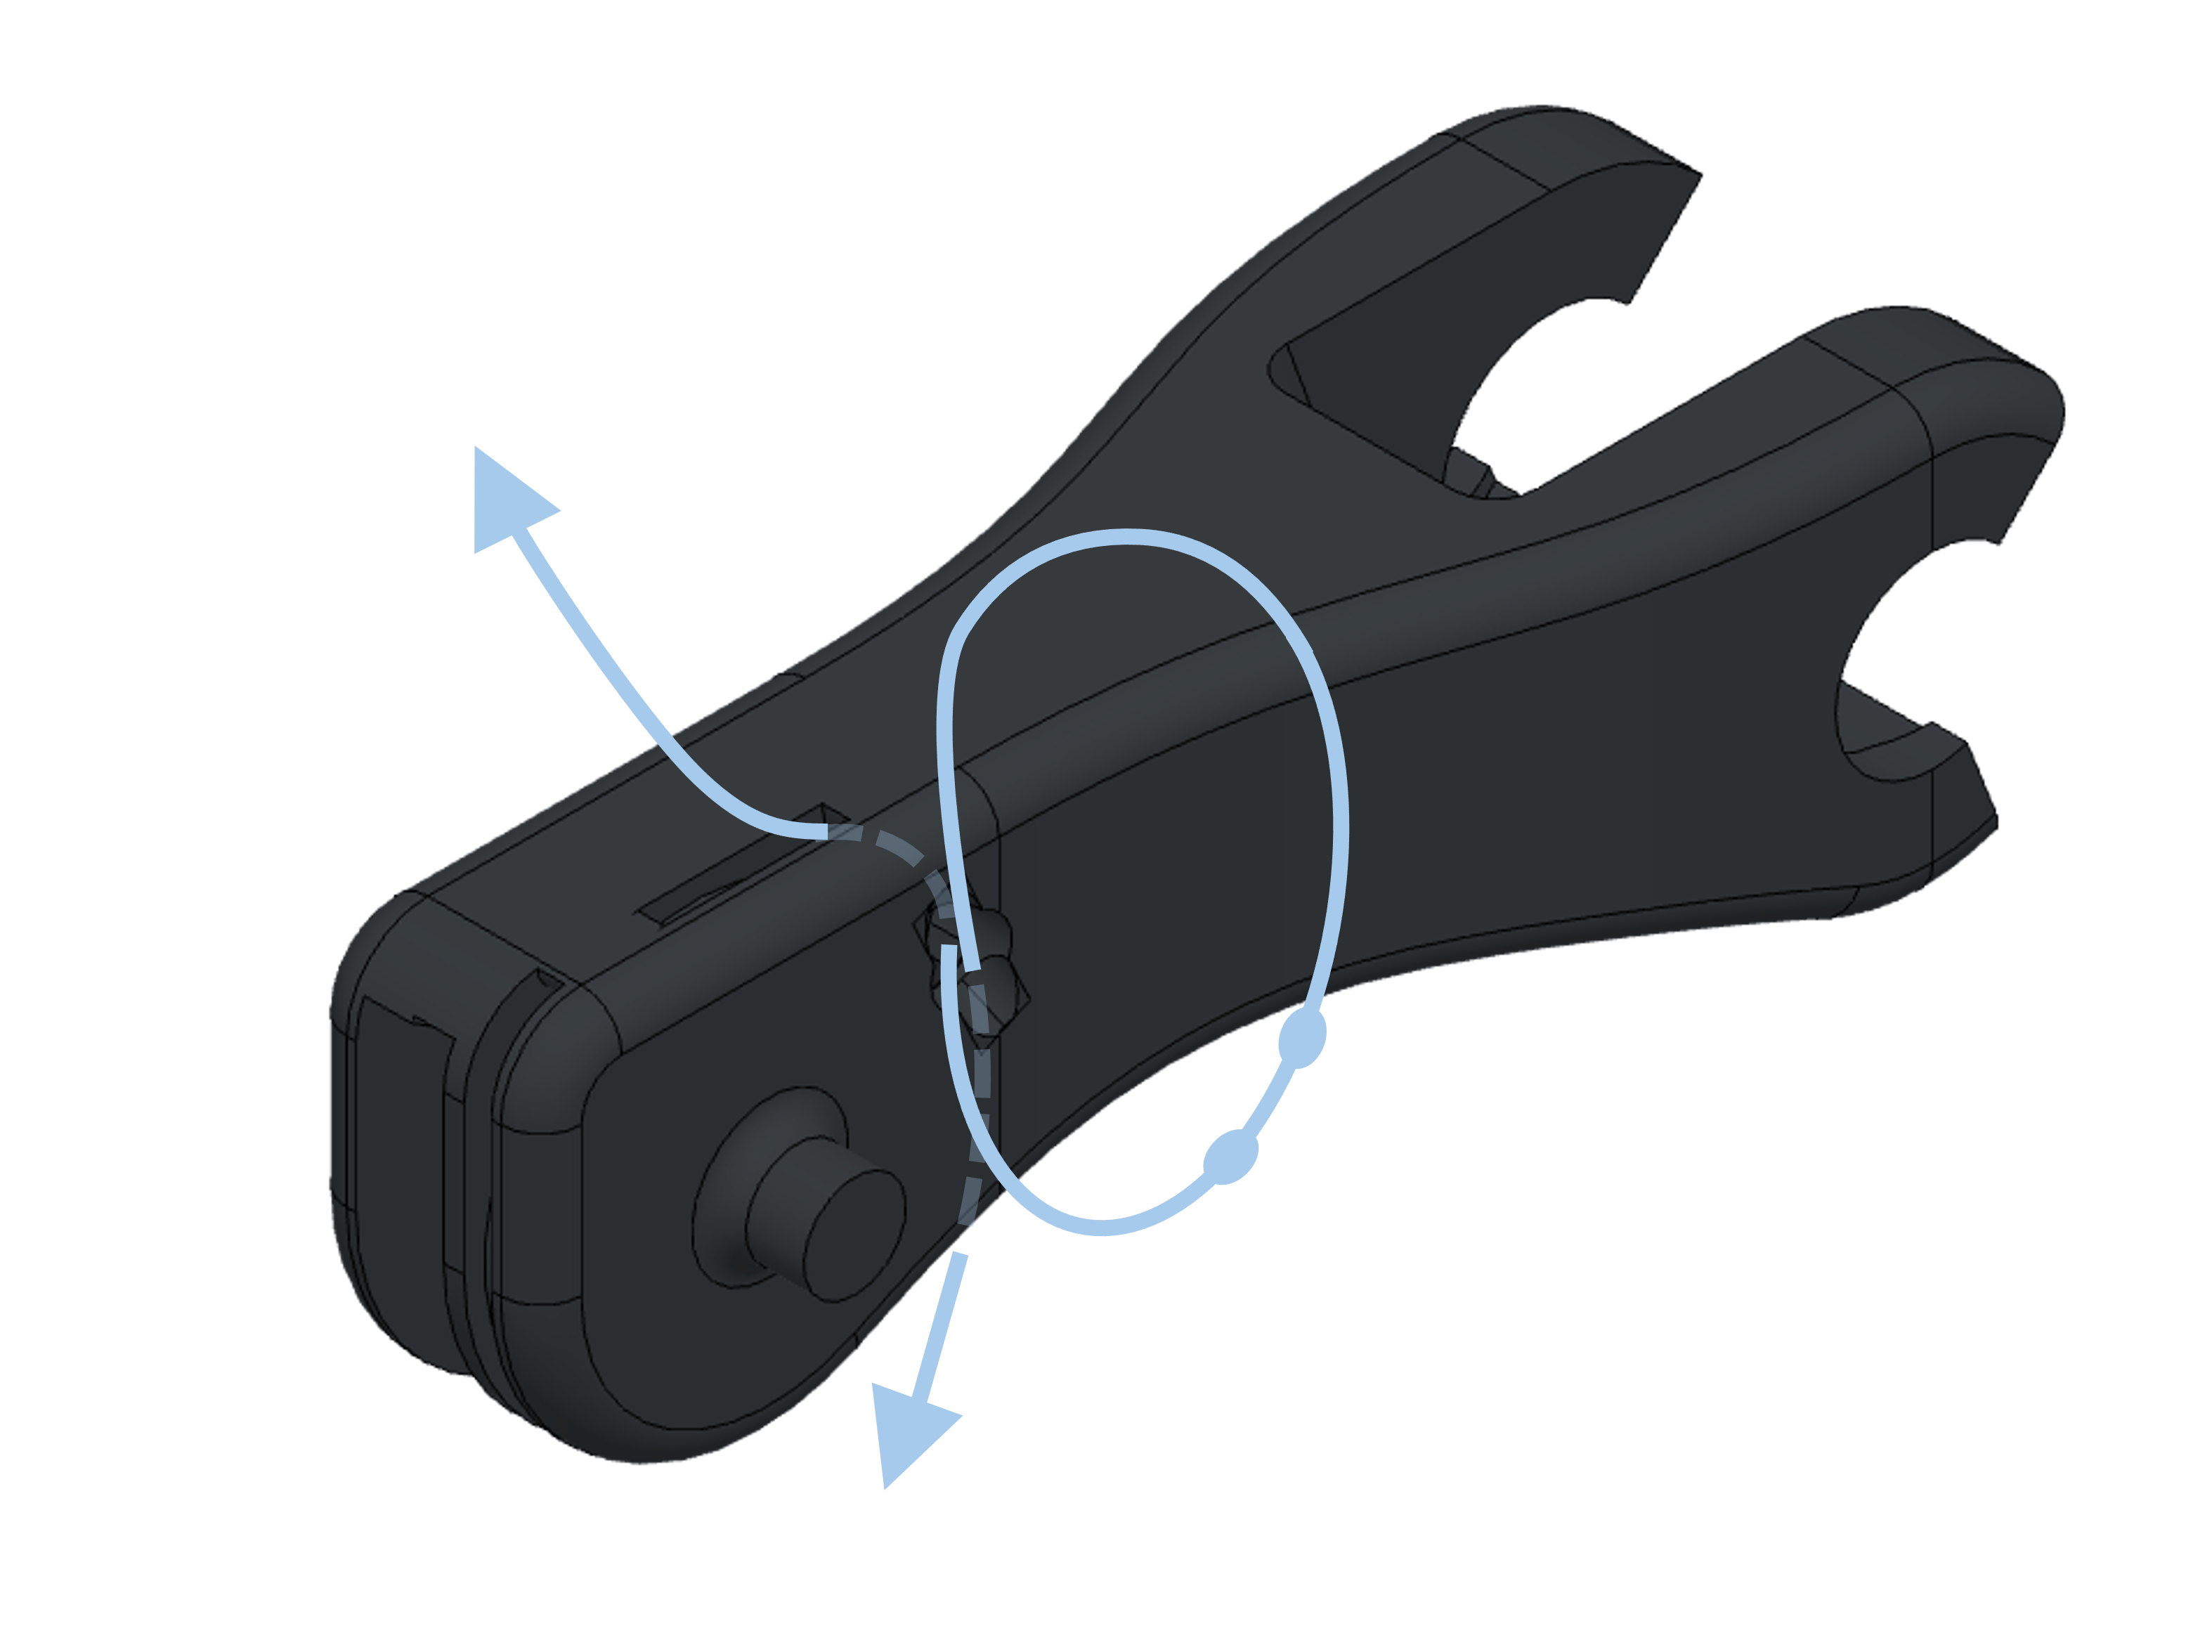
c: Form a loop

d: Insert the other side of the tendon into the hole and pull both sides of the tendon and make sure the knots sit tightly
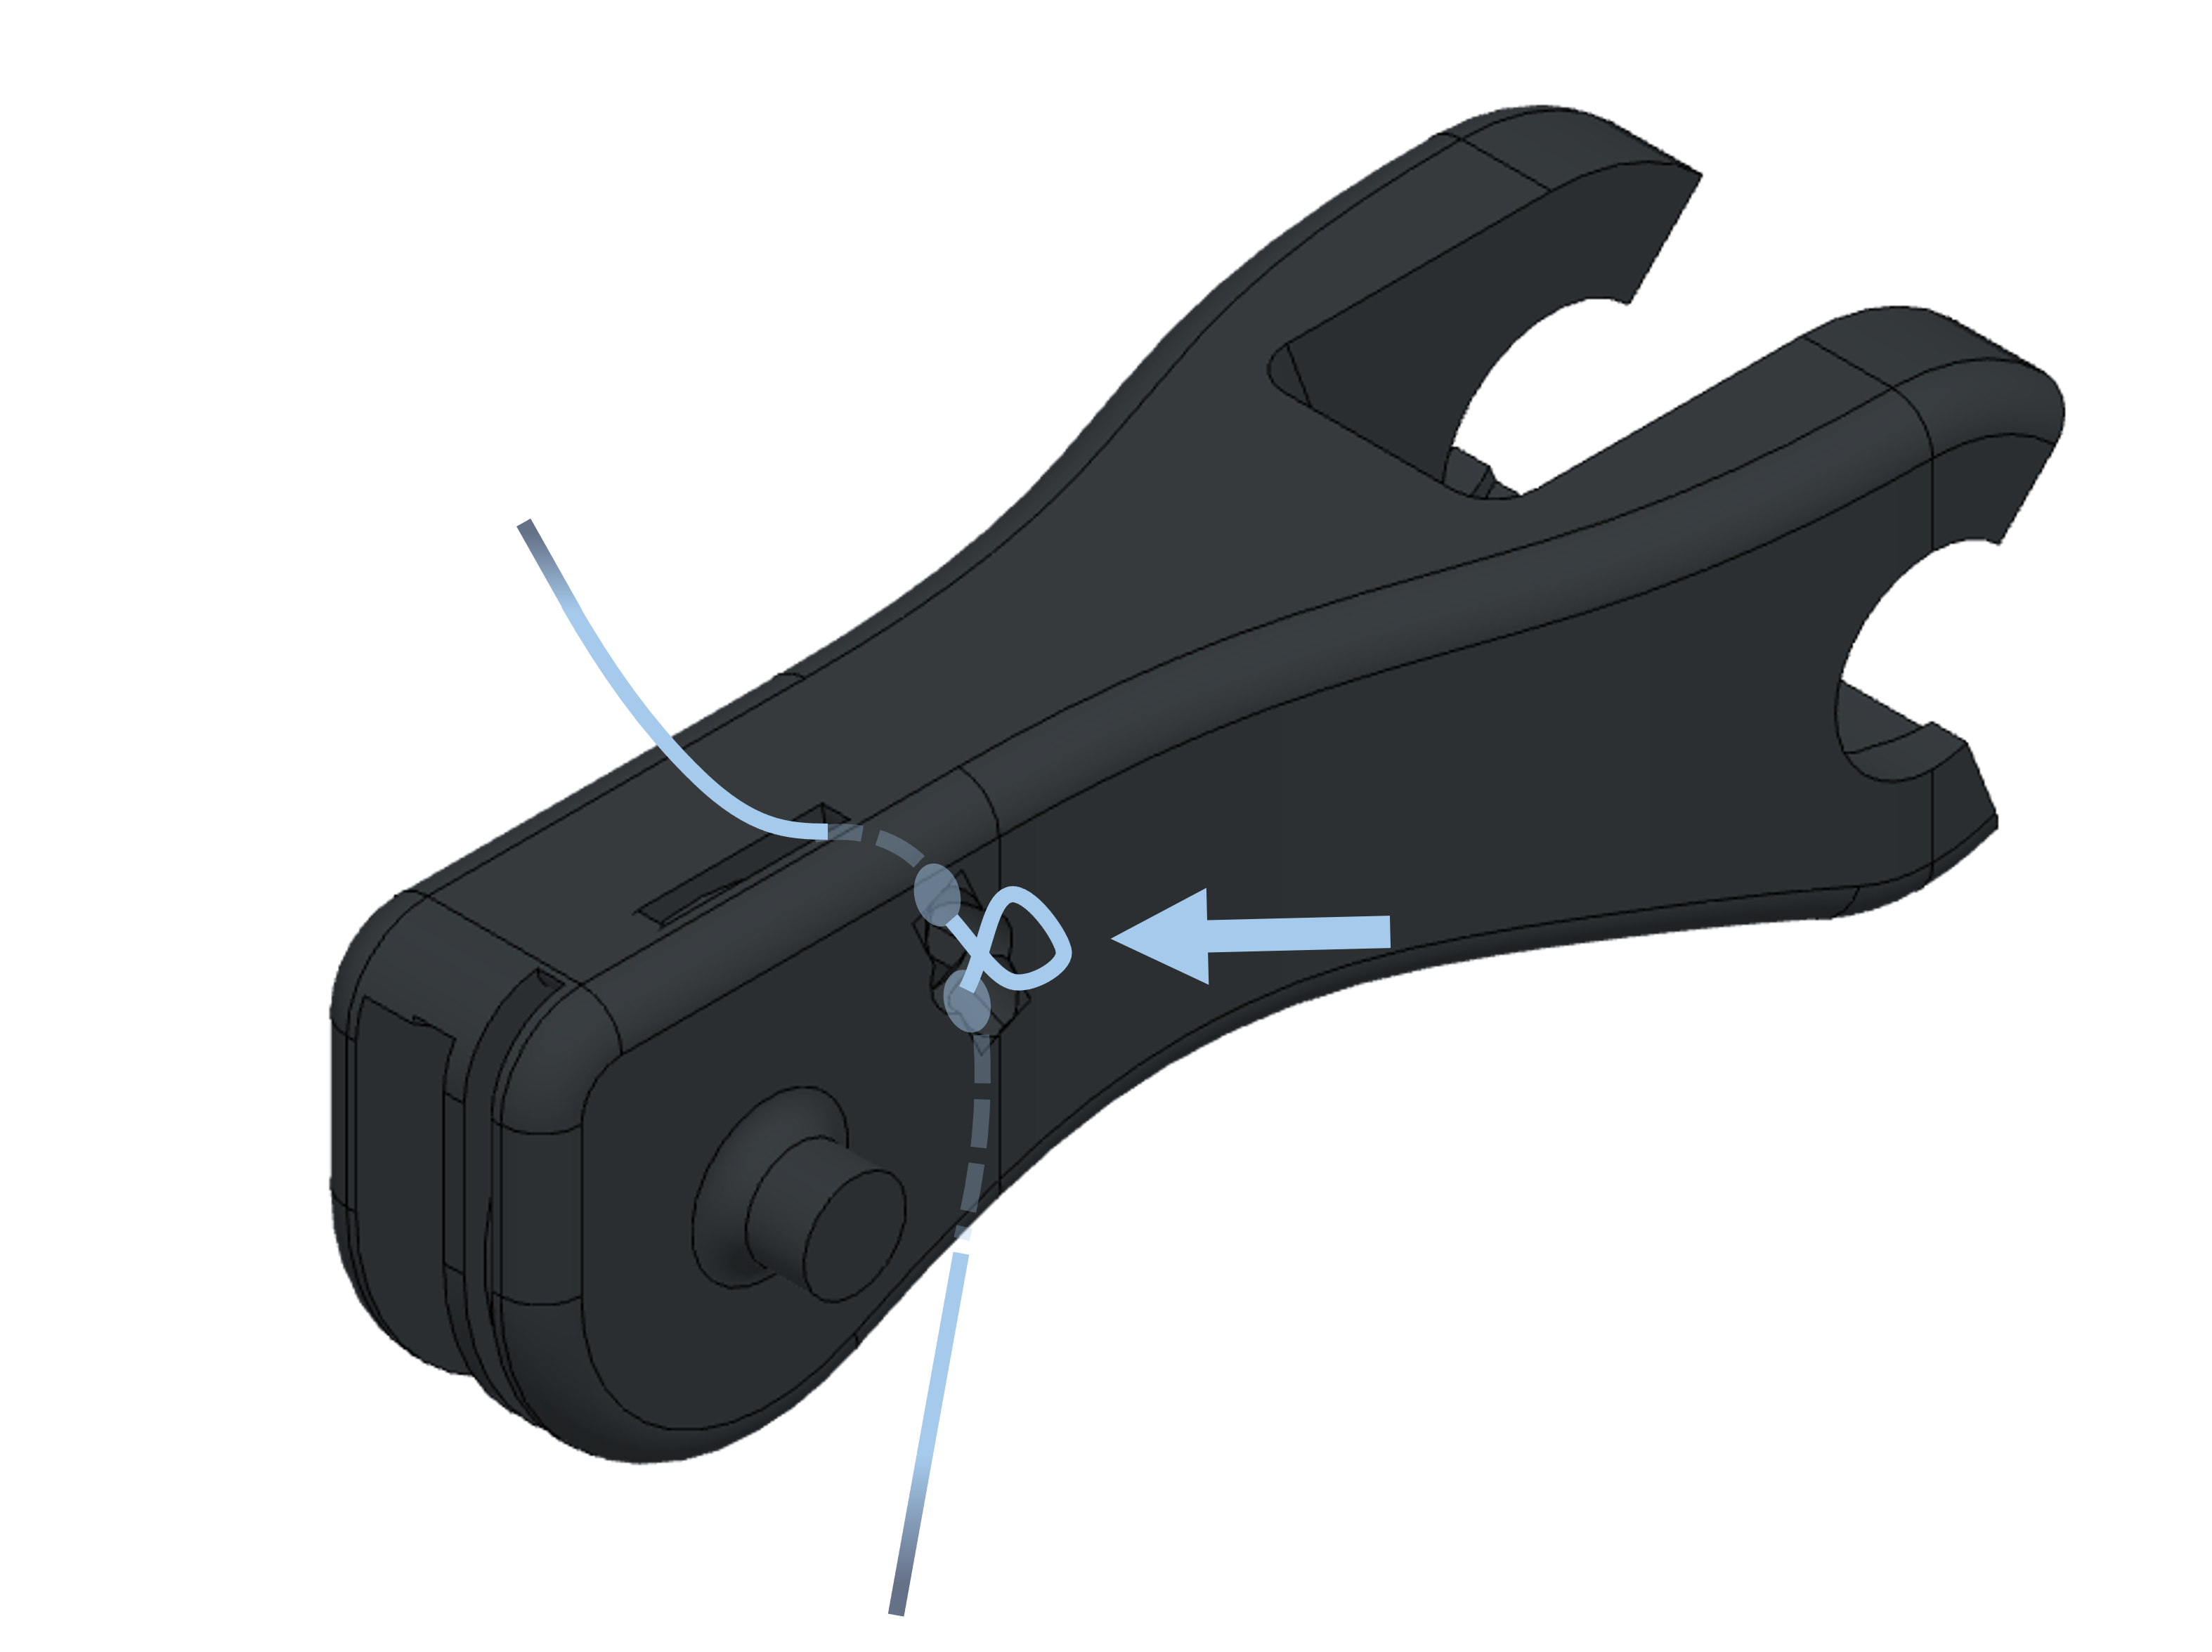
e: Push excess tendon into the opening with a screwdriver

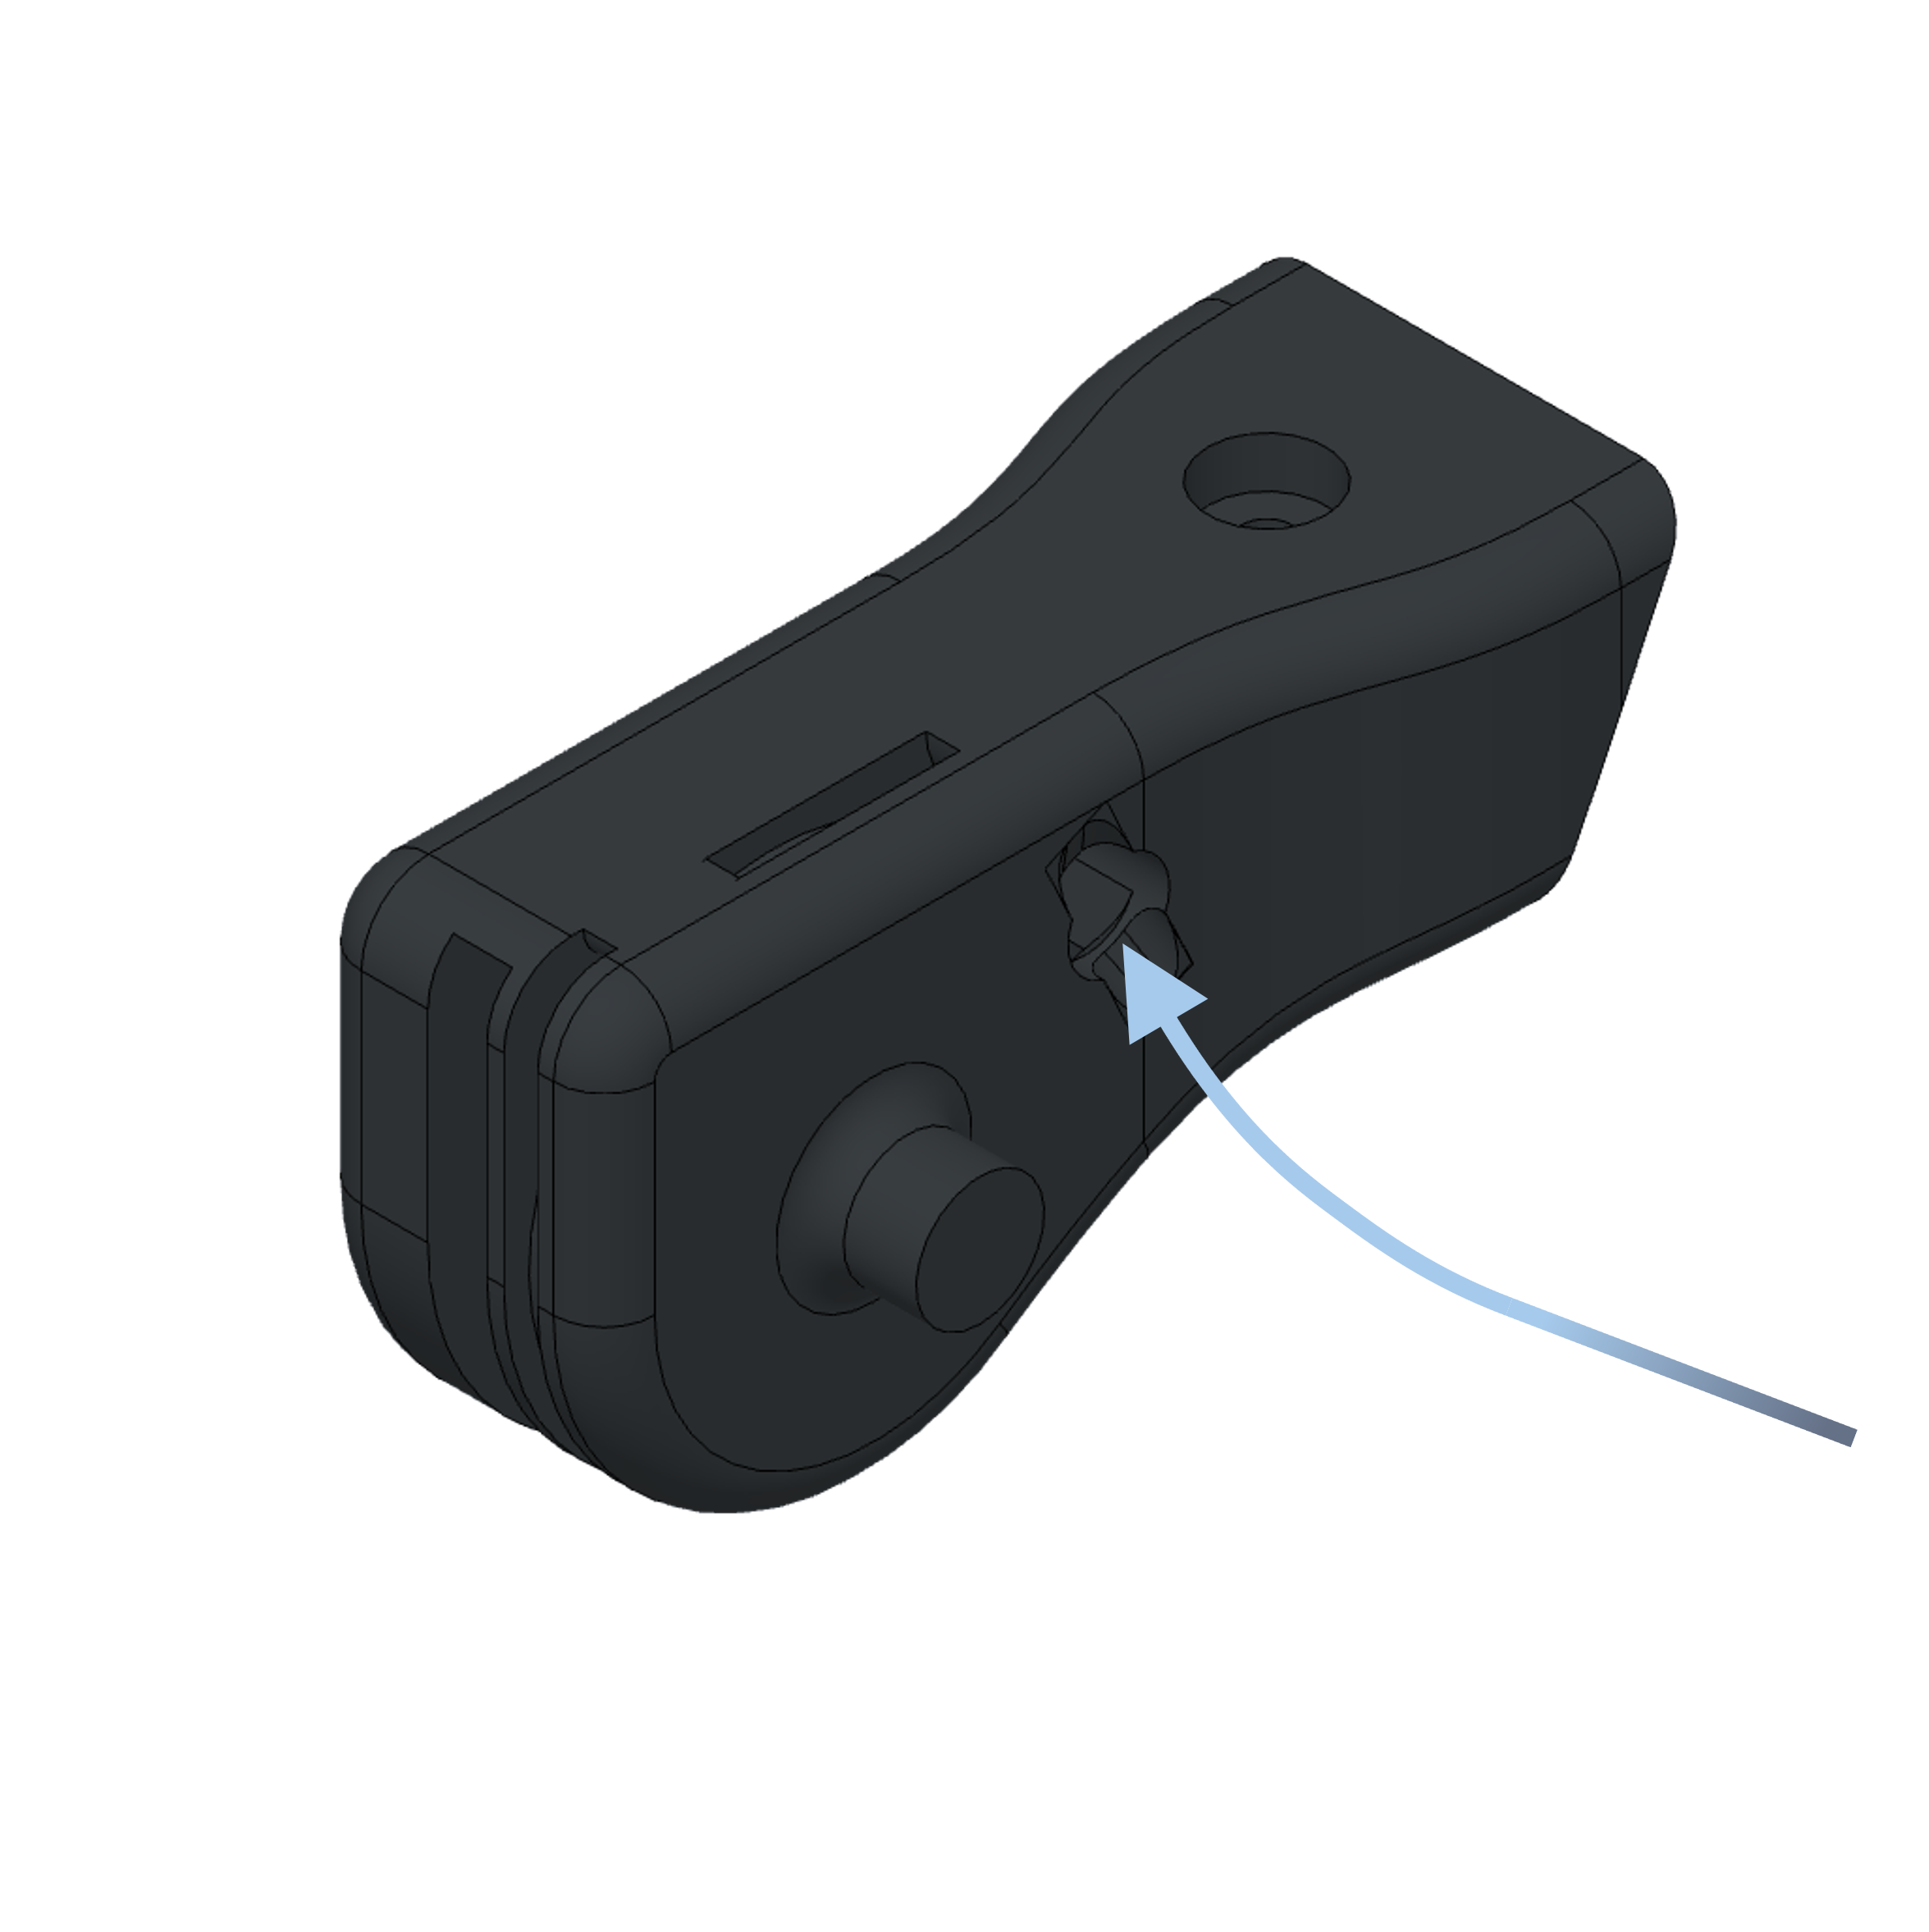
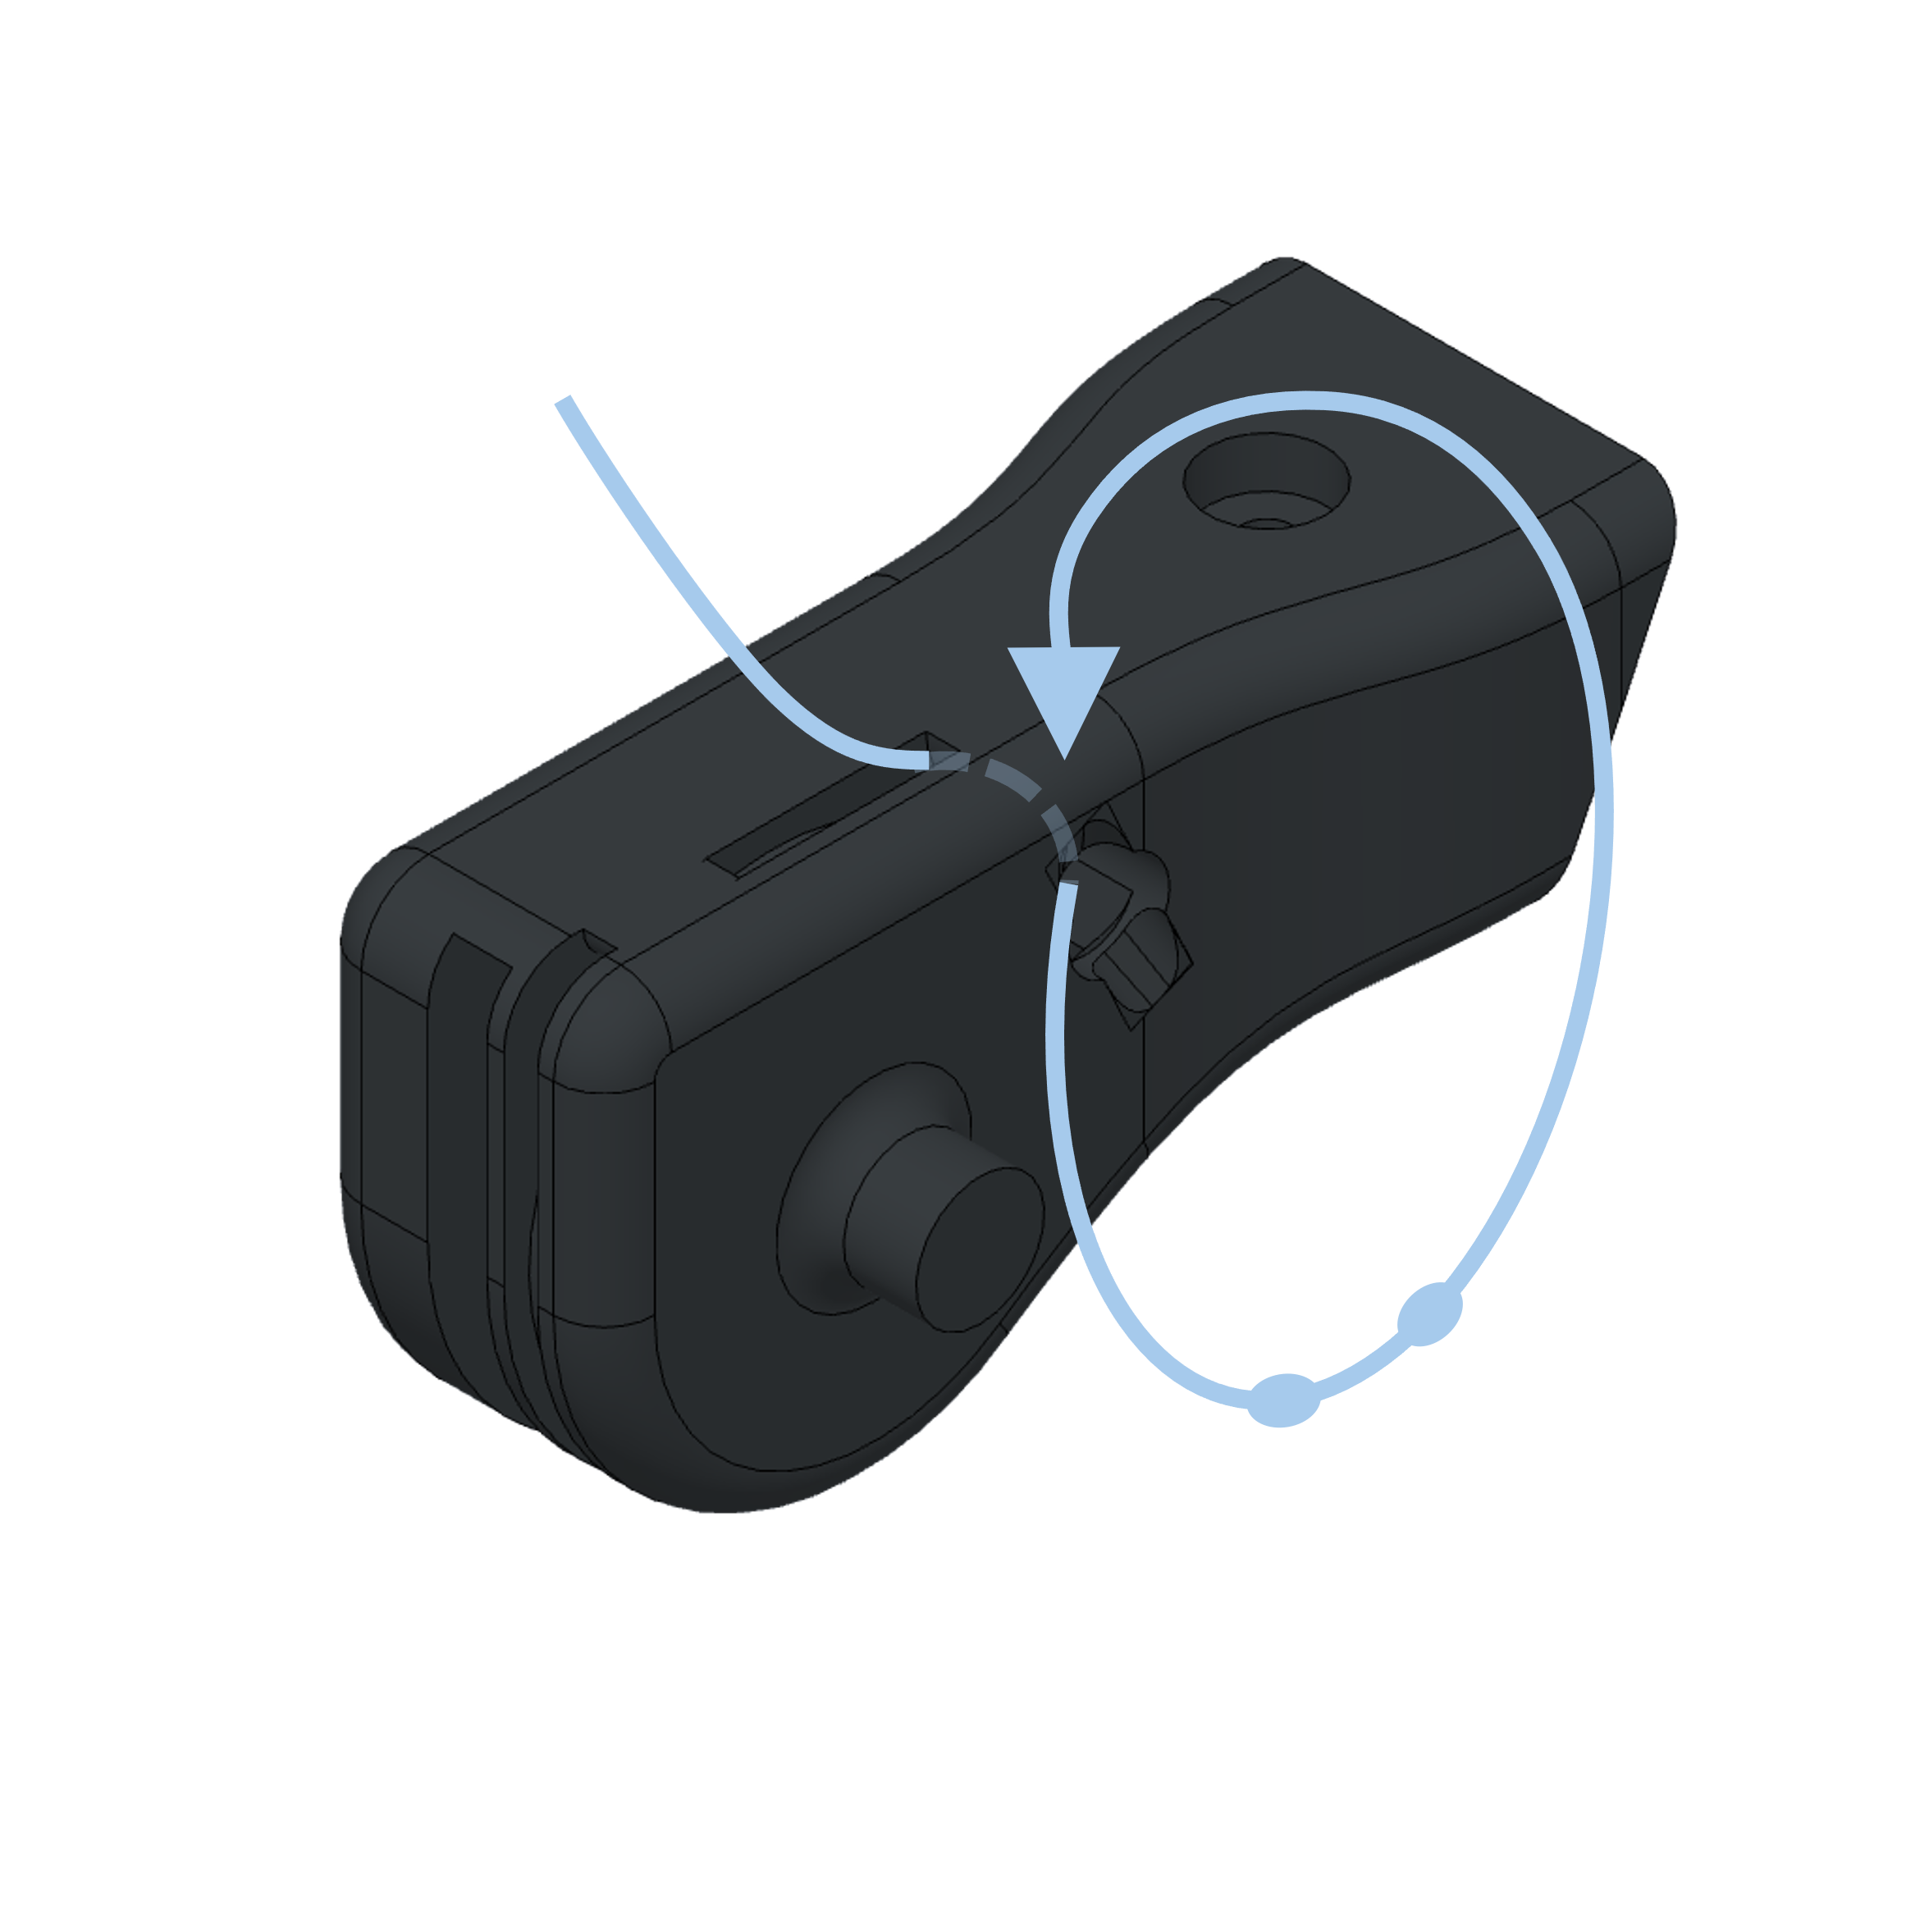
f: Secure the extensor tendon
g: Ensure the tendons sits tightly
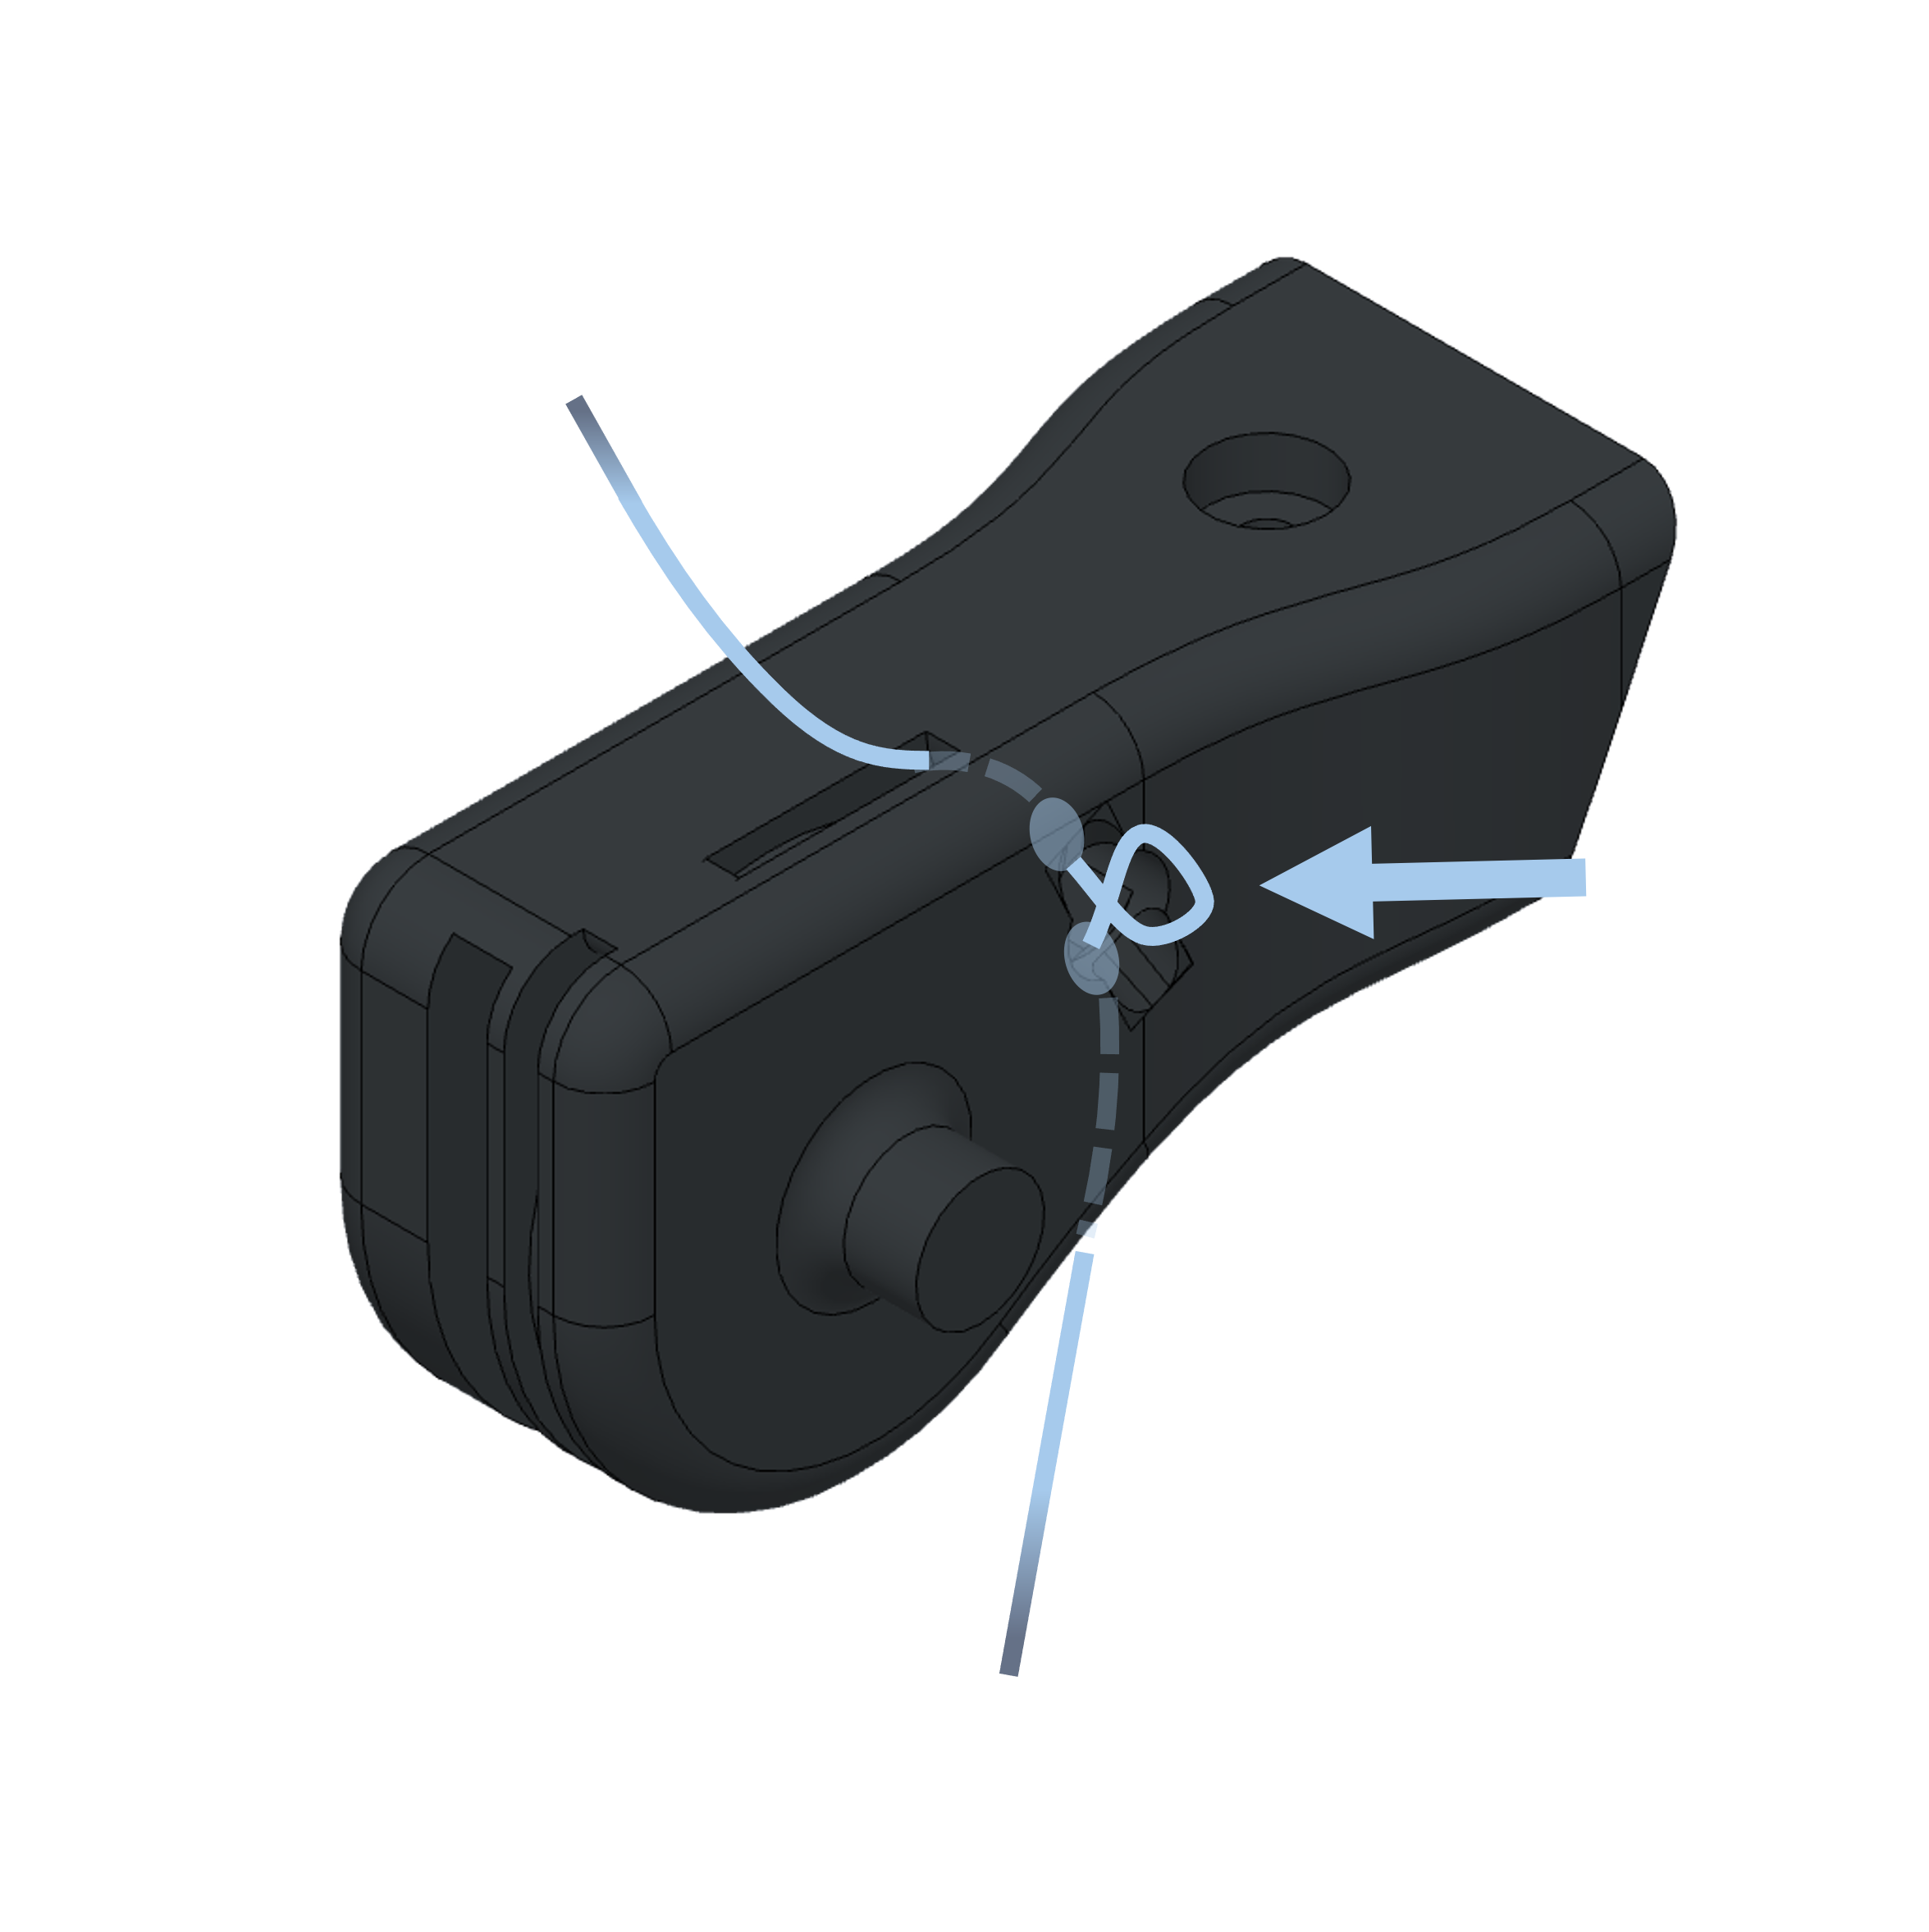
Step 4: MCP Tendon Attachment
a: Insert one end of the tendon into the hole
b: Make sure it exits the hole on the upper side

c: Form a loop
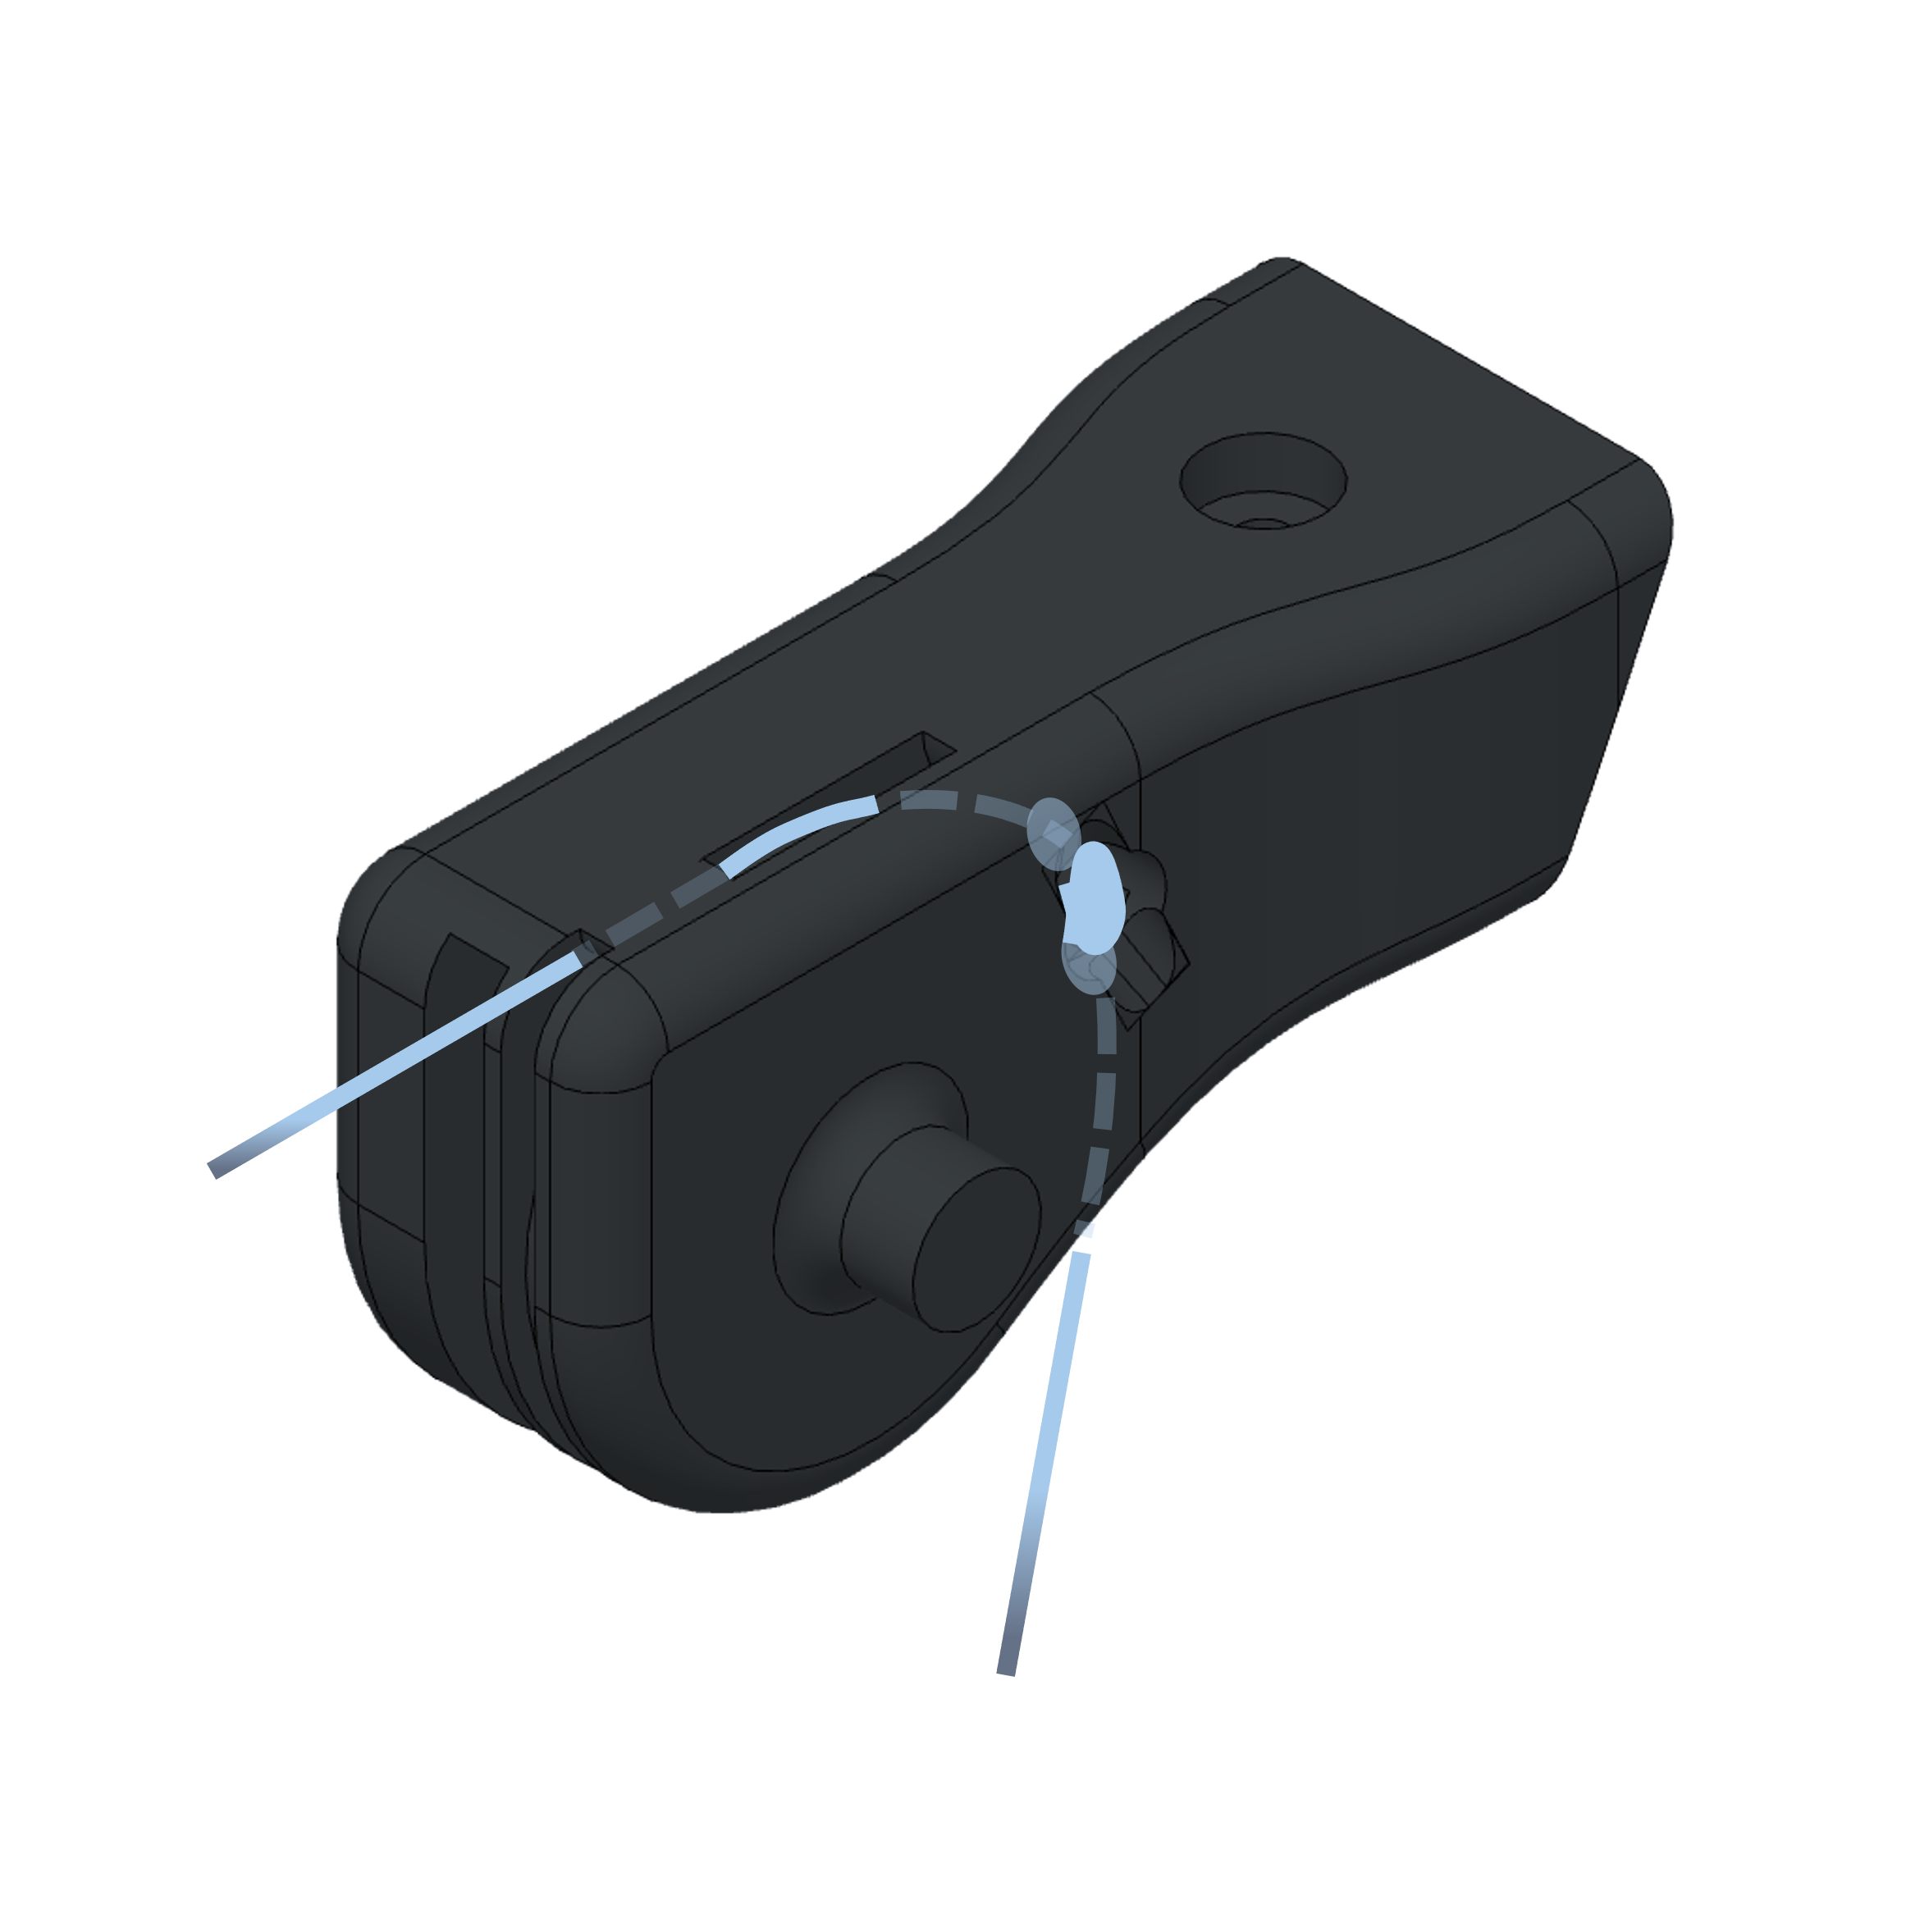
d: Insert the other side of the tendon into the hole and pull both sides of the tendon and make sure the knots sit tightly
e: Push excess tendon into the opening with a screwdriver
f: Secure the extensor tendon
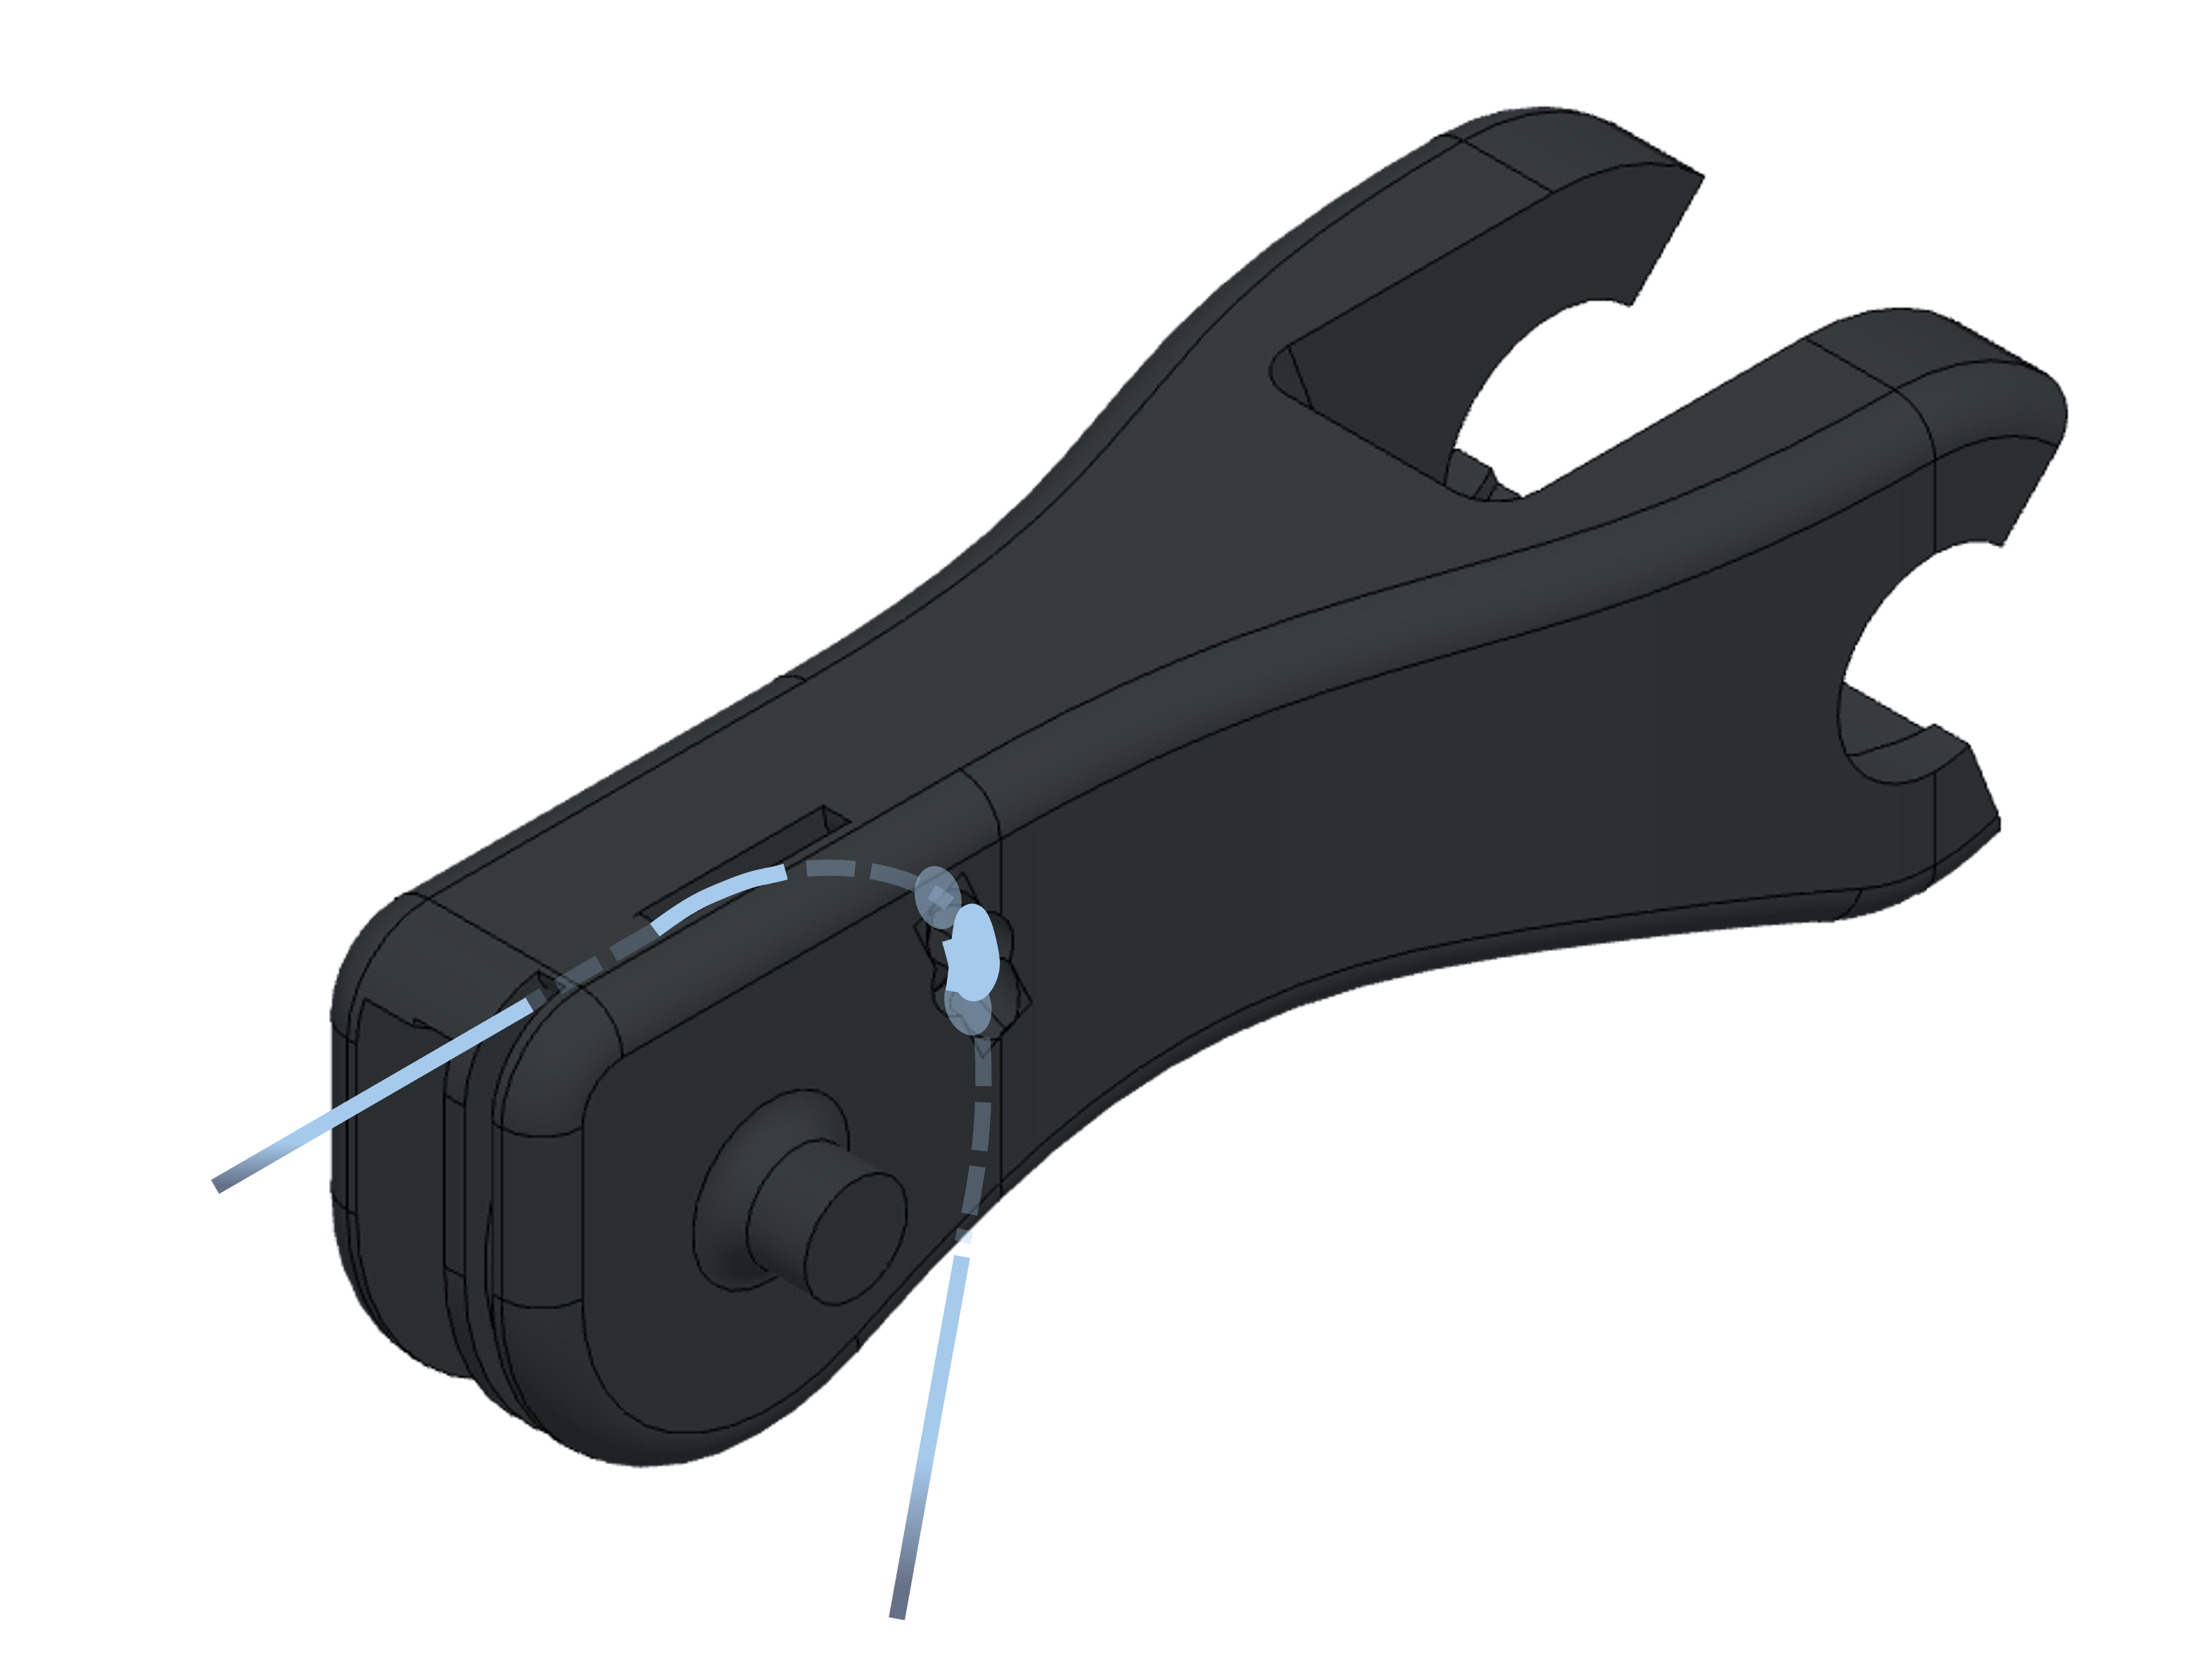
g: Ensure the tendons sits tightly
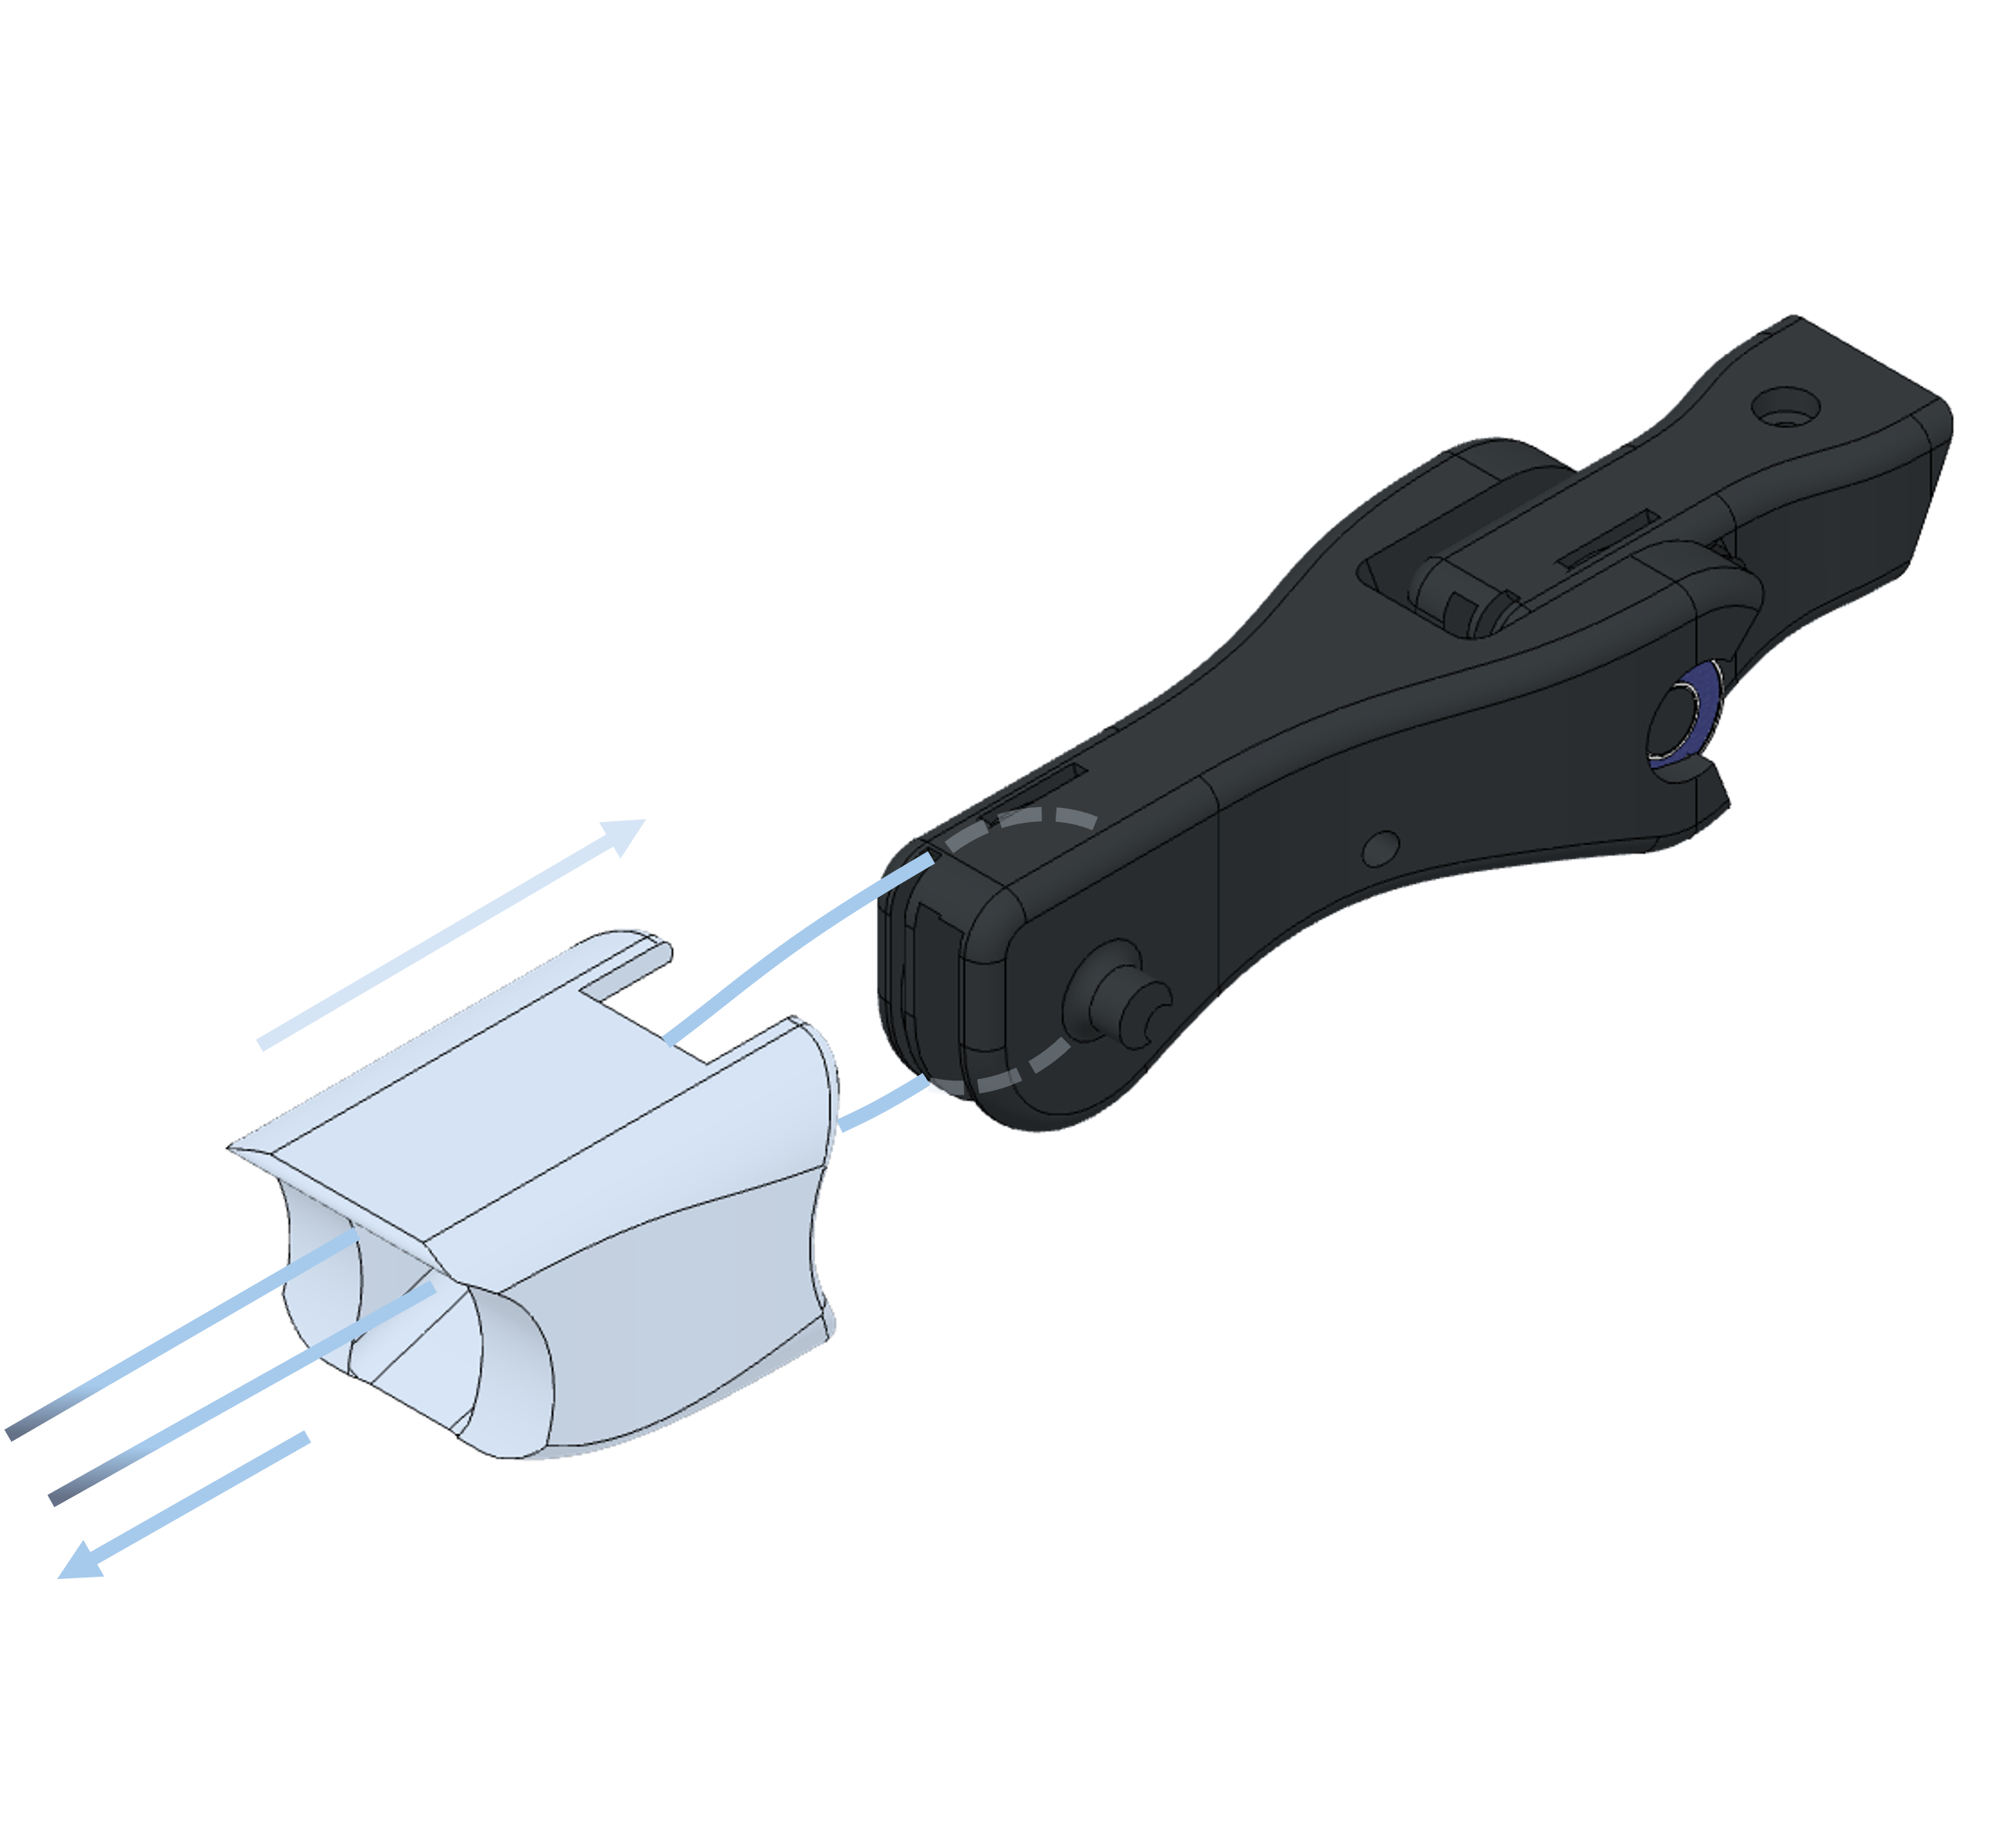
Step 5: Assemble the PIP Joint
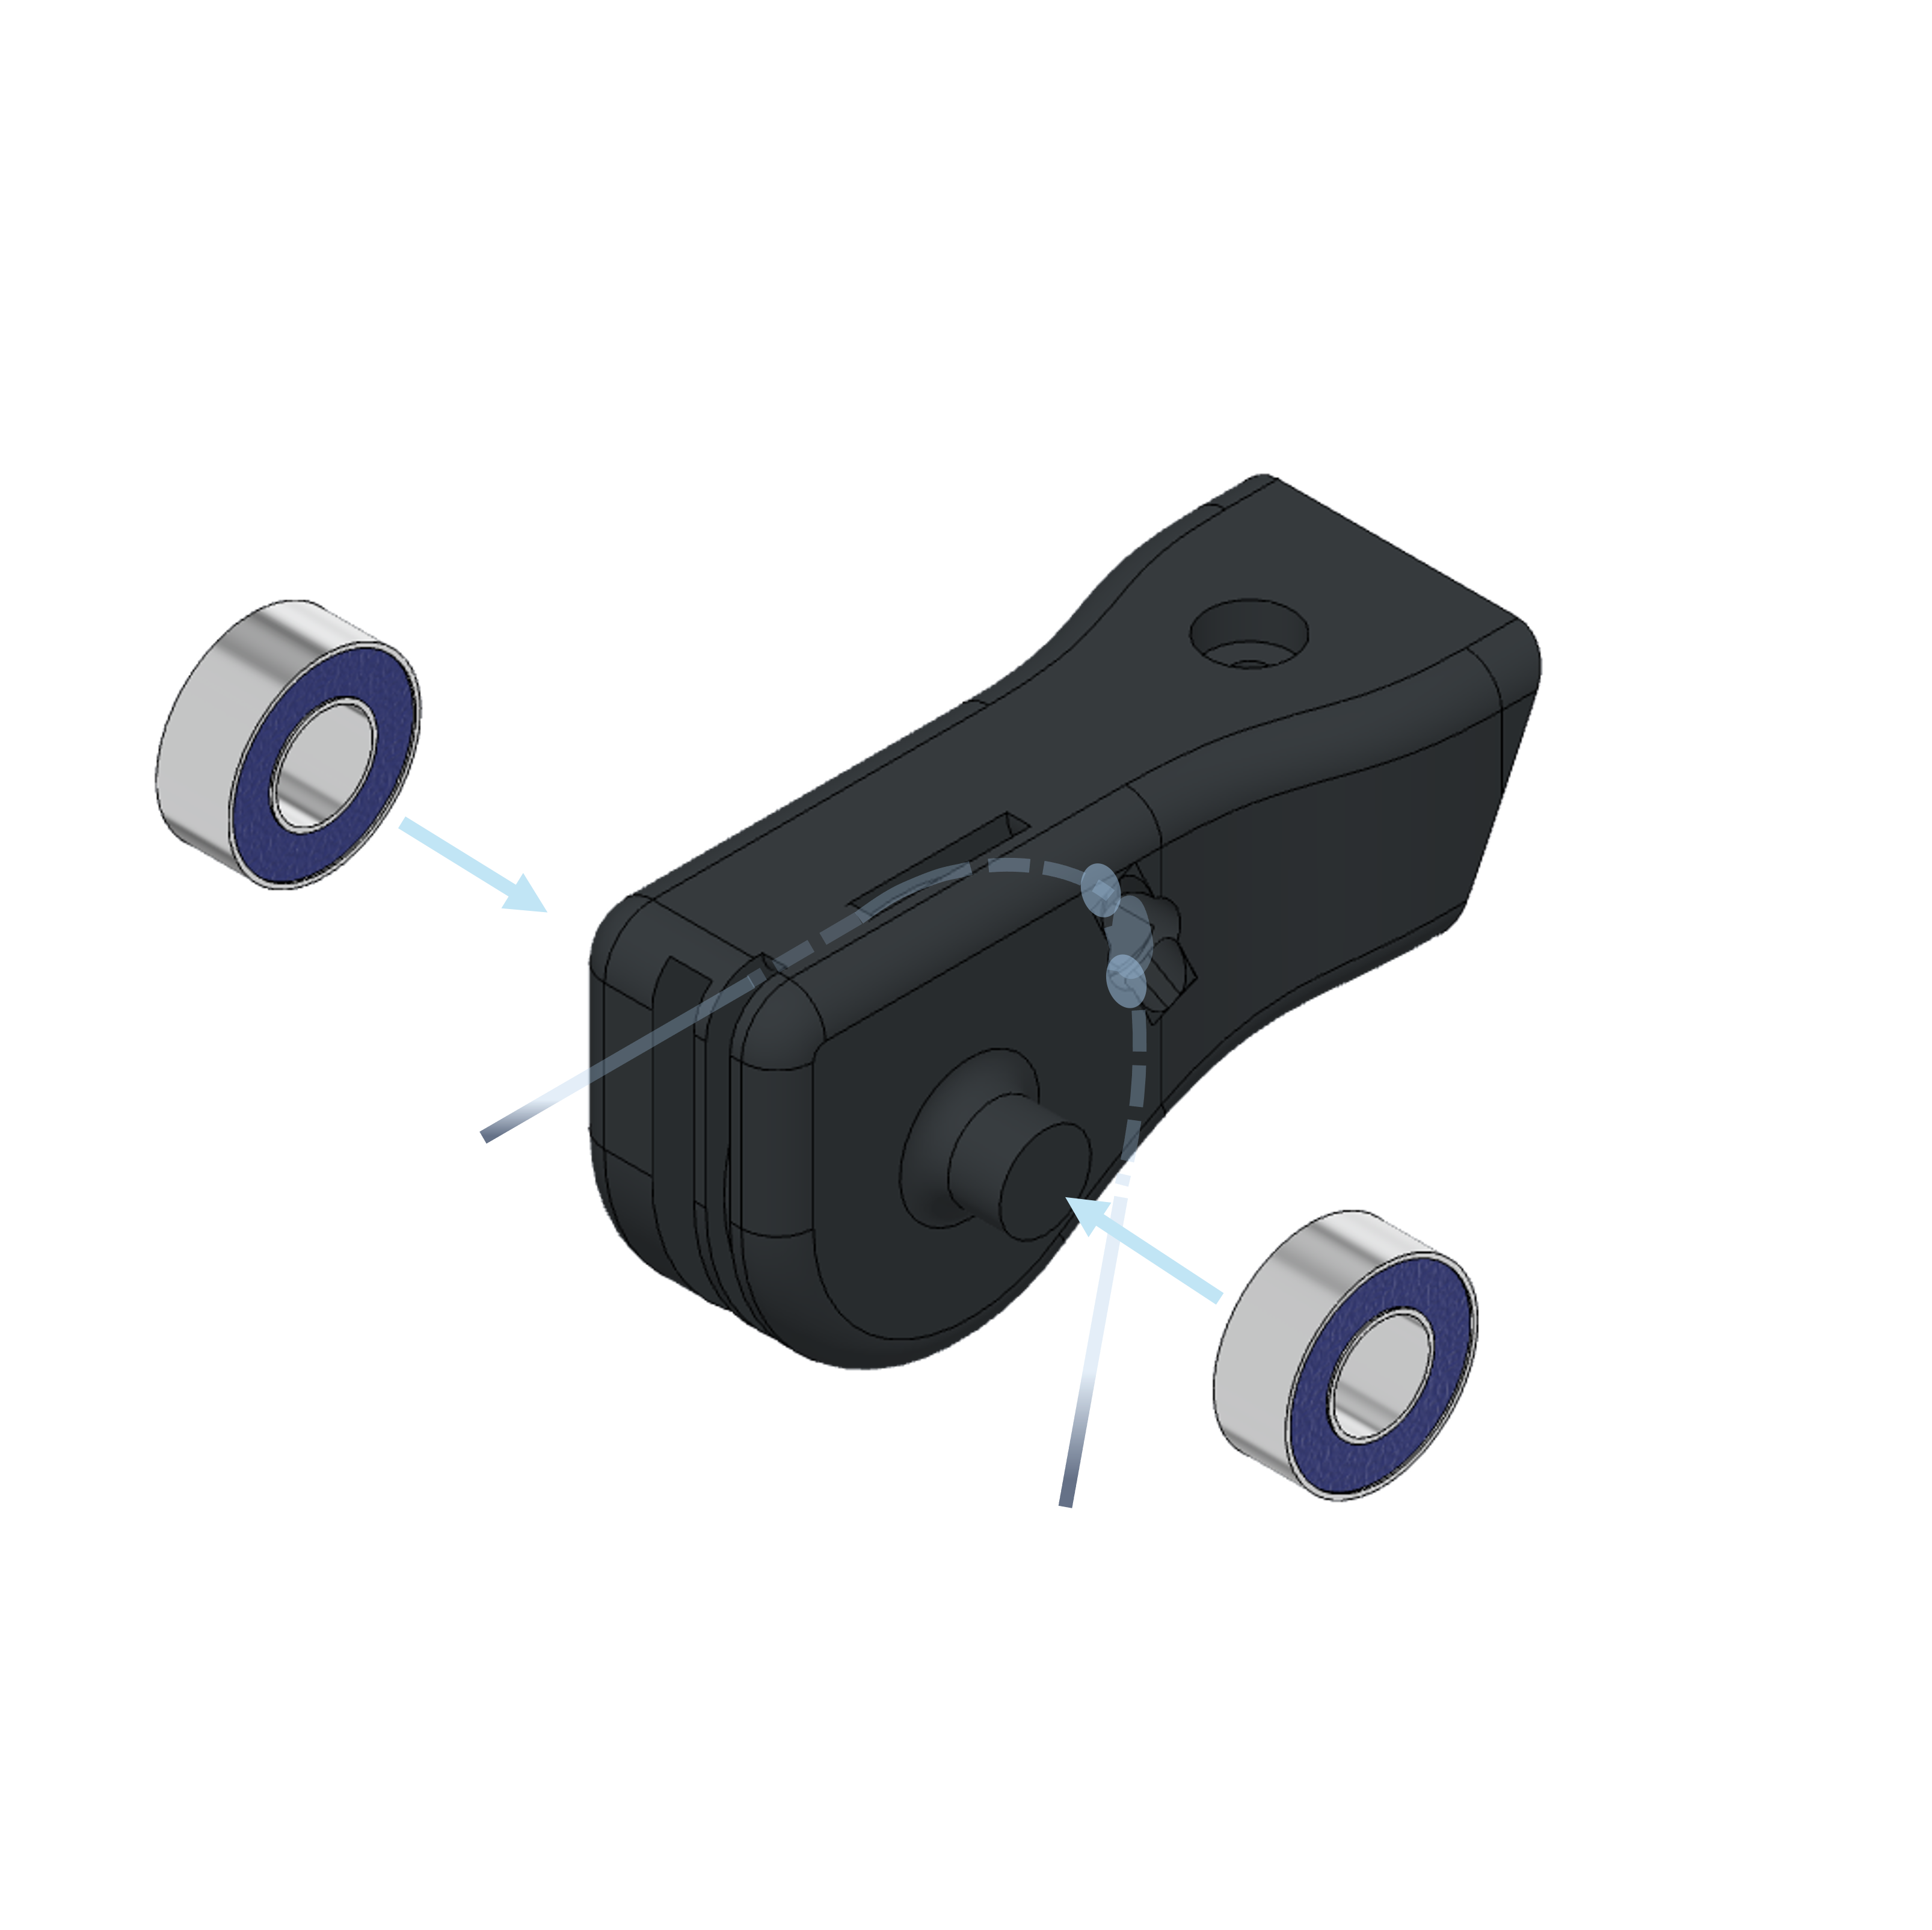
a: Attach the bearings to the MP shafts
b: Press the MP on the PP opening
c: Pop the joint and make sure that no tendon is clamped in between
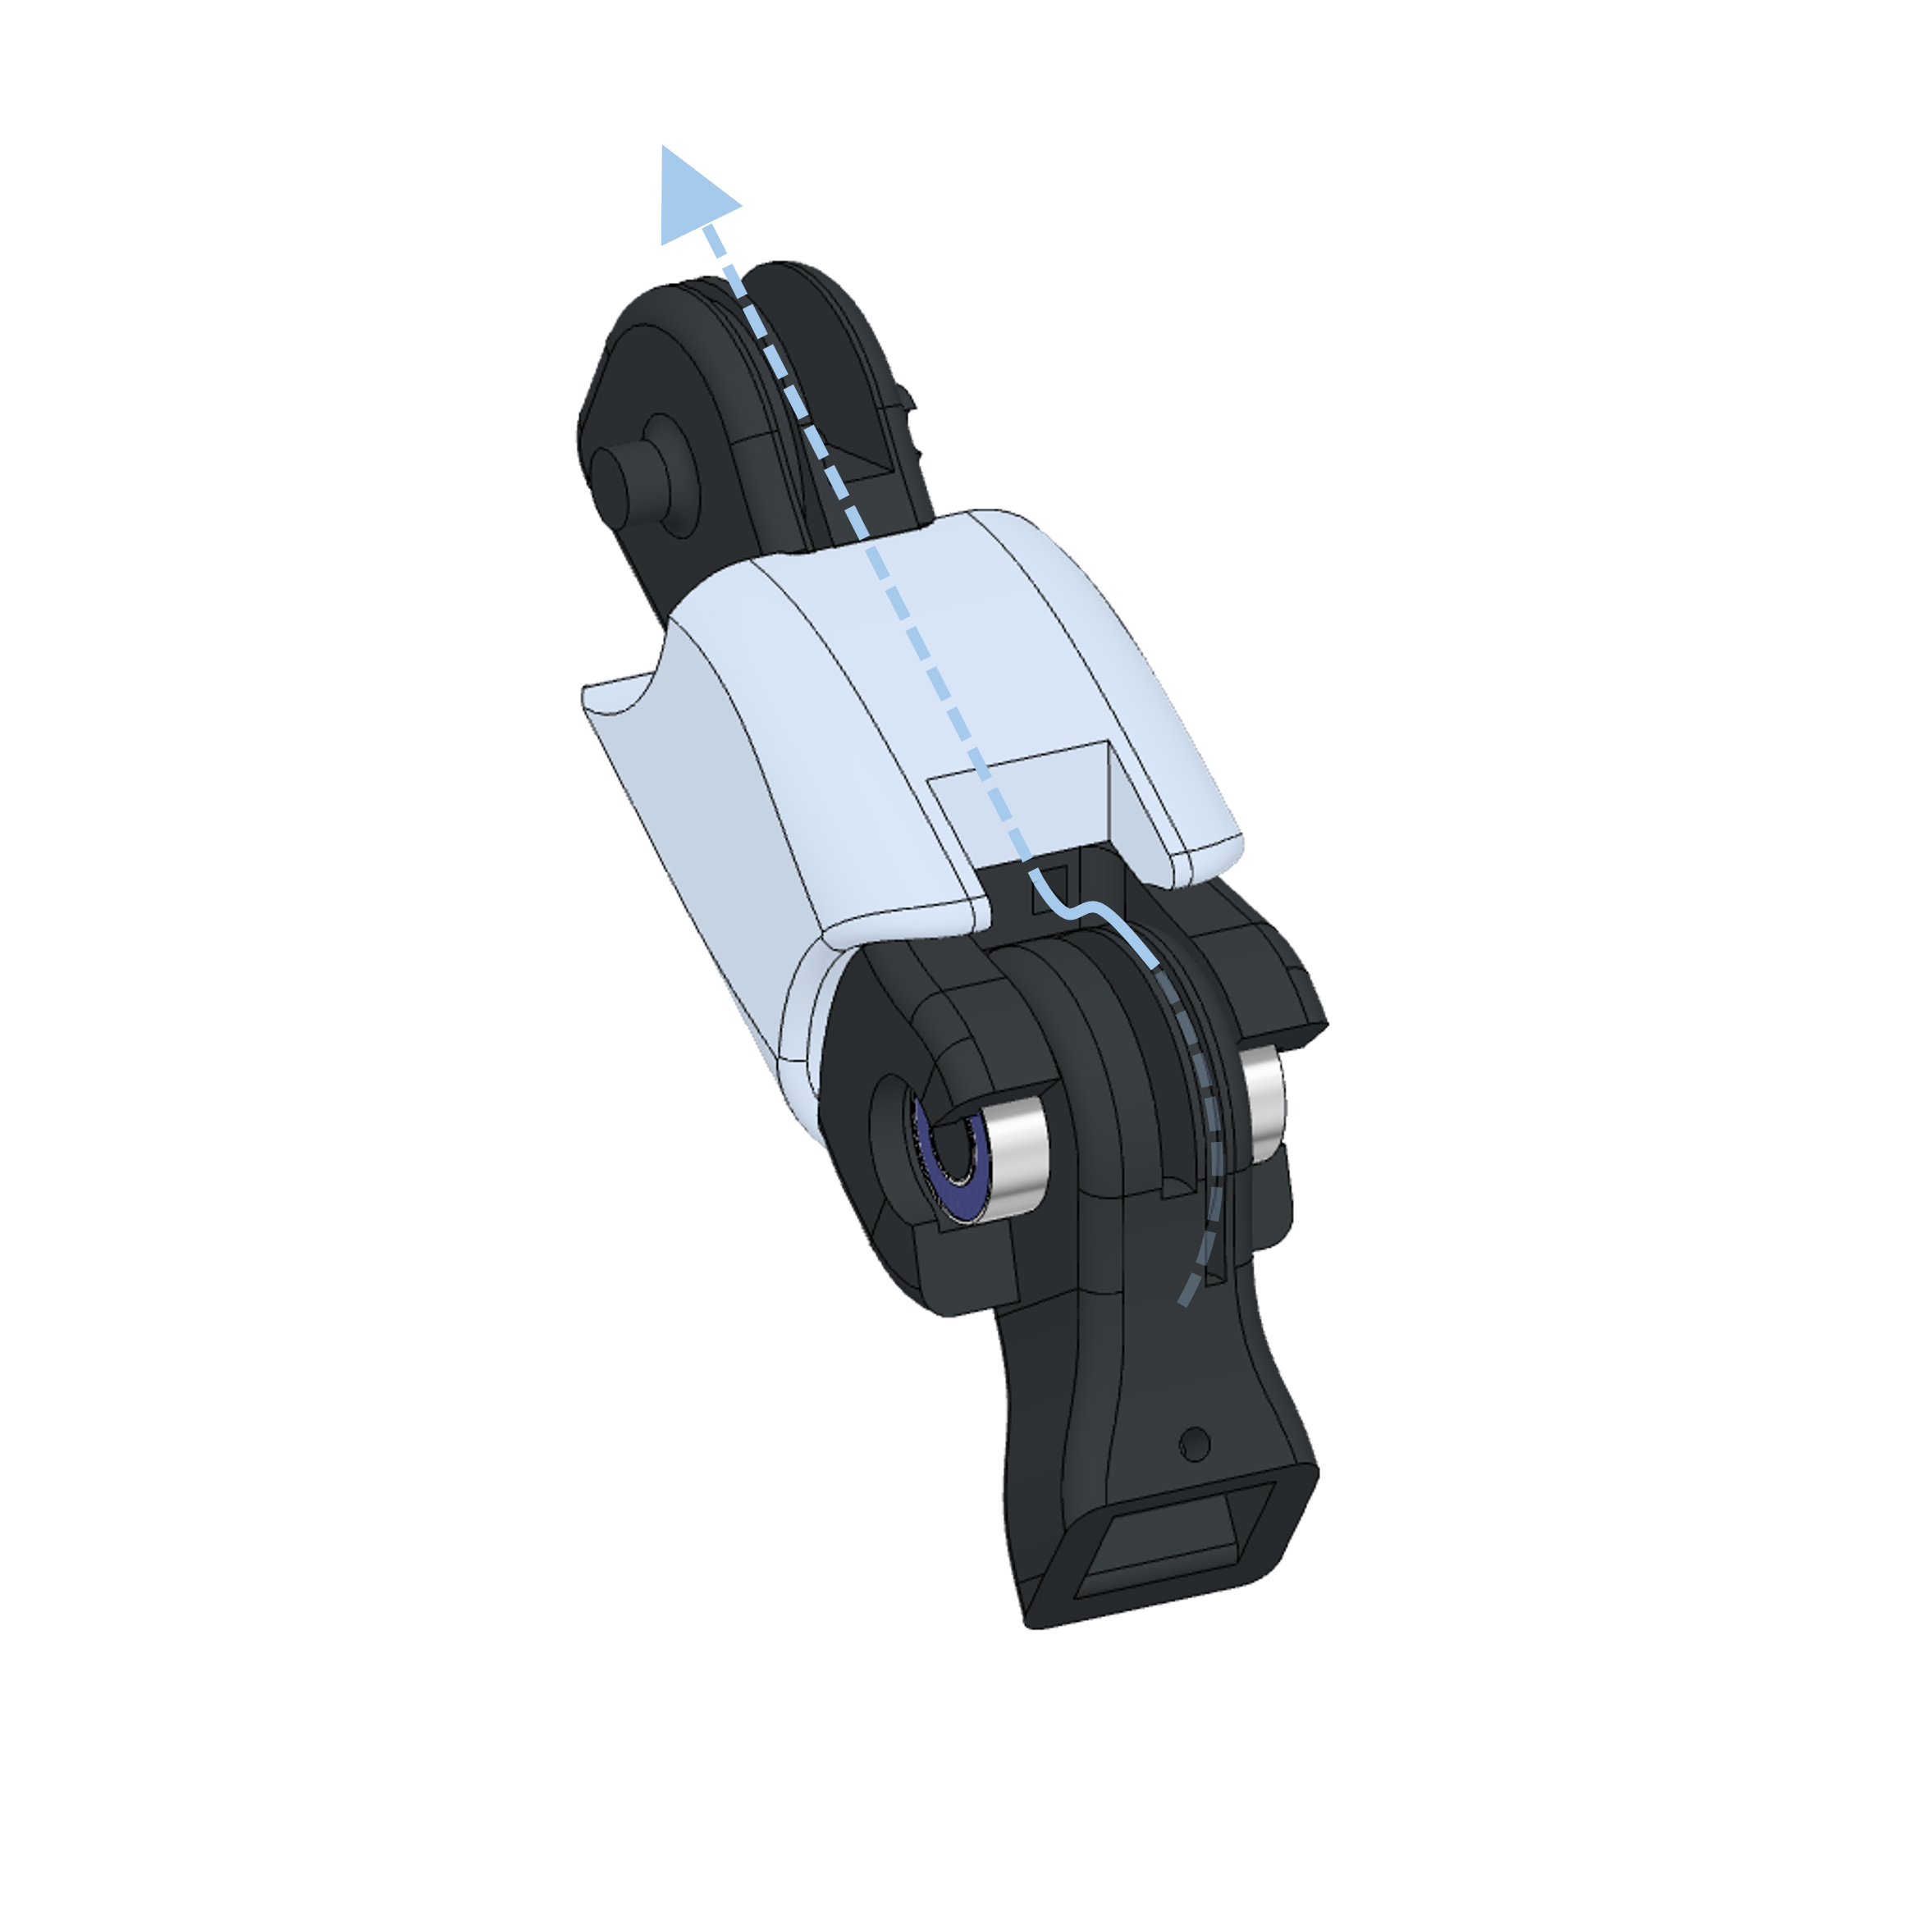
d: Move the MCP tendon through the skin and slide it over the PLA.
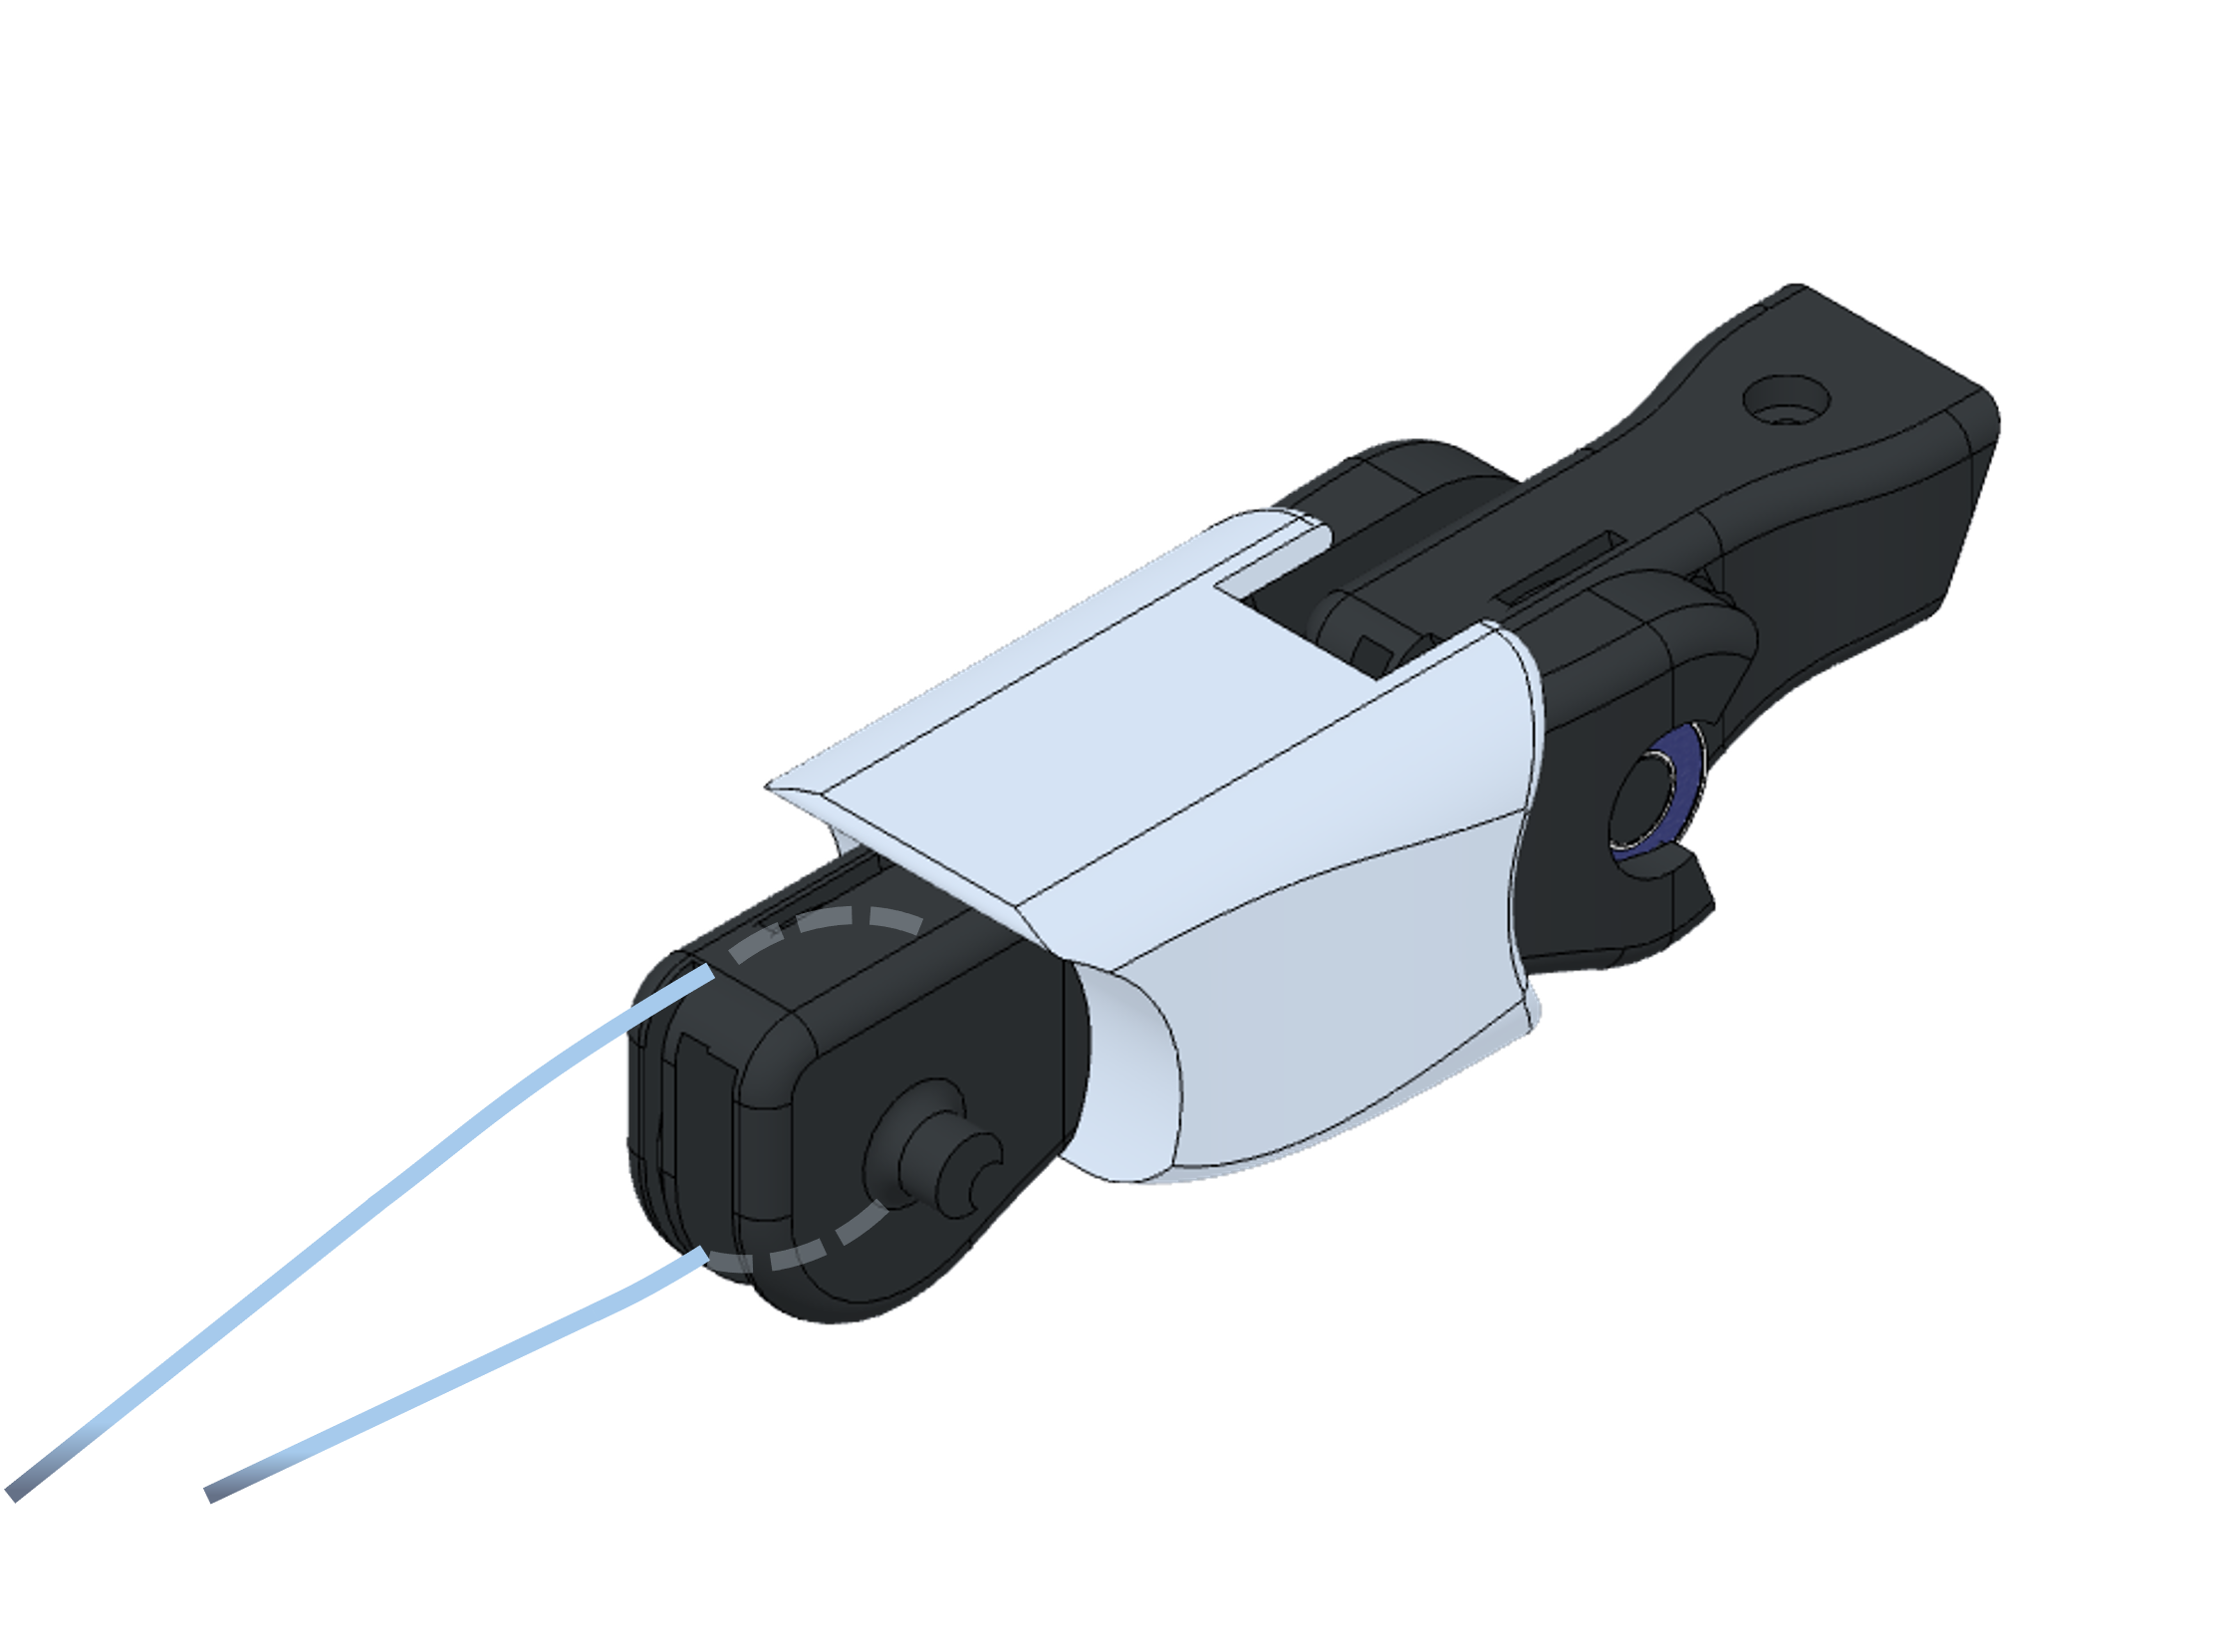
e: Make sure it sits at the correct position
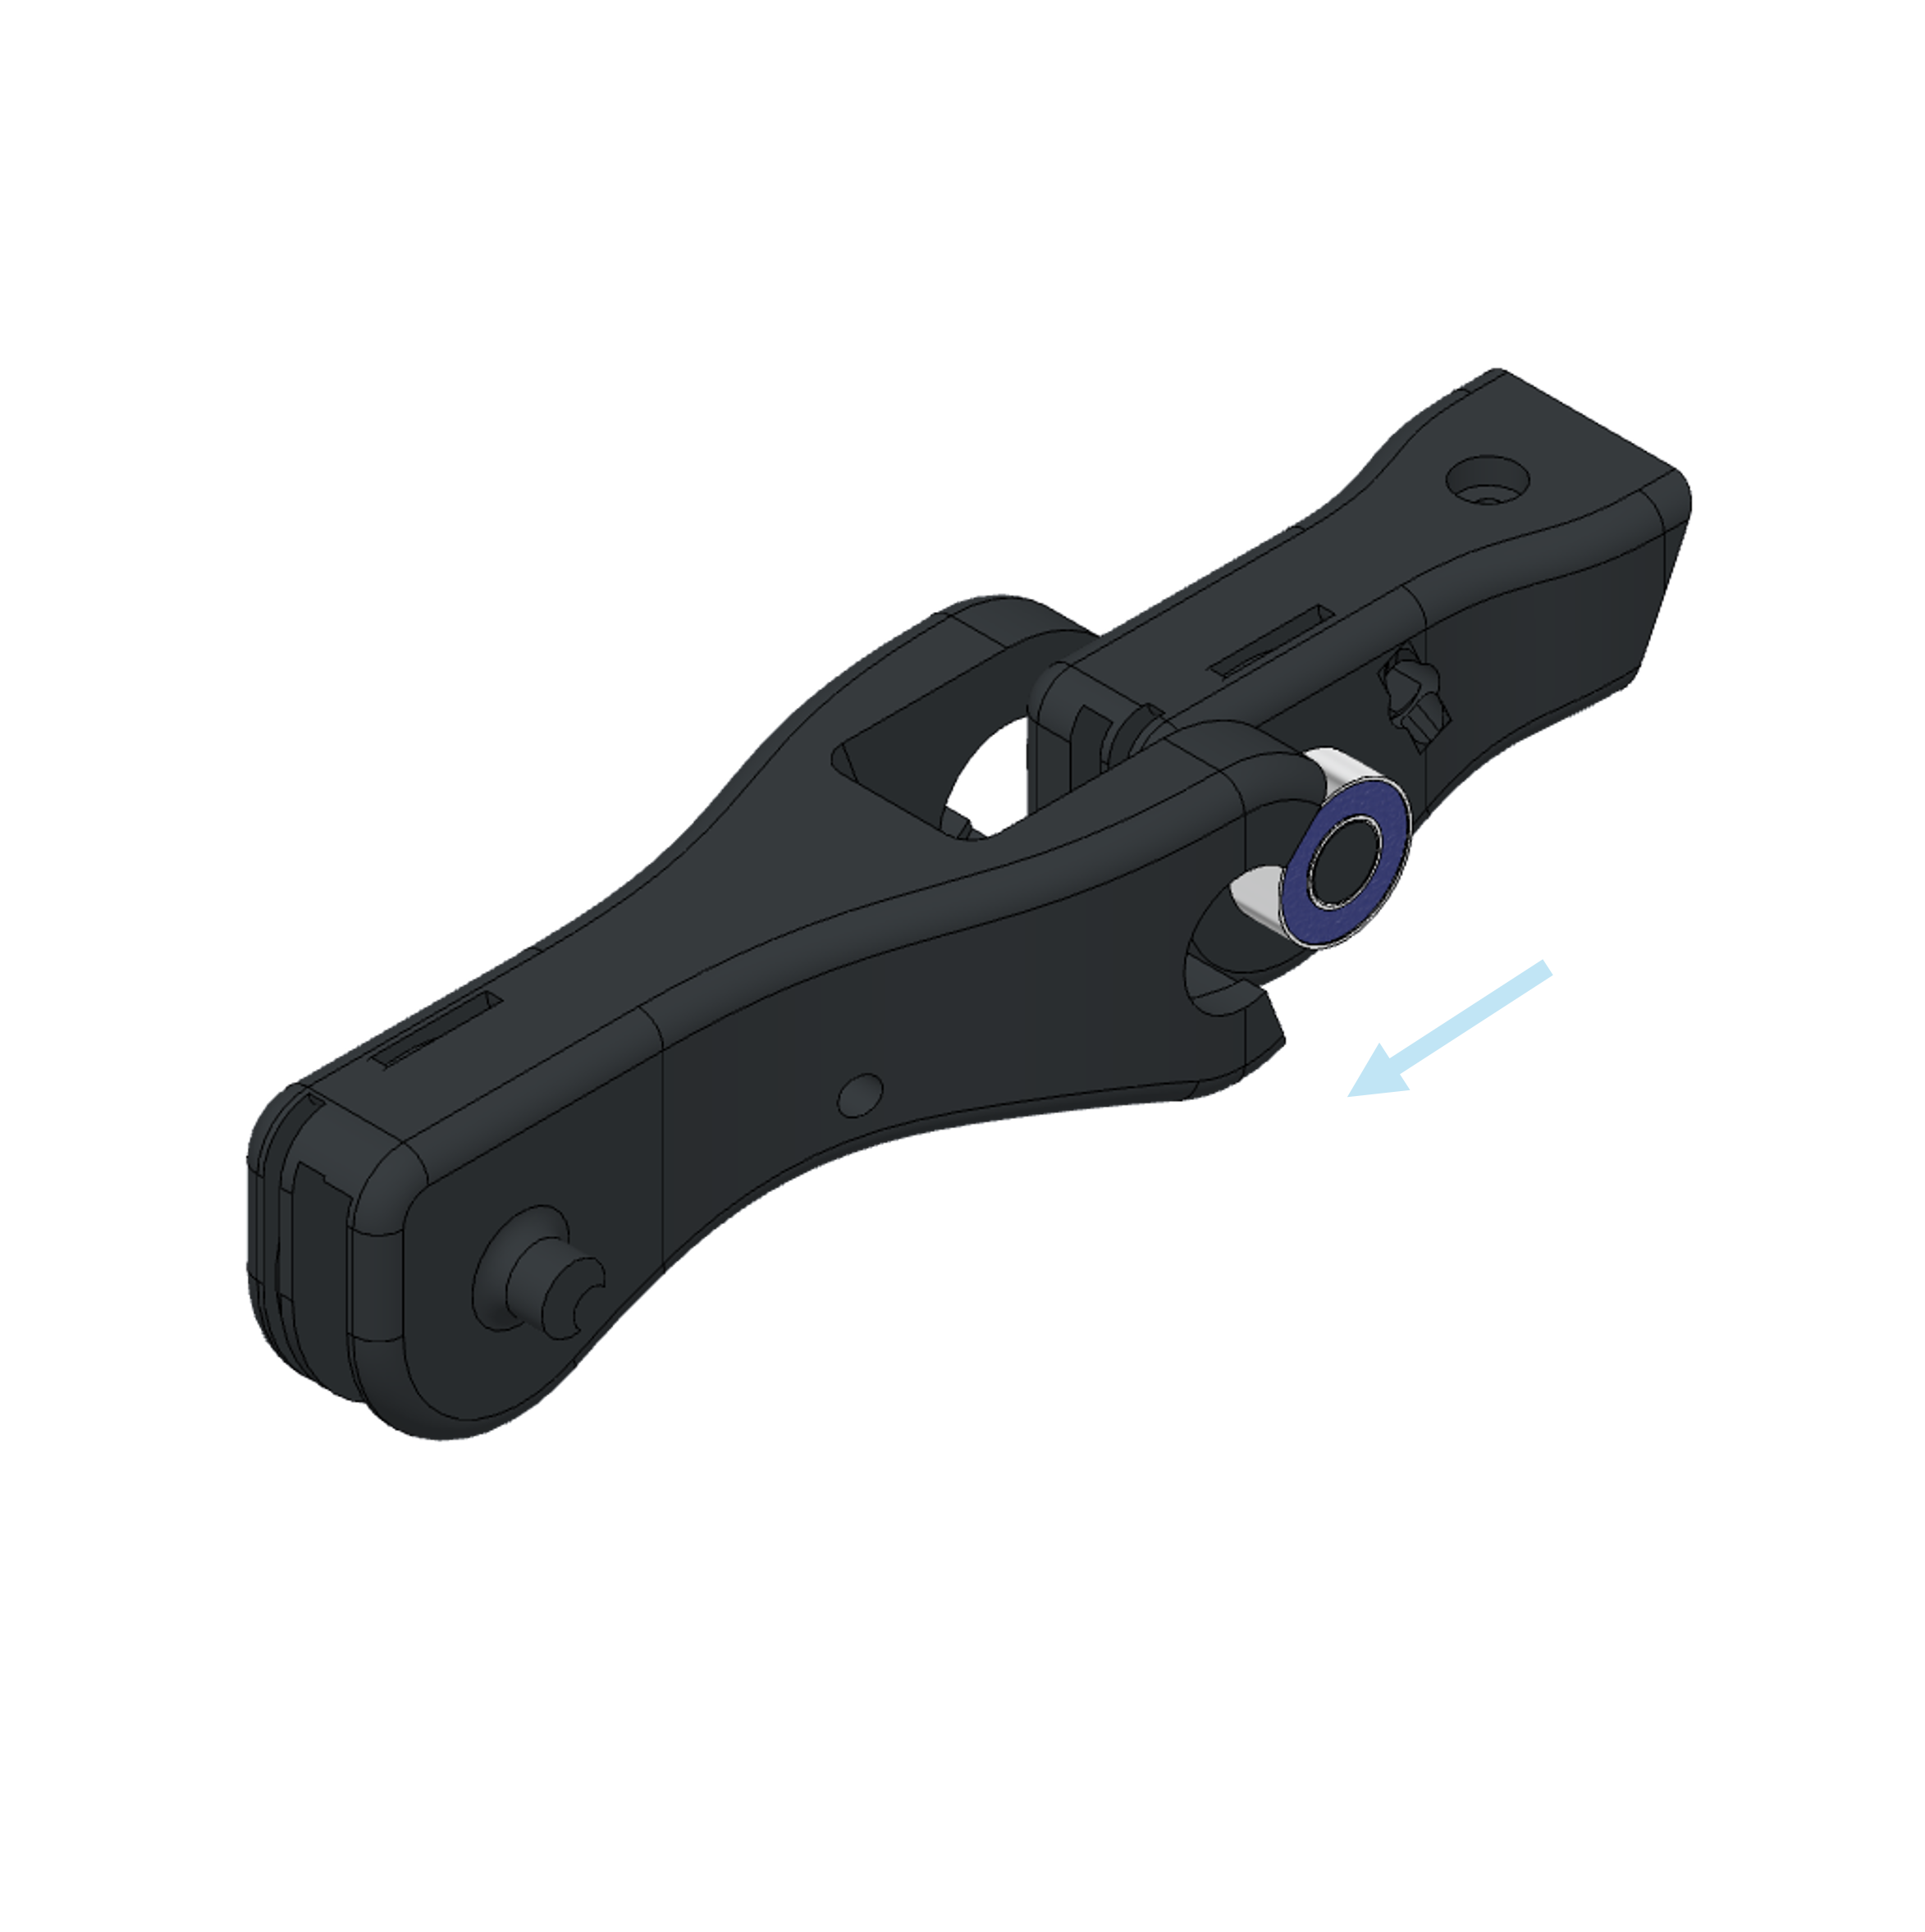
Step 6: Route PIP Tendons through the PP
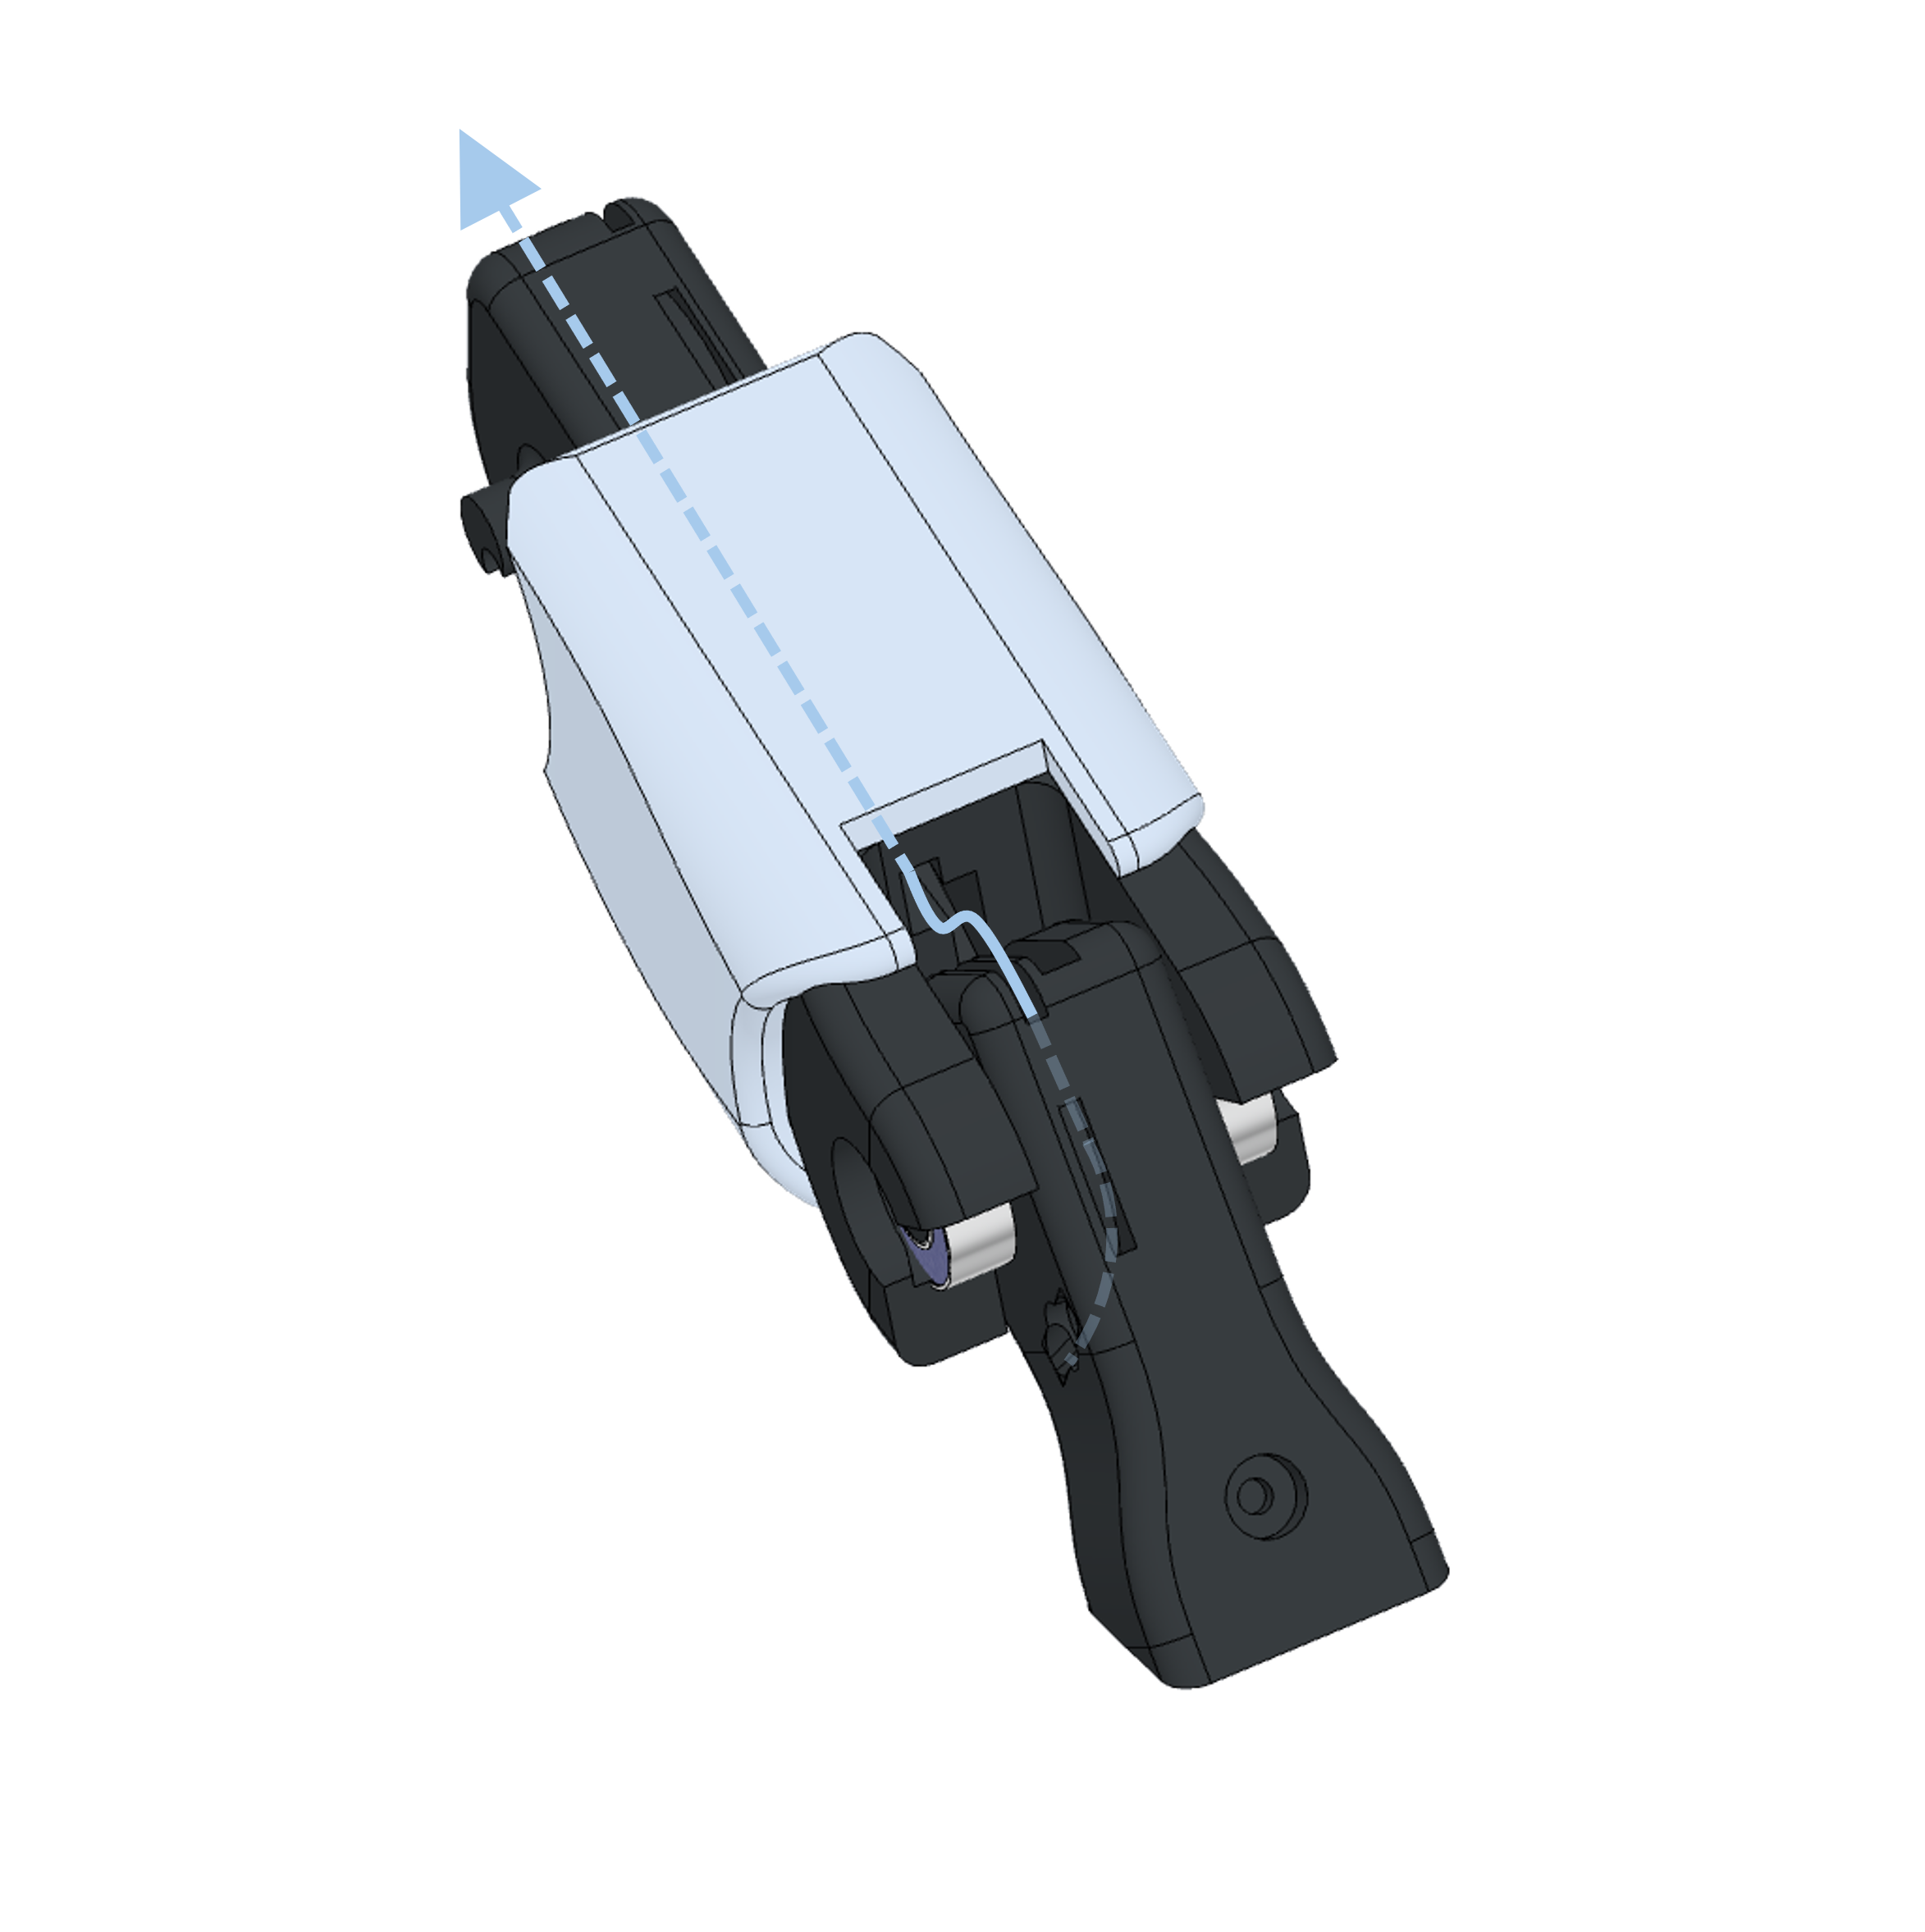
a: Insert the extensor through the upper hole until it exits
b: Repeat for the flexor tendon

c: Make sure the flexor and the extensor tendon don't cross and the flexor tendon exits on the left side
Next Steps
info
Stay tuned for the full assembly guide!